Broccoli.

Some things in life are amazing because they are so easy; like a simple meal and good weather. Since Spring is two thirds over, and summer is almost here, I wanted to cook something that represented those two things well. As much as I love spring, I like to think of it this way: going from winter to spring is like moving out of a rundown apartment. Spring to Summer is like finally unpacking all your stuff!

The first thing that gets unpacked is Broccoli! Its season starts in June and runs though to October. So while it may not be summer yet,  broccoli is a great way to not only celebrate it being a little closer, but in a few months it’s also a great way to grieve it being over. So in the spirit of keeping good weather and a good easy meal, I would share this recipe.

I originally saw this recipe sarcastically mentioned by Chef Gordon Ramsey. He was making a point about how good ingredients stand on their own. He used this as an example of how broccoli, water and salt could make a fantastic soup when done properly. His recipe involved boiling the broccoli then pureeing it. It looked and sounded delicious, however; it got me wondering… a lot of flavour and colour is leached out of vegetables when you boil them. While Chef Ramsey incorporated the leftover boiling water to regain what was lost, he didn’t use all of it. He also isn’t one for giving measurements. So I thought I would try my own method, but steam the broccoli. This not only leaches less flavour from the broccoli, but also enhances the colour.

So for my take on this you will need:

Ingredients:

  • 1.14kg Broccoli
  • 2 tsp Salt
  • 4 cups Water
  1. Wash and dry your broccoli throughly. Broccoli grows in dirt, and who wants to eat dirt?
  2. Cut the broccoli in to florets, and discard the stems*
  3. Place 4 cups of water and a steamer basket into a pot. The water level should not be higher than the basket. My pot came with a basket that sits on top of the pot.
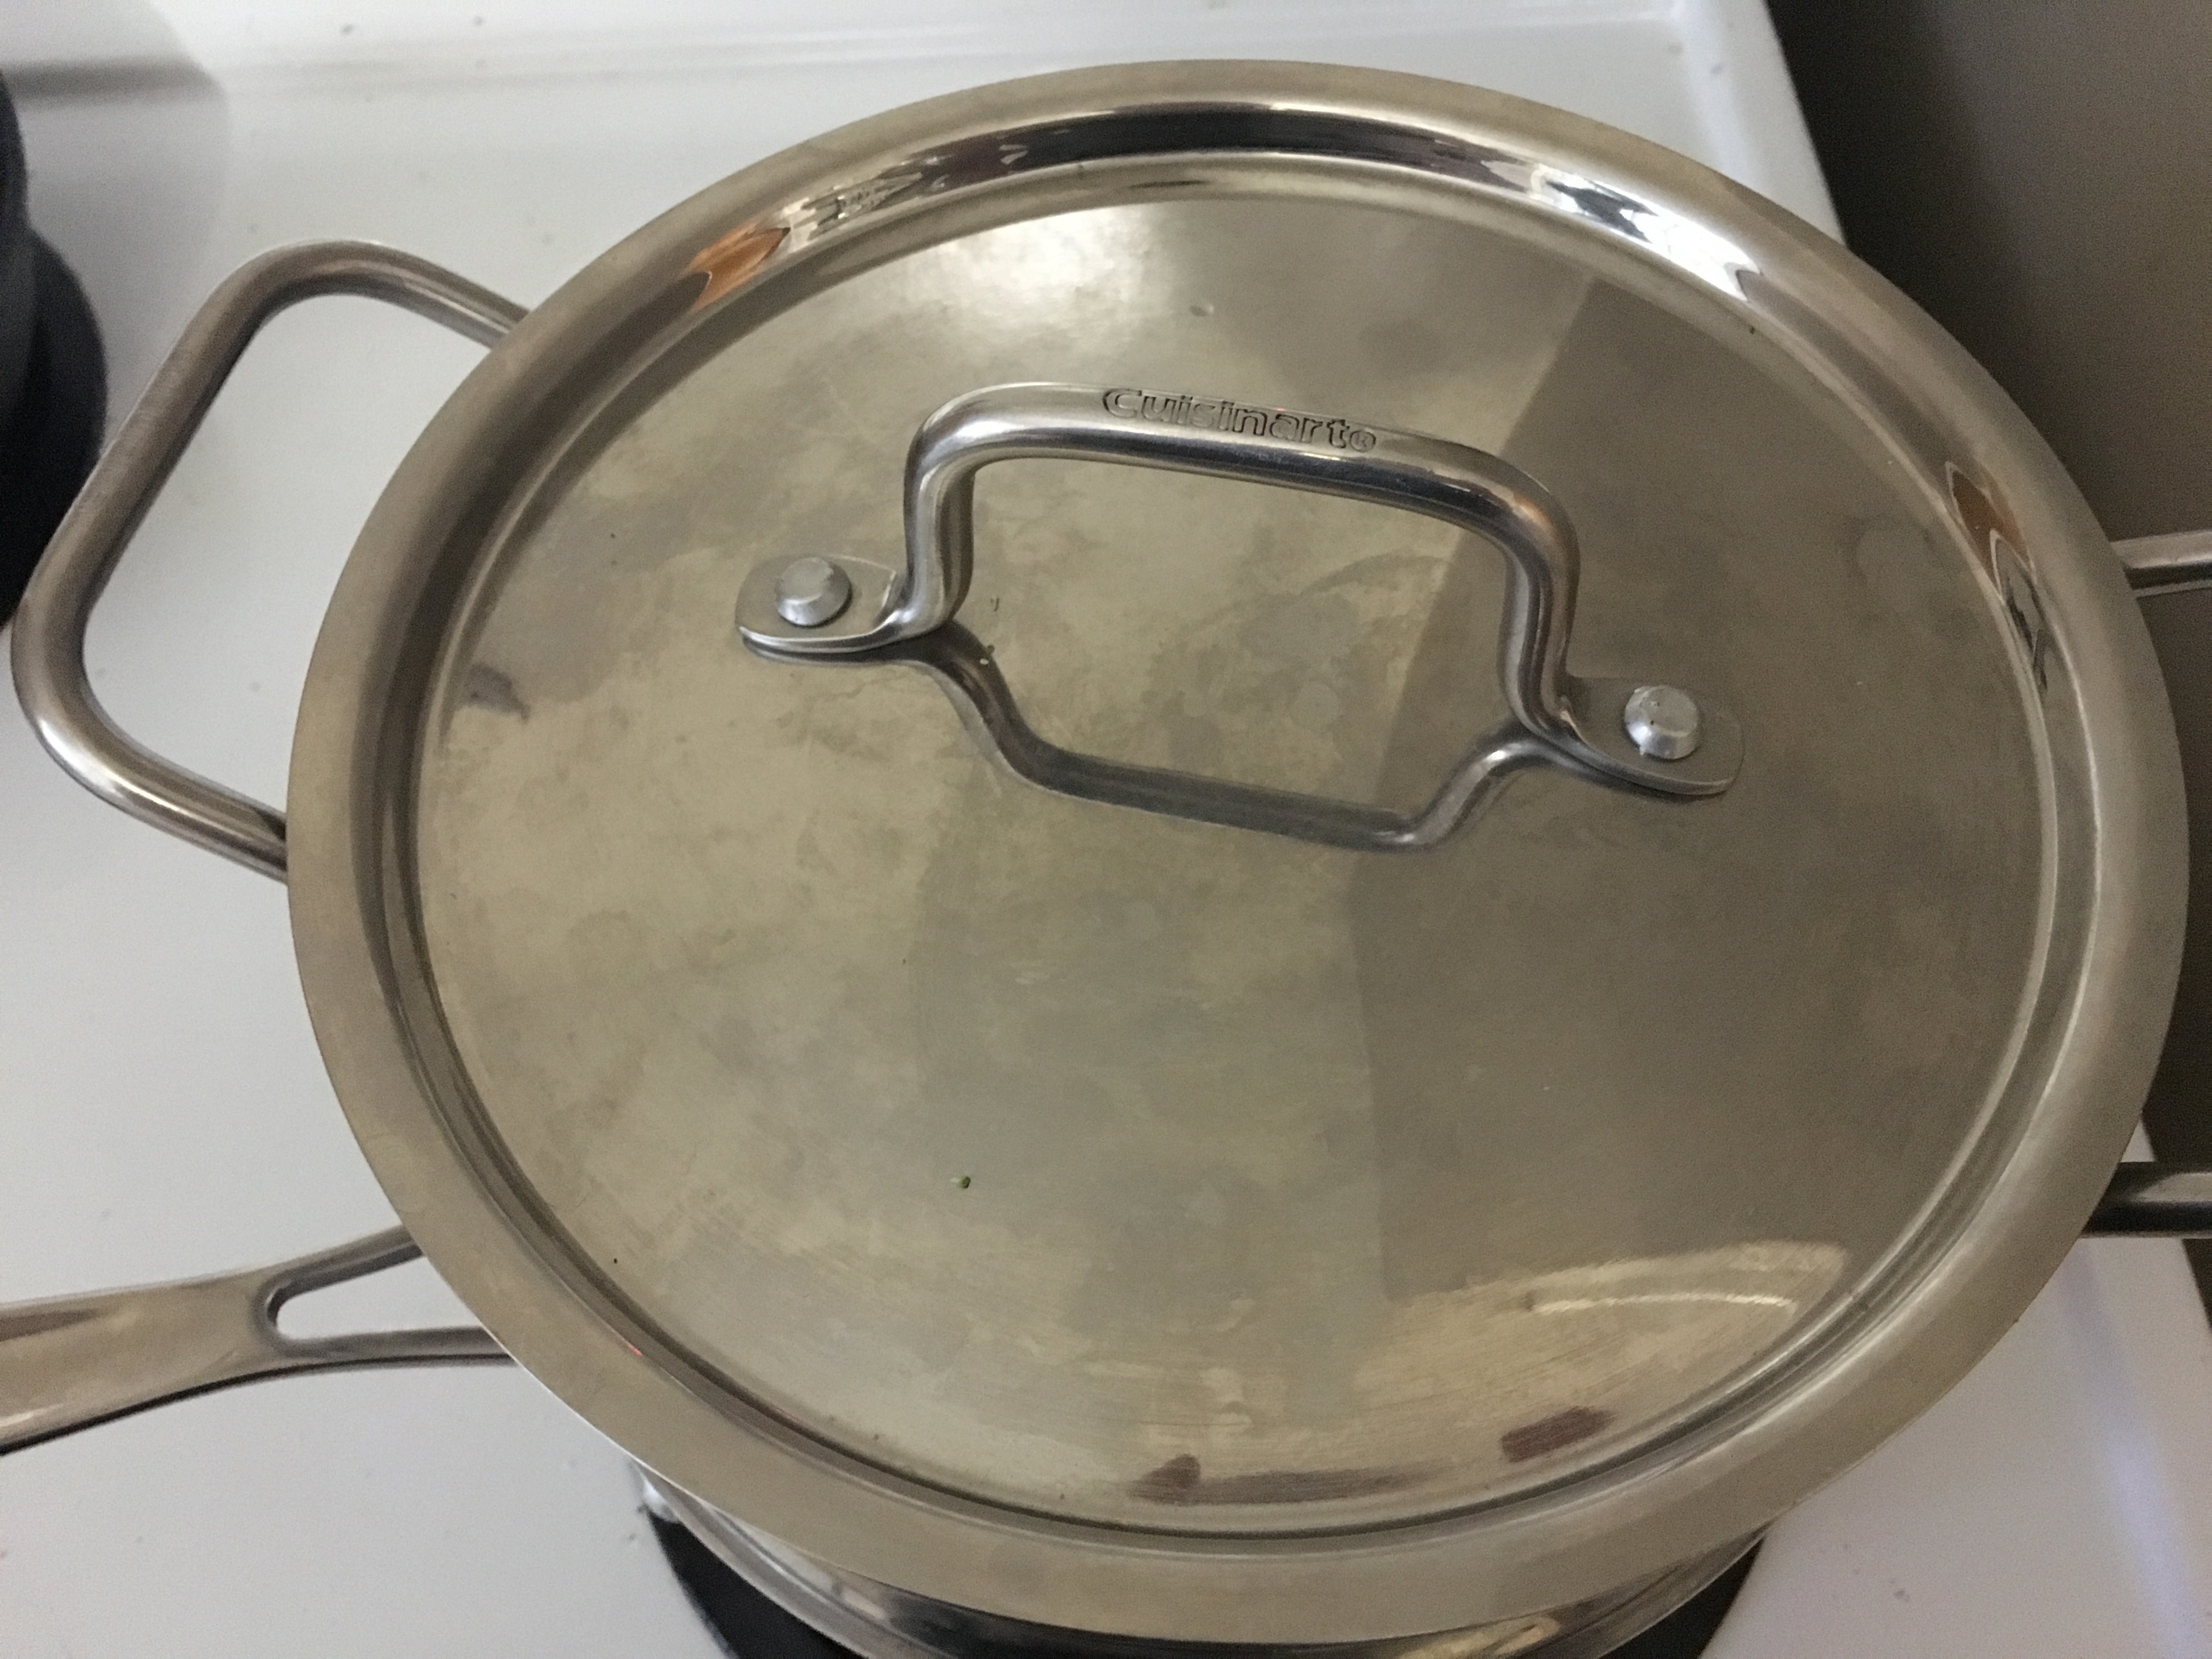
  4. Put the pot on high heat, and wait for a good head of steam to form. Put your broccoli in the basket, and place the lid on.
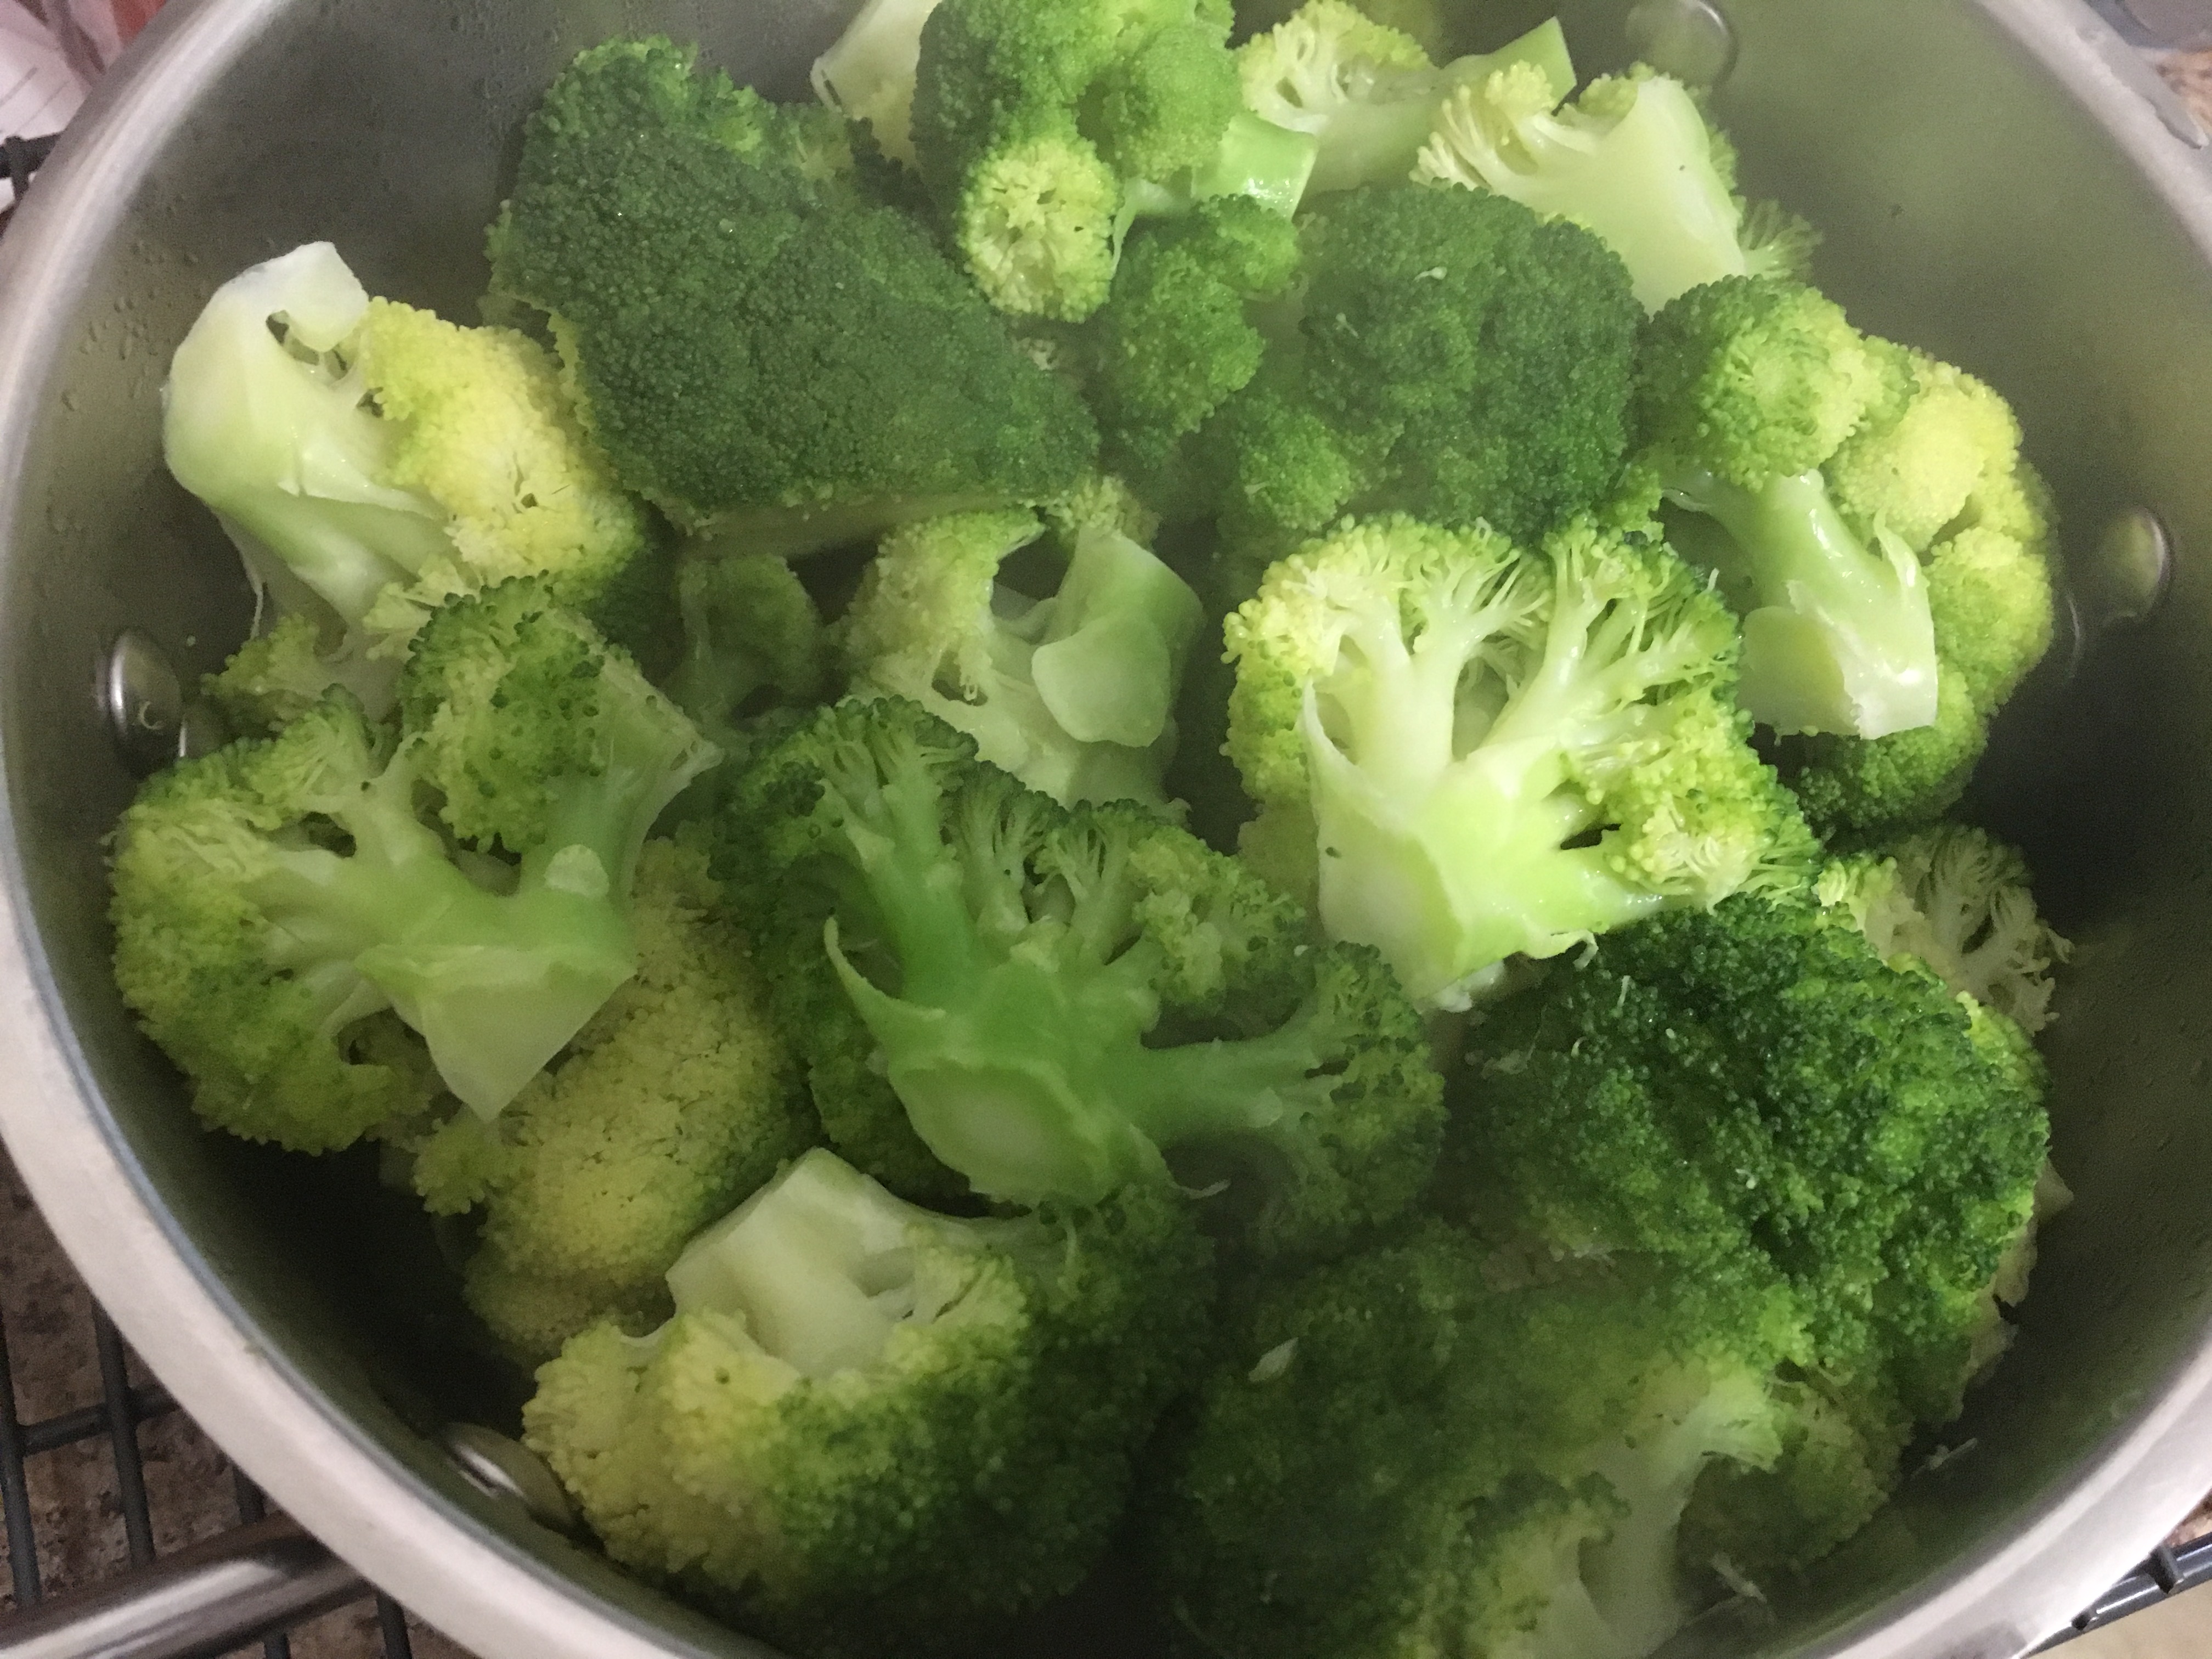
  5. Wait 3 minutes, and check to see if your broccoli has turned bright green, and is fork tender. Reserve steaming water for later
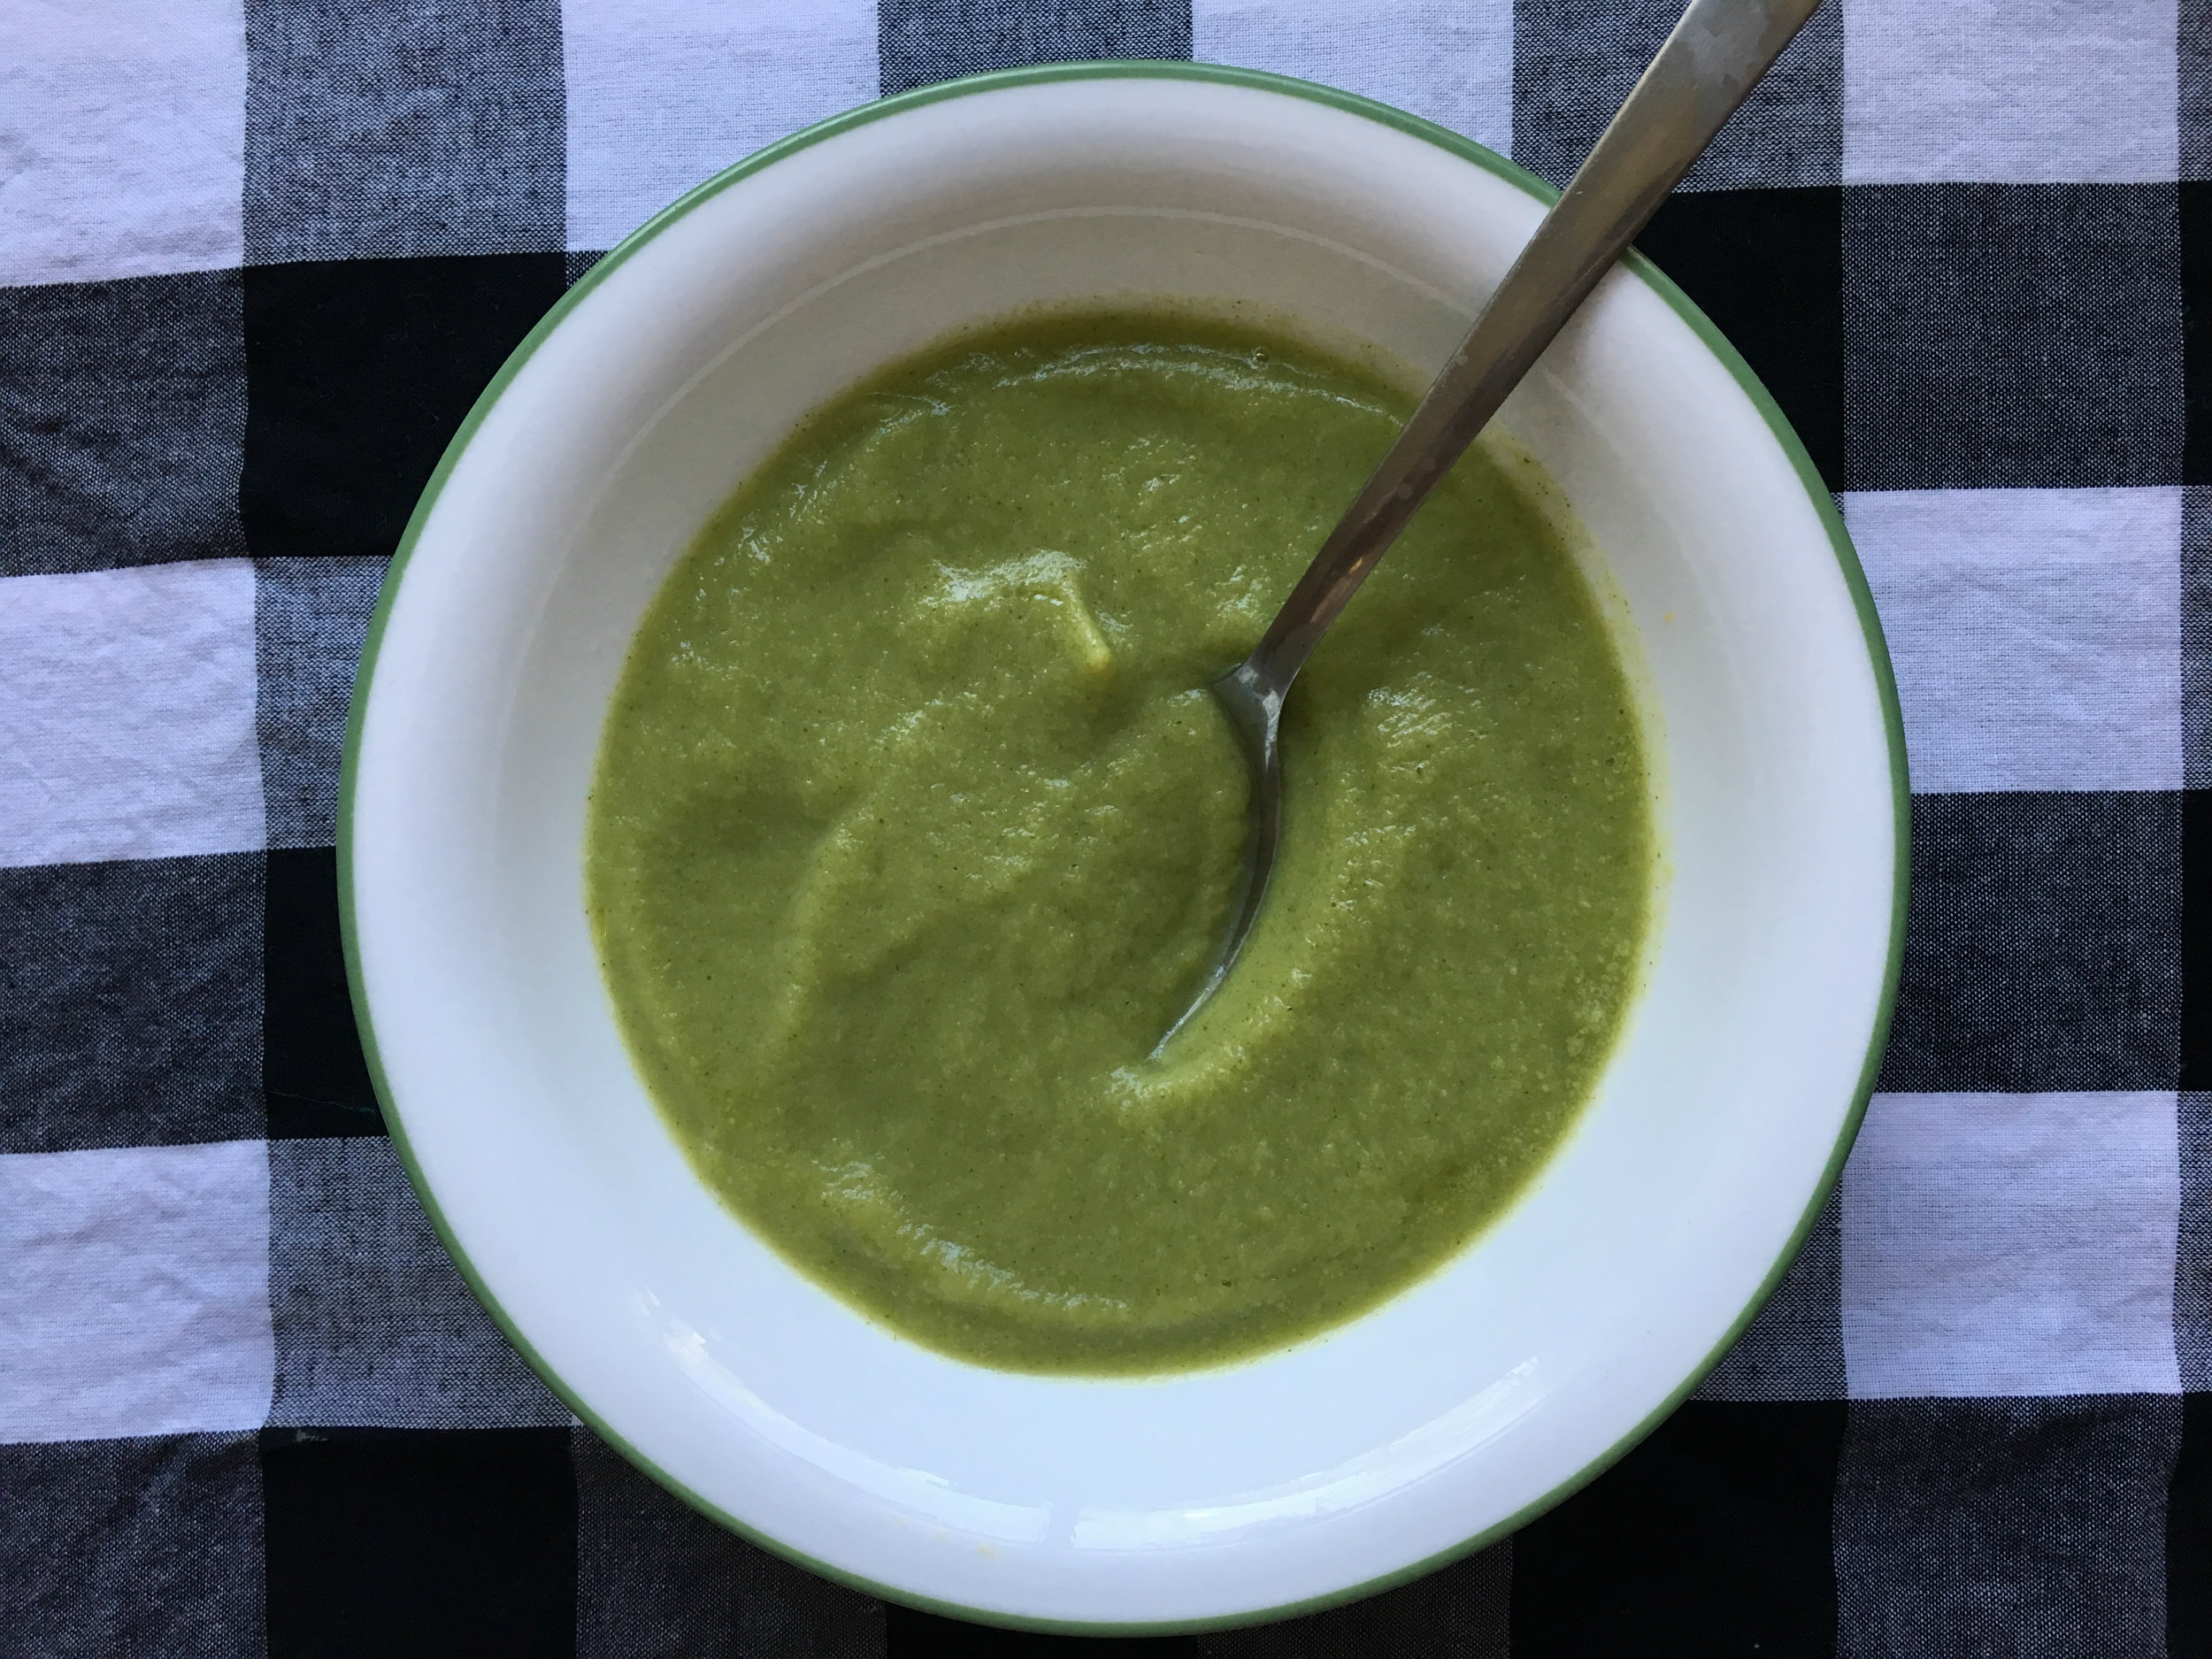
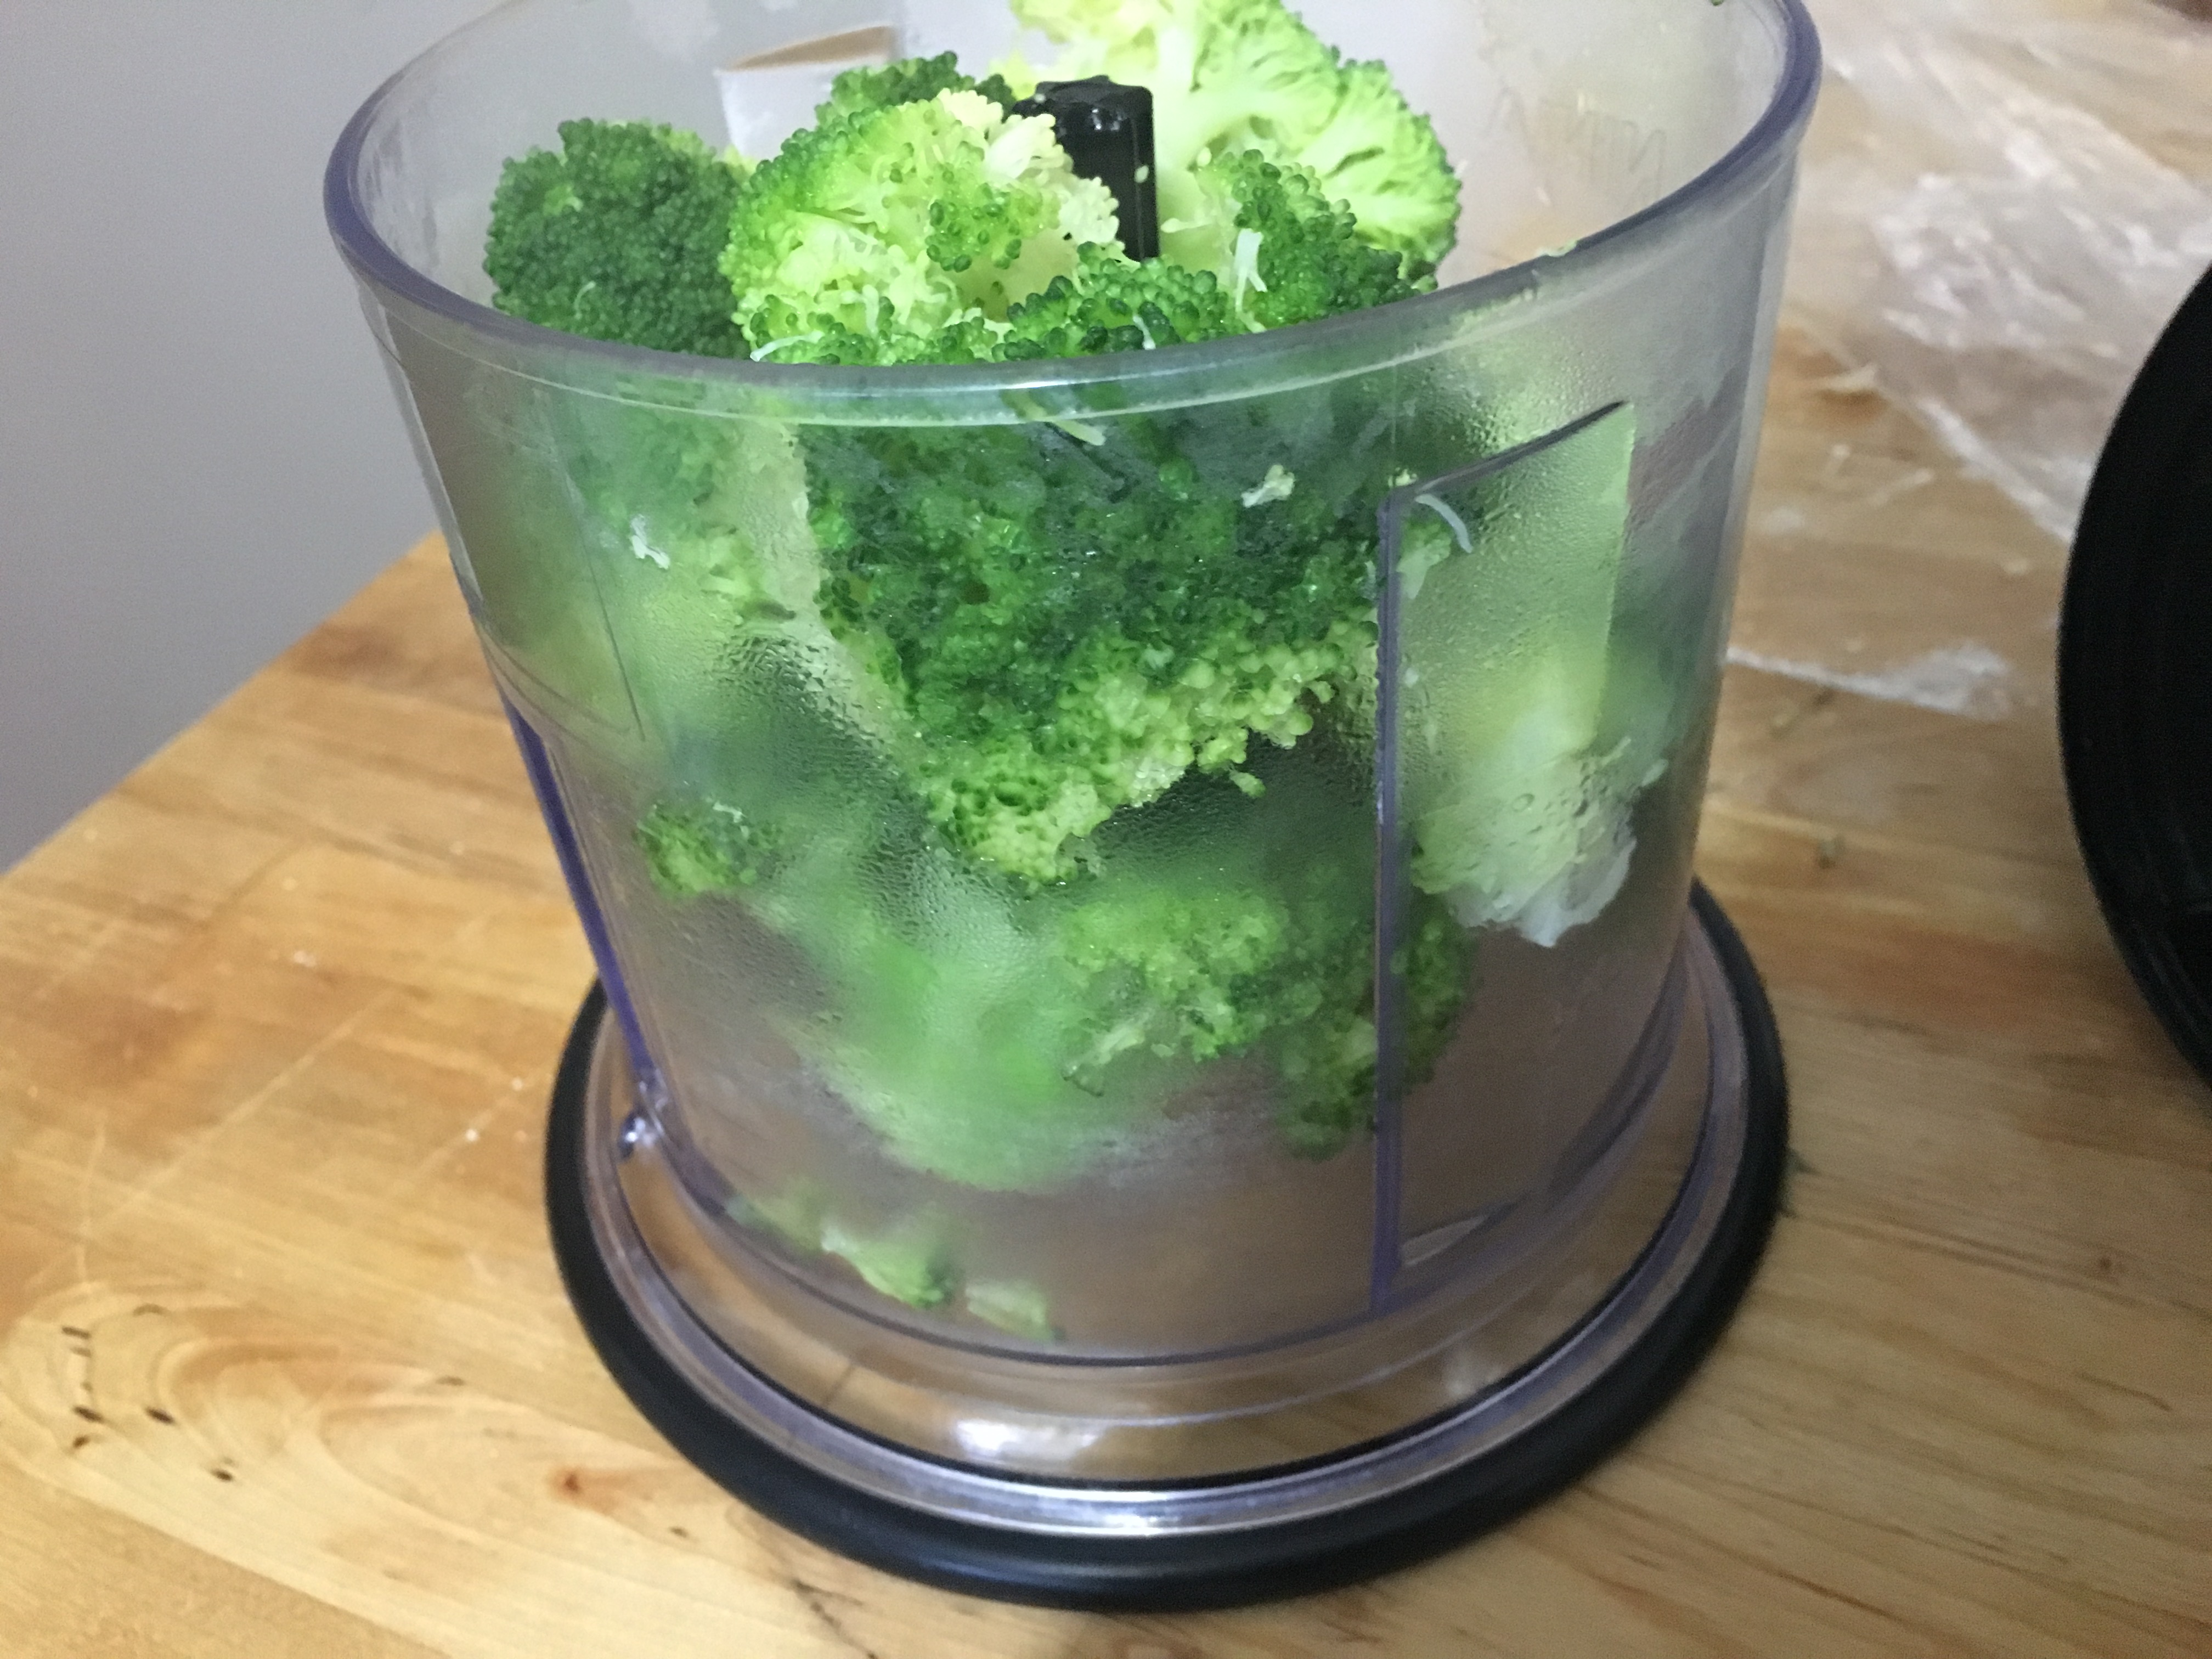
  6. Place the cooked broccoli into a food processor, and pulse until the broccoli pieces are the size of small bread crumbs. I didn’t have a big enough food processor, so I did mine in batches. Put the broccoli in a pitcher, and switch to a immersion blender for the rest of the recipe.
  7. Measure how much of the reserved water you have leftover, and add fresh water until the two combined are approximately 3 cups. In my case I had 2 1/4 cups after steaming, so I added another cup. Add this to your broccoli and blend until smooth.
  8. As the mixture gets thicker add another cup of fresh water. This will take a while. In my case it took somewhere between 5-10 minutes. You’ll know it’s smooth enough when you taste it and it has no ‘grainy’ taste.
  9. Put puree back into a pot on low to medium heat
  10. Once The soup has throughly heated, place in a bowls and serve
  11. Take a fancy photo, and post it to Instagram with the hashtag #foryourfoulmouth
*In hindsight I realized I could have added the stocks to the water I used to steam the broccoli. Since I was adding it to the soup in the end, this would have added more flavour to the end product.

Rain or swine

What is it about the rain that makes us put things off? I mean, people change around their whole day just to avoid a 5 minute walk to the car because they might get a little wet. Even the very expression we use to cancel plans is called a ‘rain cheque’, it’s kind of ridiculous when you think about it.

I bring this up because the other day I decided I wasn’t going to let the weather get in the way of my plans. This started when my roommate and I were shopping. I saw baby back ribs where on sale, and since the few days prior to that were beautiful, I thought I would pick them up and possibly smoke them. It had been a while since I made ribs and my mouth was watering just thinking about it. I popped them into my cart, and got on with my life. Then the rain came, and when it rains, it pours for 3 days! The swine gods had sought to cancel my plans to enjoys sweet fall off the baby back ribs… and I was having none of it. Ribs were only good for a few days in the fridge, and I wasn’t about to freeze them indefinitely until the clouds parted.

The way I saw it, I had 3 options:

  1. BBQ in the rain
  2. Use liquid smoke and other methods to simulate the flavour of BBQ in an oven.
  3. Change my plans to best fit the situation, and braise my ribs.

Since my smoker is homemade and electric, I didn’t feel using it in the rain was a good idea. I also am not a fan of liquid smoke, since it feels like aiming for second place. Oven roasted ribs bring so much possibilities, and once I’ve got the oven ready, why use it in a way where it less than shines? So braising it is!

My roommate is not a fan of cooked tomatoes, and a big fan of Asian food. So I decided instead of cooking like down south, I’d aim for the Far East, and use things like ginger, soy sauce and oranges to braise the baby back ribs.

The end product wasn’t perfect, but it was definitely a good start to a recipe I think will one day shine.

If I had let the rain entice me into making something else, I would have missed out on exploring this. Down below is the recipe I used. Next time I try this, I’m going to use more orange juice, and reduce it more. I’m also going to cut the amount of spices in the braising liquid by up to half while increasing the honey. I am probably going to replace the Apple Cider Vinegar with regular rice vinegar. I feel the orange flavour is what best compliments the ribs. The last change I would make is how I coated the ribs with the reduced braising liquid. I coated the ribs and broiled it three times until the liquid was dry. In hindsight, I should have only done that once, and one more time taken it out sooner. That way their would have been more of a ‘sauce’ on the ribs.

The Ribs:

  • 2 Full rack of Baby back Ribs

The Rub:

  • 2 Tablespoons Chili pepper
  • 2 Tablespoons Salt
  • 1.5 Tablespoons Whole Peppercorn
  • 2 Tablespoons Paprika
  • 1/2 Tablespoon white Pepper
  • 1 teaspoon Ground Ginger Powder
  • 1 teaspoon Ground Garlic Powder
  • 1 teaspoon Ground Onion Powder

The Braising Liquid:

  • 300ml (approx 1 1/3 cup) freshly squeezed Orange Juice
  • 50 ml (approx 1/4 cup) Apple Cider Vinegar
  • 1 Tablespoon  Soy Sauce
  • 1 Tablespoon Worcestershire Sauce
  • 1 Tablespoon Honey
  • 1 Clove Garlic
  • 1/2 Ginger
  1. Blend whole peppercorn in a spice grinder, or small blender, place in bowl with the other spices then set aside
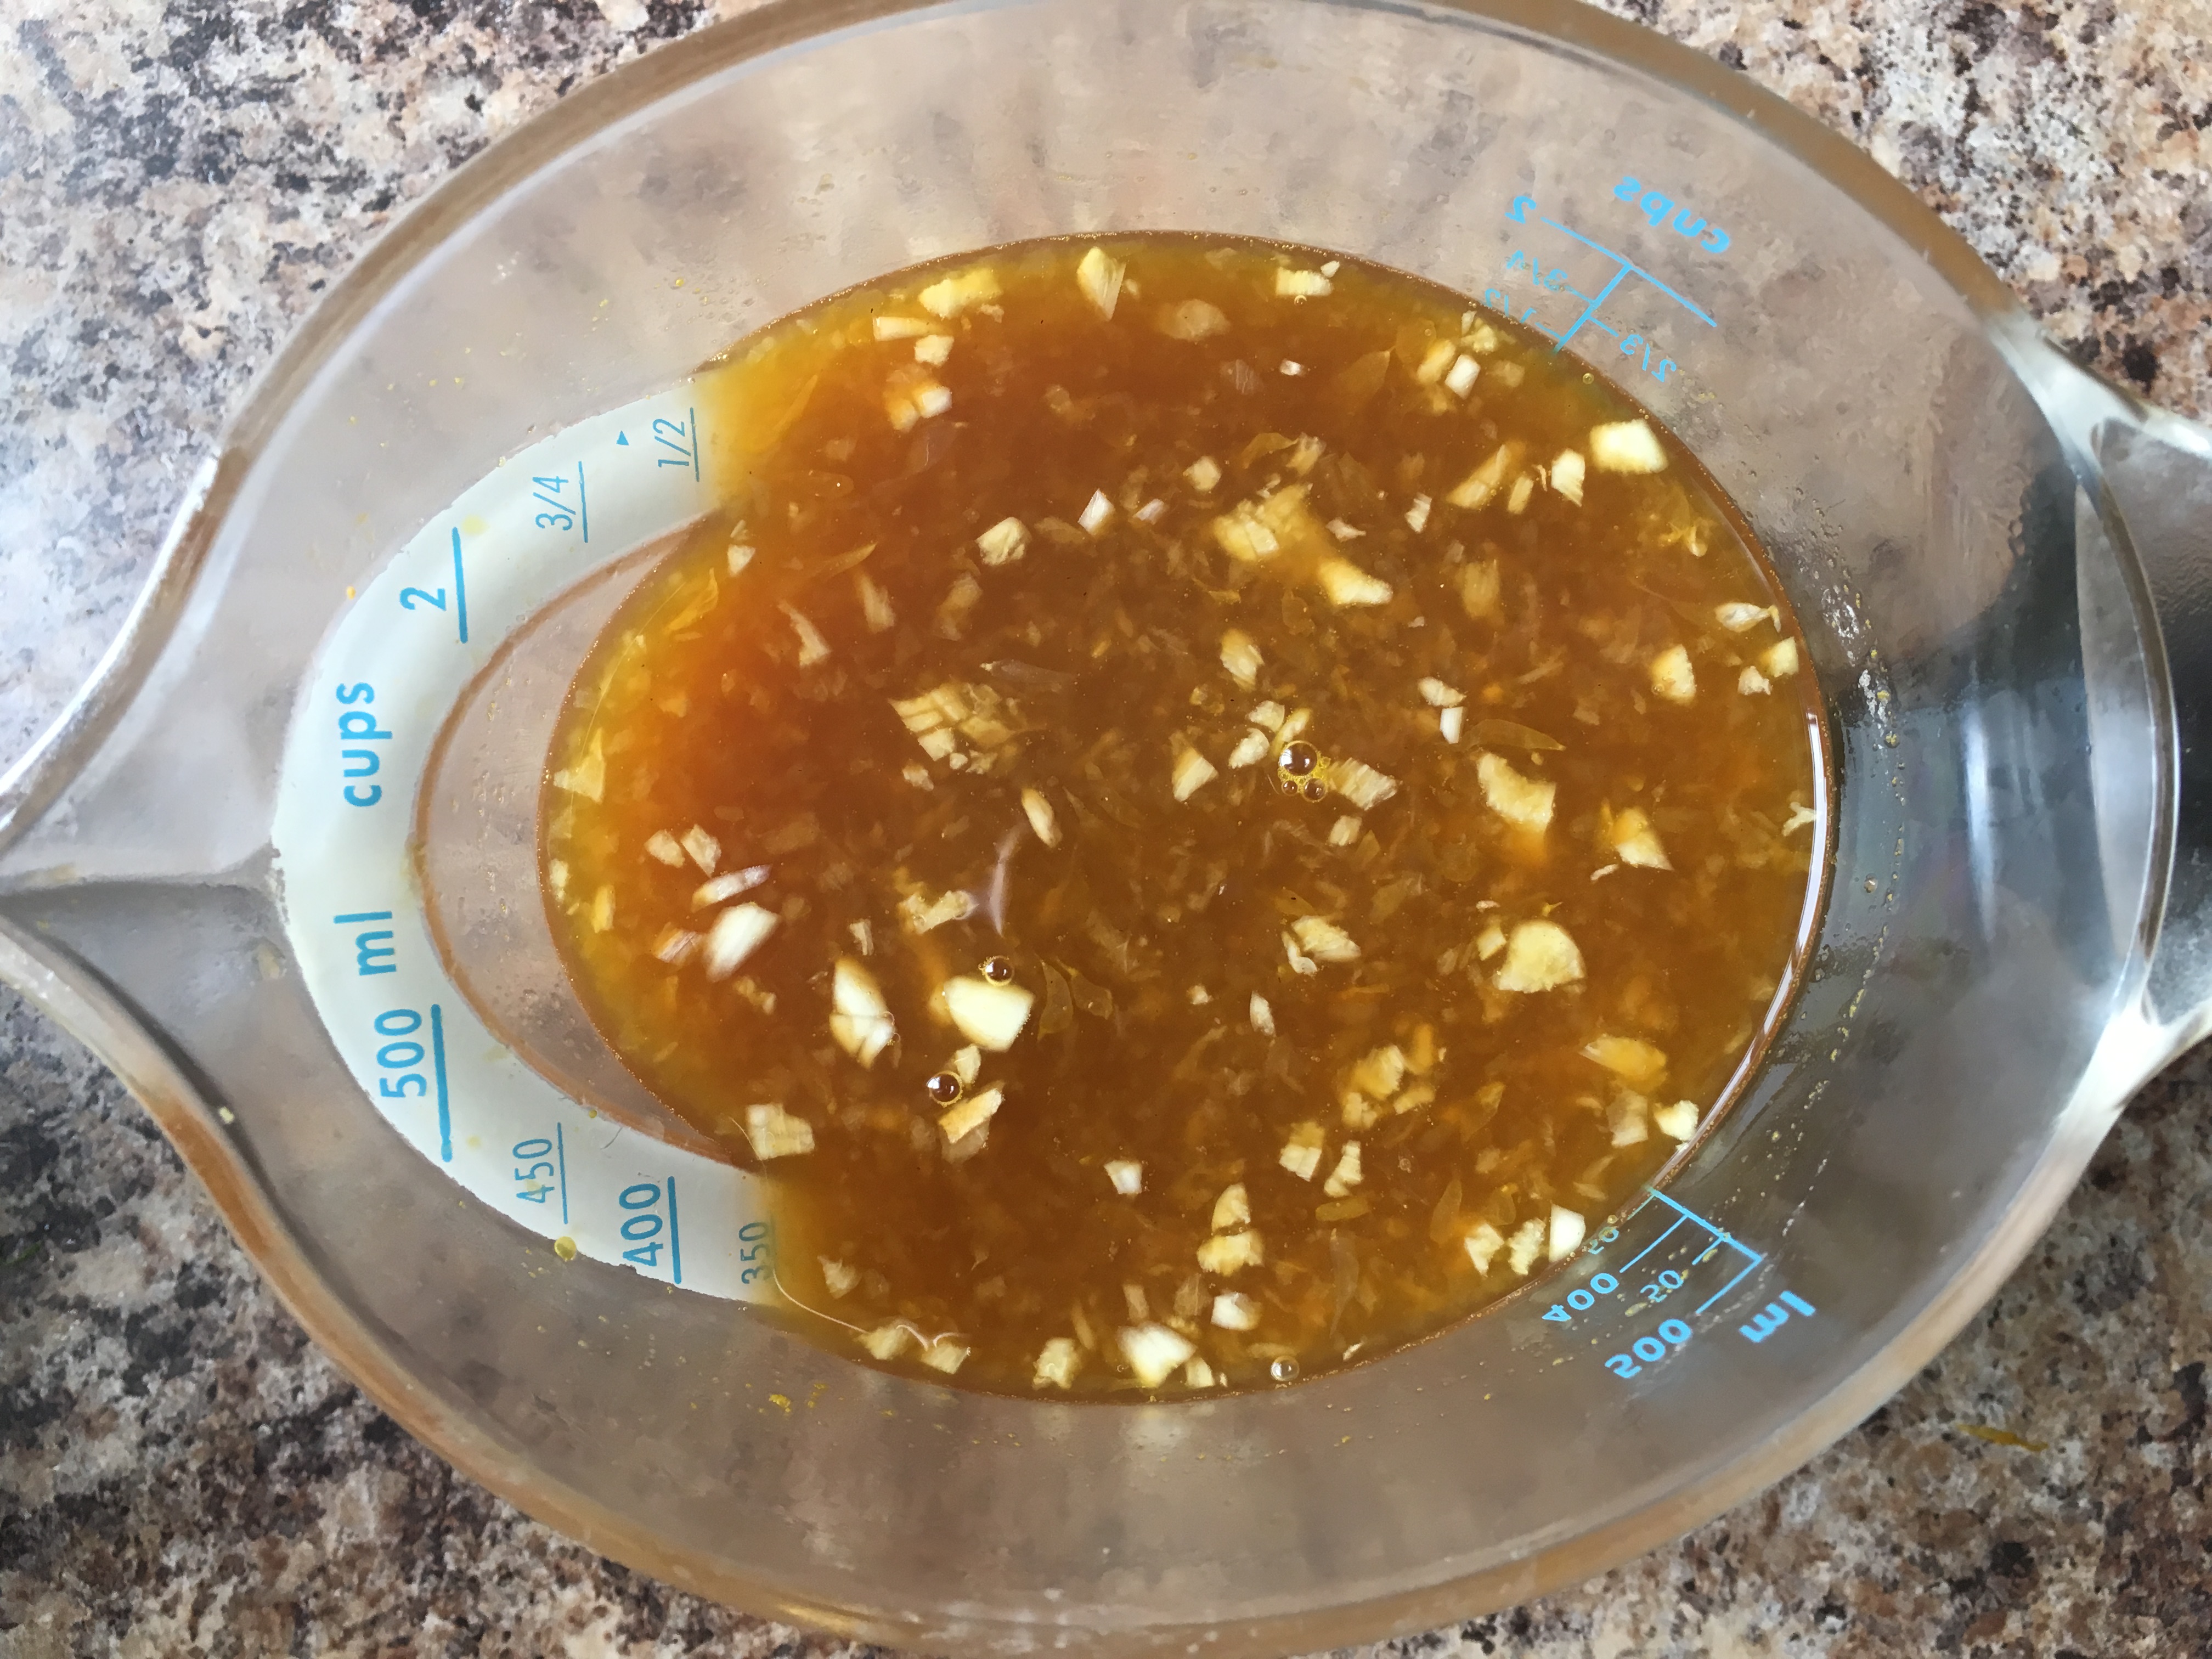
  2. Place your orange juice in a pot and simmer on low until it has reduced to about 250ml (1cup), turn off heat and whisk all the other Braising Liquid ingredients together in the pot, let cool and set aside covered in the fridge.
  3. Let your ribs sit out for about 30 mins, it’s easier to work with at room temperature.
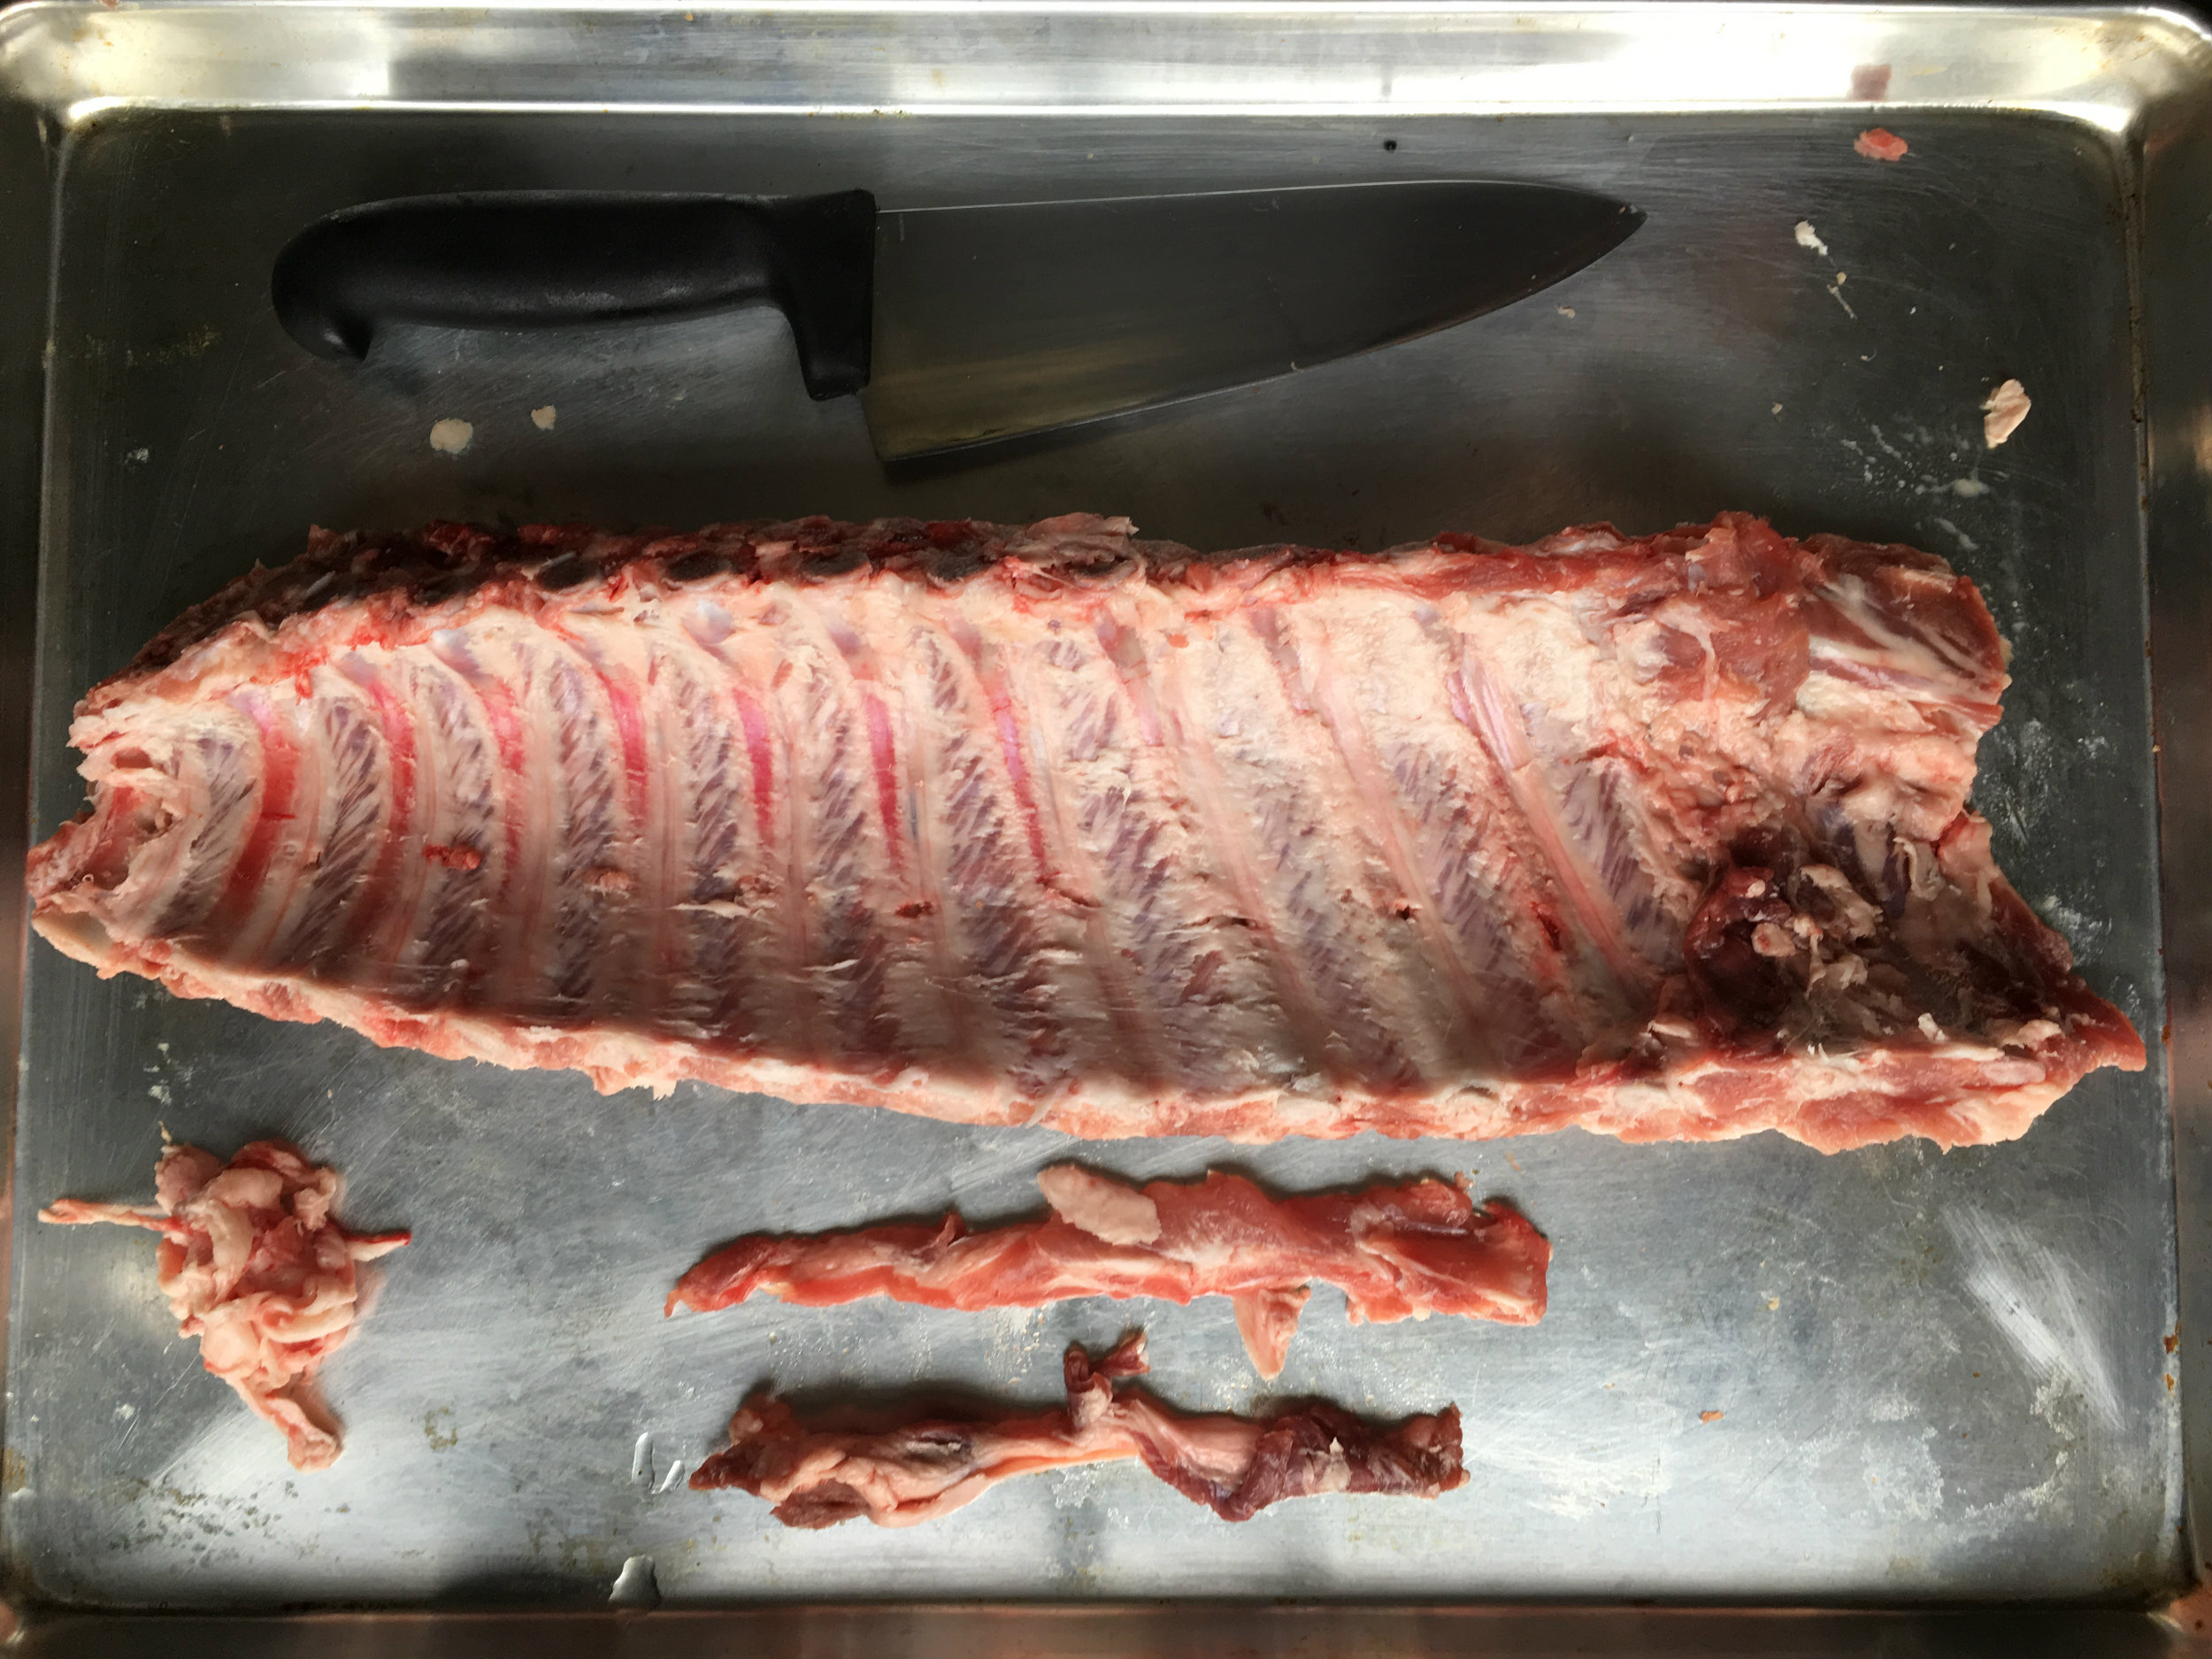
  4. Trim your ribs of any extra “flabs” of meat. these will cook too fast, and generally be unappealing, also you want to remove the pulmonary pleura (Aka the thick membrane on the concave side of the ribs). There are some myths that this prevents flavour from penetrating into the meat, but that isn’t true. It does however create a chewy texture. You can remove it by using a knife to poke a hole in the membrane in the corner, and using your finger to pull it off. It should come off as one piece.
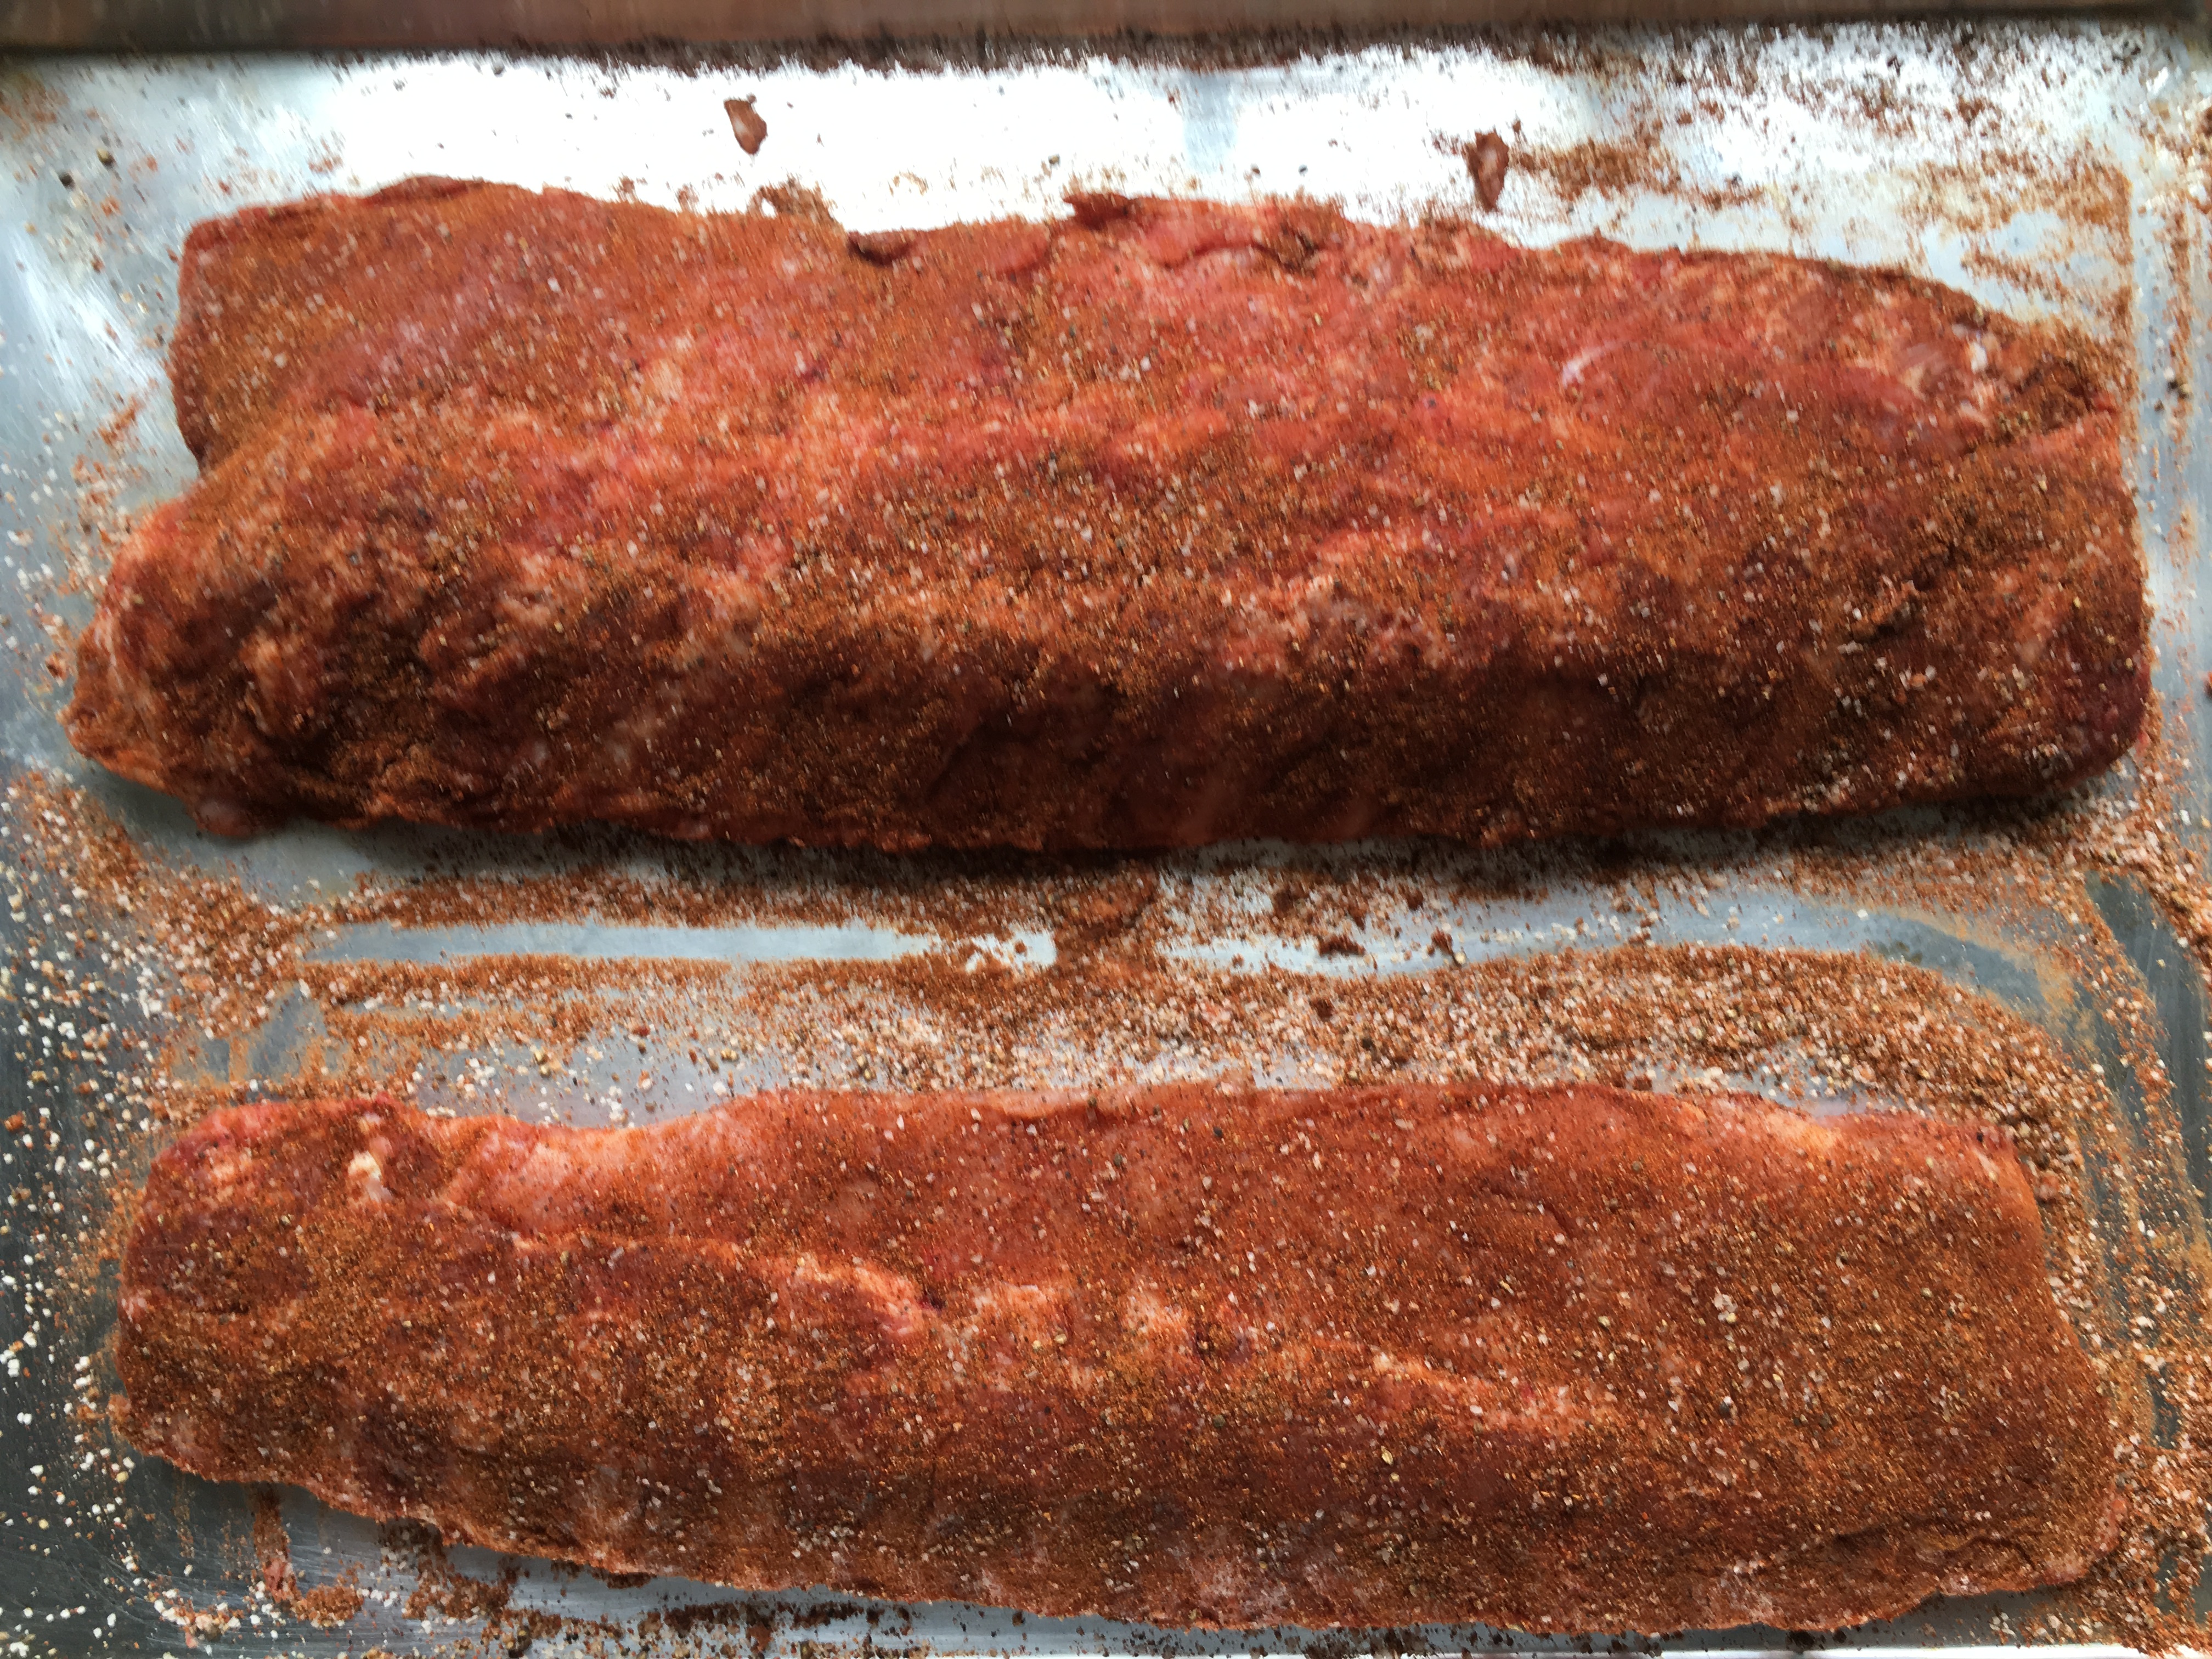
  5. Cover both of your ribs in the Rub mixture. Don’t be shy here, this is what will form your “bark”. You want to cover the top, sides and bottom of the ribs.
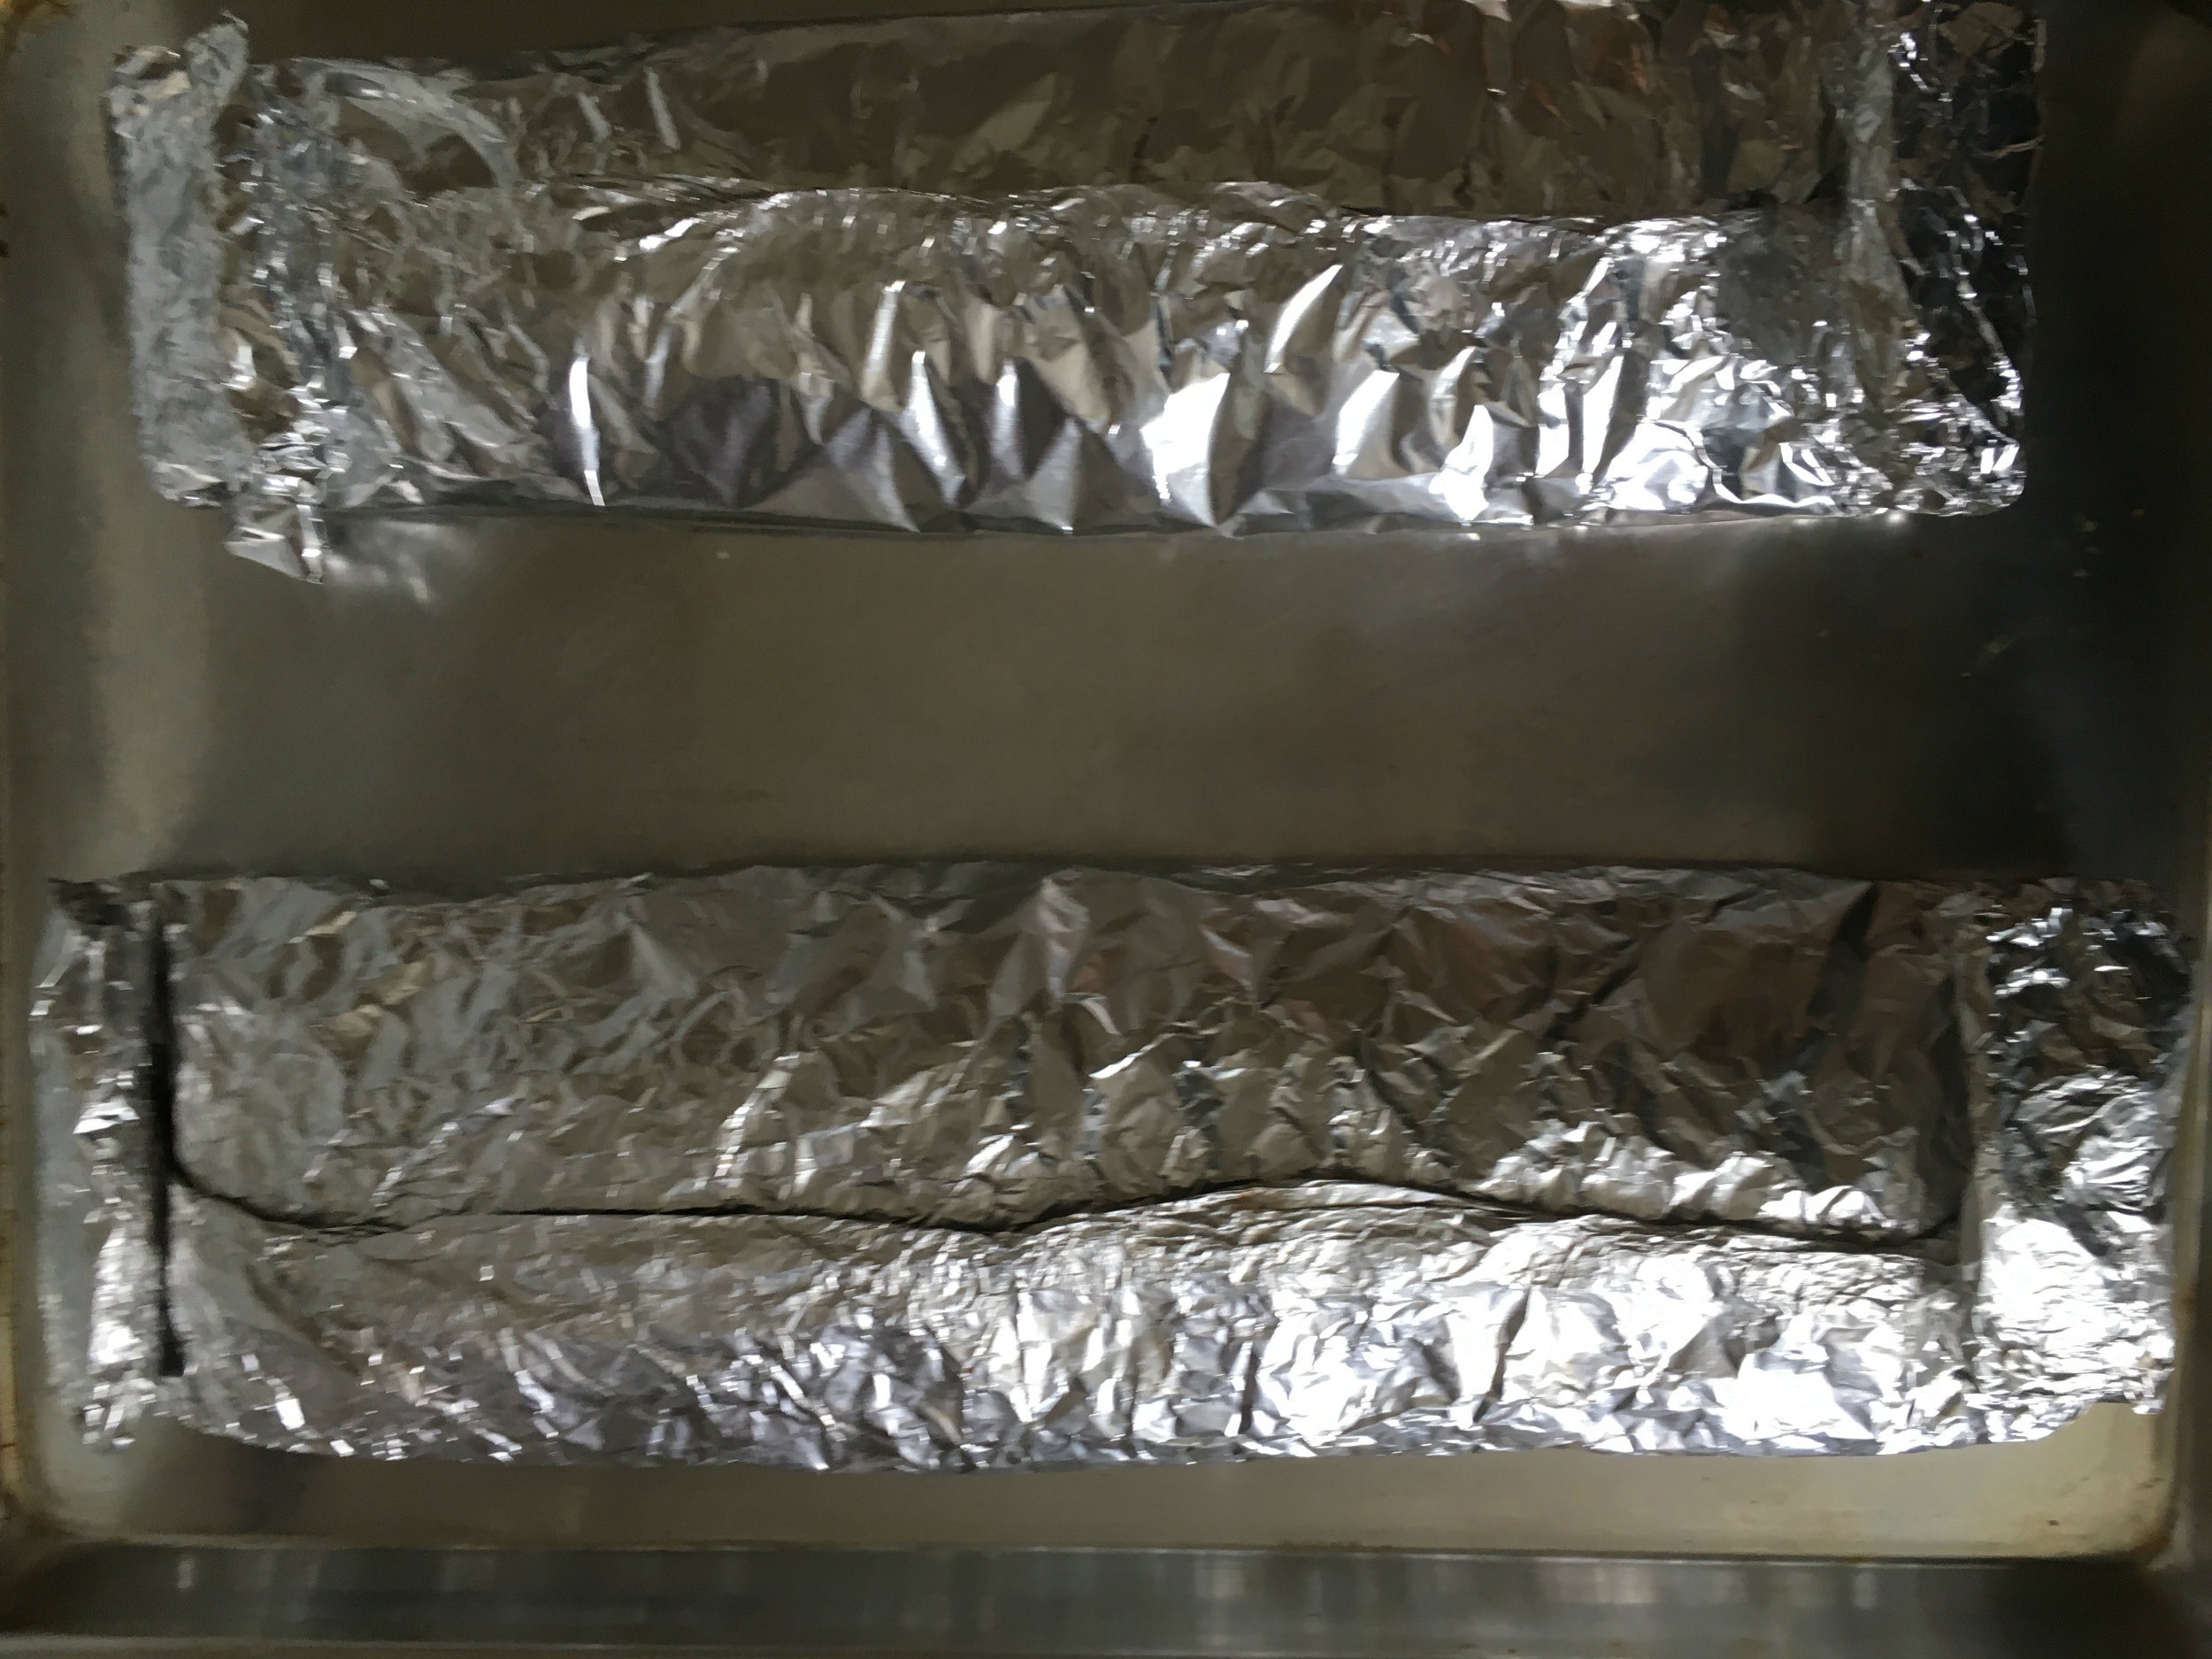
  6. Place your ribs on top of wide heavy duty aluminum foil so the concave side is down. You want to wrap them so you have a tight seam on top of the ribs. Then tightly roll up one side of the foil, and loosely roll up the other.
  7. Place your wrapped ribs in the fridge for a minimum of 2 hours, preferably overnight.
  8. Preheat your oven to 225 degrees Fahrenheit.
  9. Take the ribs out of the fridge and unroll the loosely rolled side of the foil, pour half the braising liquid into each foiled ribs. Tightly re-roll the aluminum foil.
  10. Place the foiled ribs on a baking sheet, and place the baking sheet into the oven for minimum 2 hours. Unfortunately this recipe doesn’t have a set cooking time, after the two hours you’re going to have to use best judgement to tell if these are cooked or not. My method (amongst other people) is to unwrap the corner of the ribs, and look for 3 major signs. pull, crack and twist. That means You want: the ribs to have significant amount of the bones showing, also called “pull back”, you want to see cracking on the top when you bend the ribs, and you can twist the bones fairly well in the ribs. If the ribs don’t pass this test, roll the foil back up, and put in the oven. Generally speaking, if I don’t see the Pull Back, I don’t bother doing the other two test, and put it back in the oven for 30-45mins. If it only passed the first test, I do 15-30 mins of cooking time. By doing this, you have ensured the connective tissue of the ribs of dissolved. This will give you more tender ribs.
  11. Once your ribs passed the three tests, pour your braising liquid into a pot and simmer to thicken, also place your ribs directly on the baking sheet, and place it on the side for now.
  12. Set your oven to broil, and move the rack to the highest position in the oven.
  13. You want your braising liquid to thicken. My general test is I can run a spatula though the liquid and see the bottom of the pan for about 2-3 seconds. This will form your rib sauce.
  14. Once you have your rib sauce made, use a pastry brush to lightly coat your ribs with it and place it in​ your oven (set to broil) until the sauce is bubbling and forms a nice thick coating on the rub. Don’t walk away from this, it takes about 20-45 seconds for this to happen. Repeat the coating and broiling 2 more time.
  15. Cover the ribs one more time with the sauce, plate and serve.
  16. Take a fancy photo, and post it to Instagram with the hashtag #foryourfoulmouth
Sources:
Amazing Ribs I got the information about the
Good Eats SEASON 2 EPISODE 13 TITLED Pork Fiction. My Recipe is nothing like Alton Browns, however the techices where inspired buy this episode.

What to Do In a Jam

Spring is when some of the best produce is made; including peas, root veg, asparagus, rhubarb, and oddly enough, strawberries. Doesn’t that last one just stick out like a sore thumb?

I love Strawberries, these little guys are not only sweet, but confusing as hell. For example, they aren’t berries, they aren’t even fruits! They are in the same family of plants as roses, and the fleshy part of the ‘berry’ is what botanist call a fleshy receptacle, which is a fancy word for a swollen part of the vine that holds seeds. Which I think technically makes them a vegetable, however I couldn’t find anything that confirms they are. That being said, the ‘seeds’ on the outside, are actually little fruits! Which make the whole strawberry an aggregate accessory fruit. When you think about it, accessories can make the outfit, and accessories to murder still go to jail, so what’s the difference!

All that aside, let’s start making some jam.

I’m using rhubarb from my local farmers market, and frozen strawberries… which might sound odd, but here is the fact of the matter: the weather has given my area little to no strawberries. The weather in Peru must be beautiful this time of year because the package of frozen strawberries I bought were from there, and they were perfect.

Fruit and vegetables get all their taste and nutrients from the vine/ground they grow in/on. When you buy fruit and vegetables from the grocery store, the product is picked early, so it will ripen as it travels; giving it a longer shelf life. This means the quality of the product suffers. Buying local is a great way to get a better product because it has a shorter travel distance, and therefore get more time in the soil. Because of the afformentioned weather here, the strawberries are subpar and non existent in the farmers’ market. So, I’m going for the frozen strawberries. Firstly,  they are picked right when they are ripe, and then flash frozen. Secondly, they are brought in from where the weather has been kinder to them. So it’s the best choice for me now.
This Jam came out beautifully, the classic mixture of strawberries and rhubarb is popular for a reason, and the added hint of caramel was a nice addition. That being said, the recipe given below is what I did, but if I were to do it again, I would definitely cut the Pectin in half, and replace more of the regular sugar with the Browned sugar.

Browned Sugar:

  • 283g (10oz) of granulated sugar.
  • This is essentially caramel that acts more like sugar. It has that sweet aromatic flavour of caramel, but remains crystallized like sugar.

Jam:

  • 600g Frozen sliced strawberries (yes frozen, read above for why)
  • 200g of Rhubarb
  • 254g Browned Sugar
  • 293g Sugar
  • 57g Pectin
  • 1.5 T Vinegar
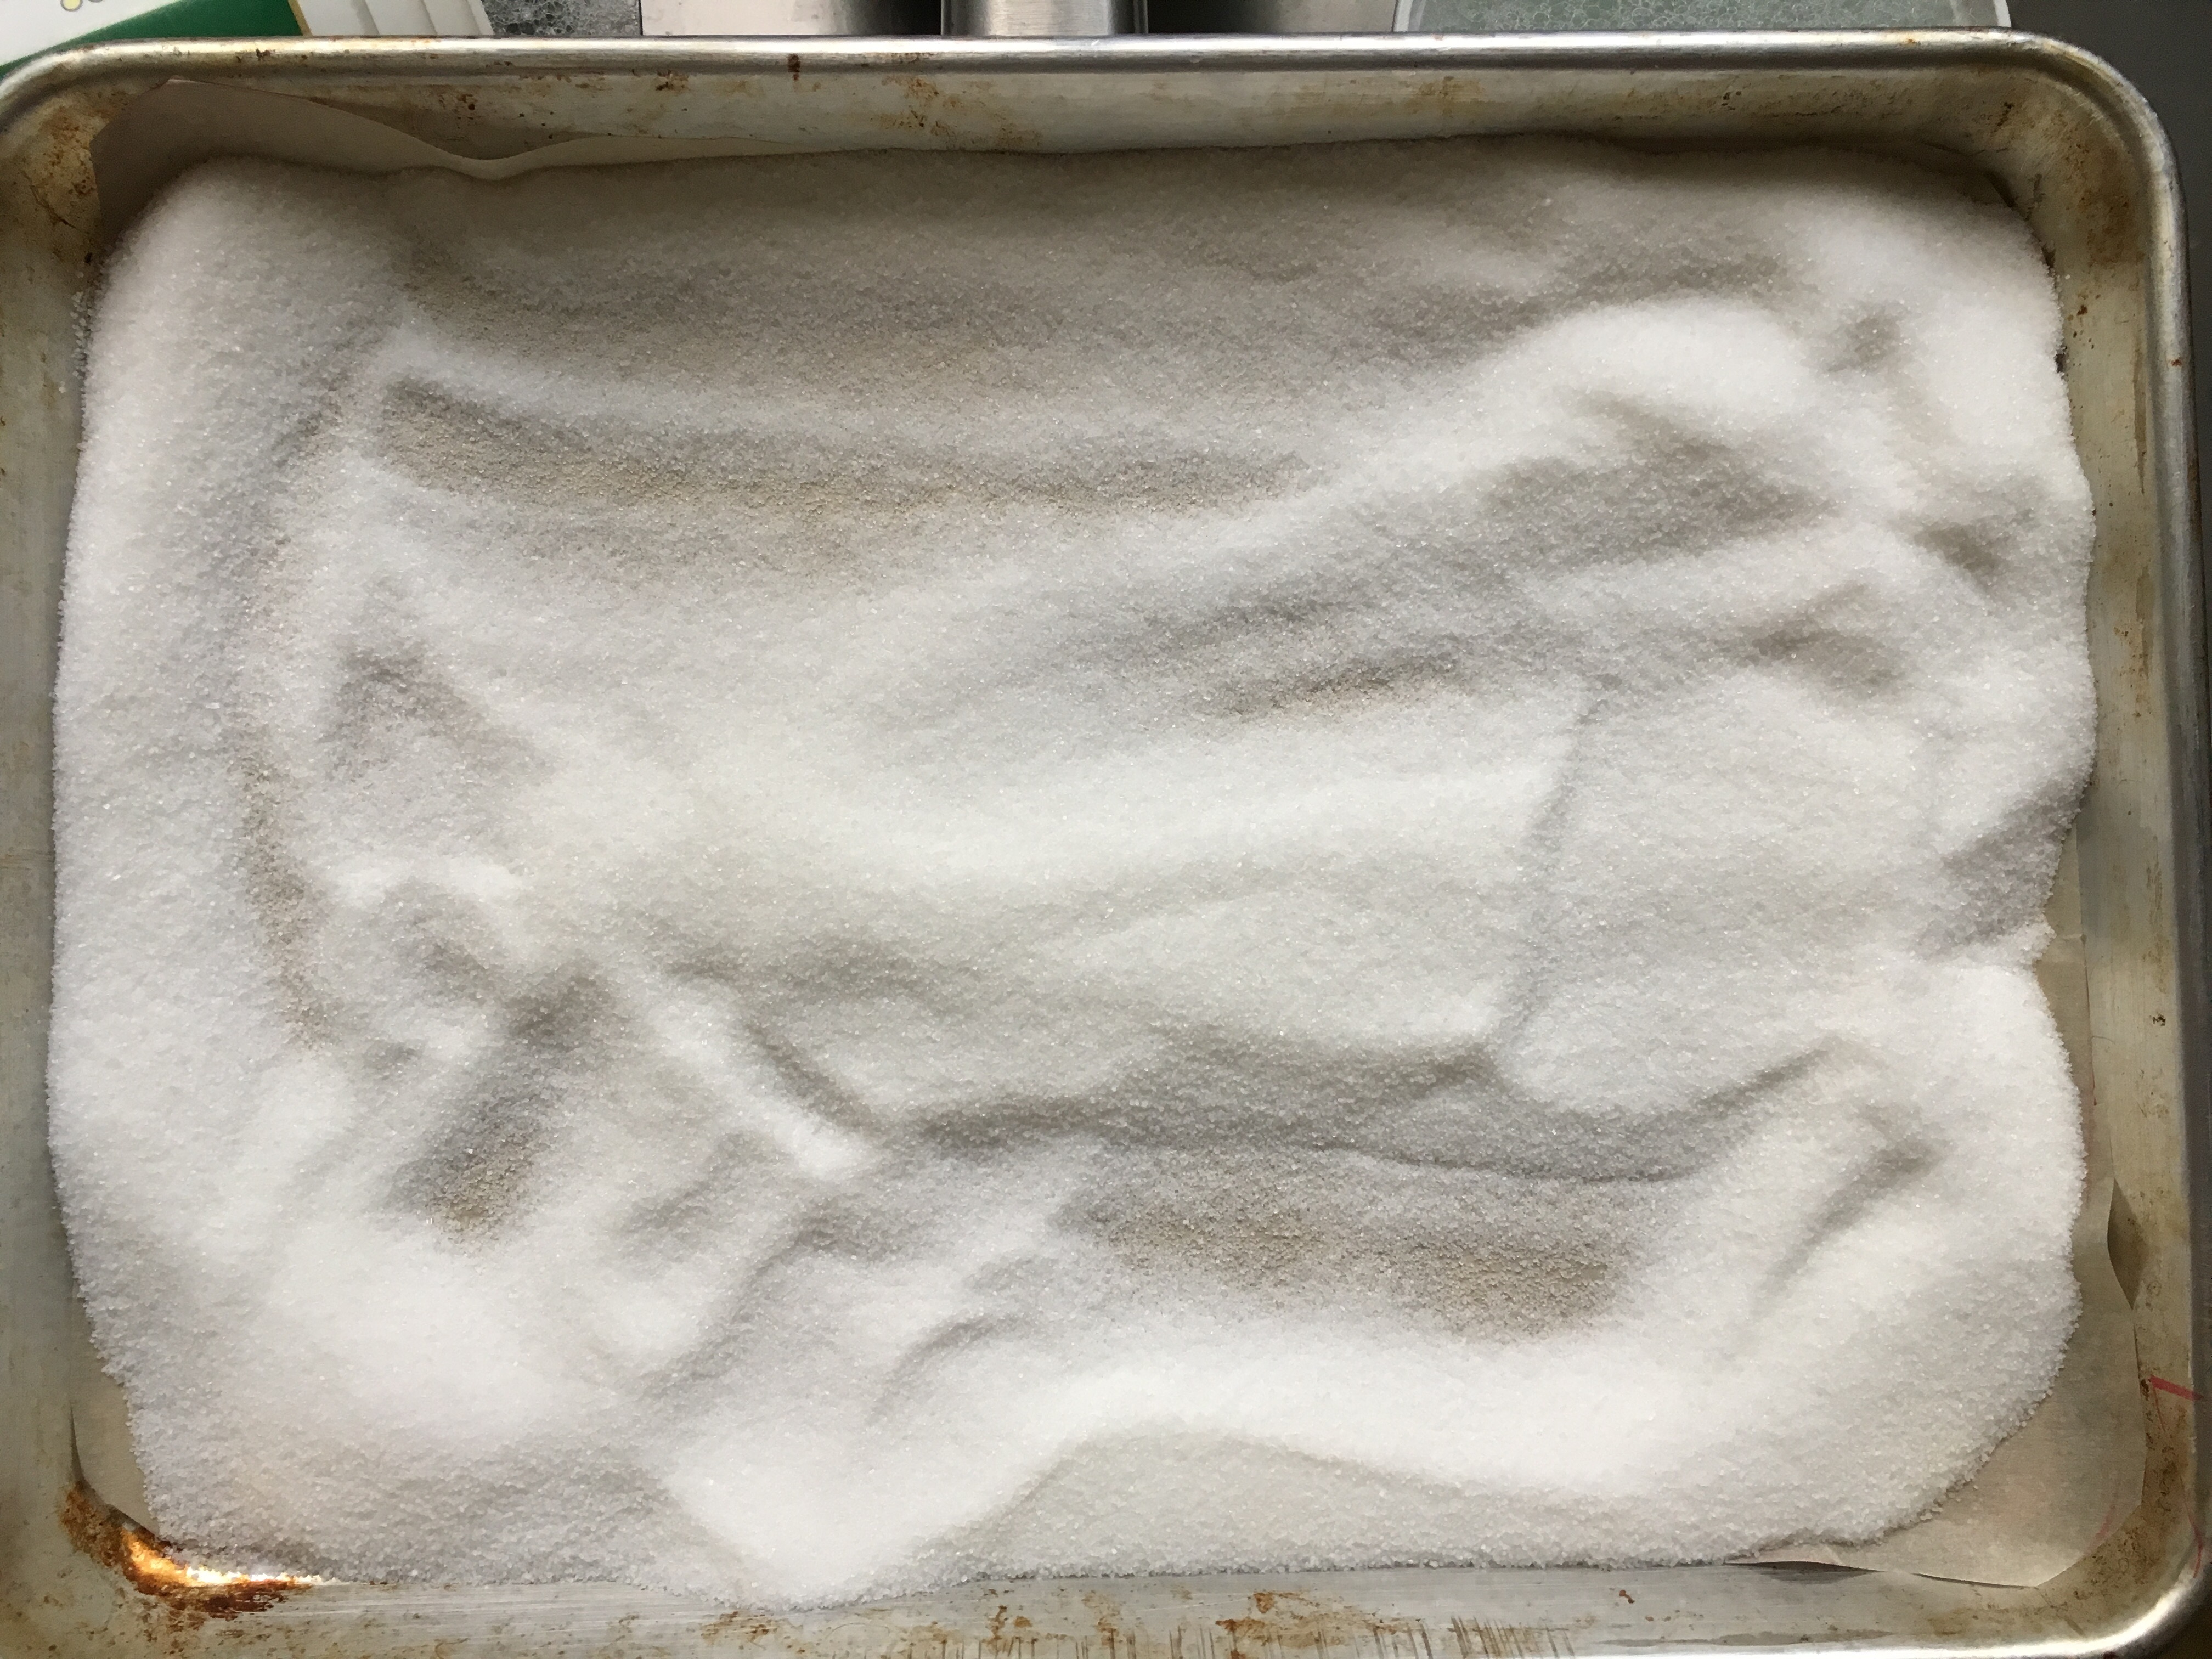
  1. Place a piece of parchment paper on a sheet pan, and layer 283g of sugar evenly over the sheet pan.
  2. Place pan into a 270 degree convection oven (300 degree, if not convection).
  3. After half an hour, use a spatula to move sugar around, and break up any clumps forming. Rotate pan 180 degrees.
  4. Keep repeating step 3 until sugar is golden brown and delicious
    Let sugar cool, if lots of clumps form, use a food processor to restore to granules

Now that we have the Browned Sugar, let’s start our jam!

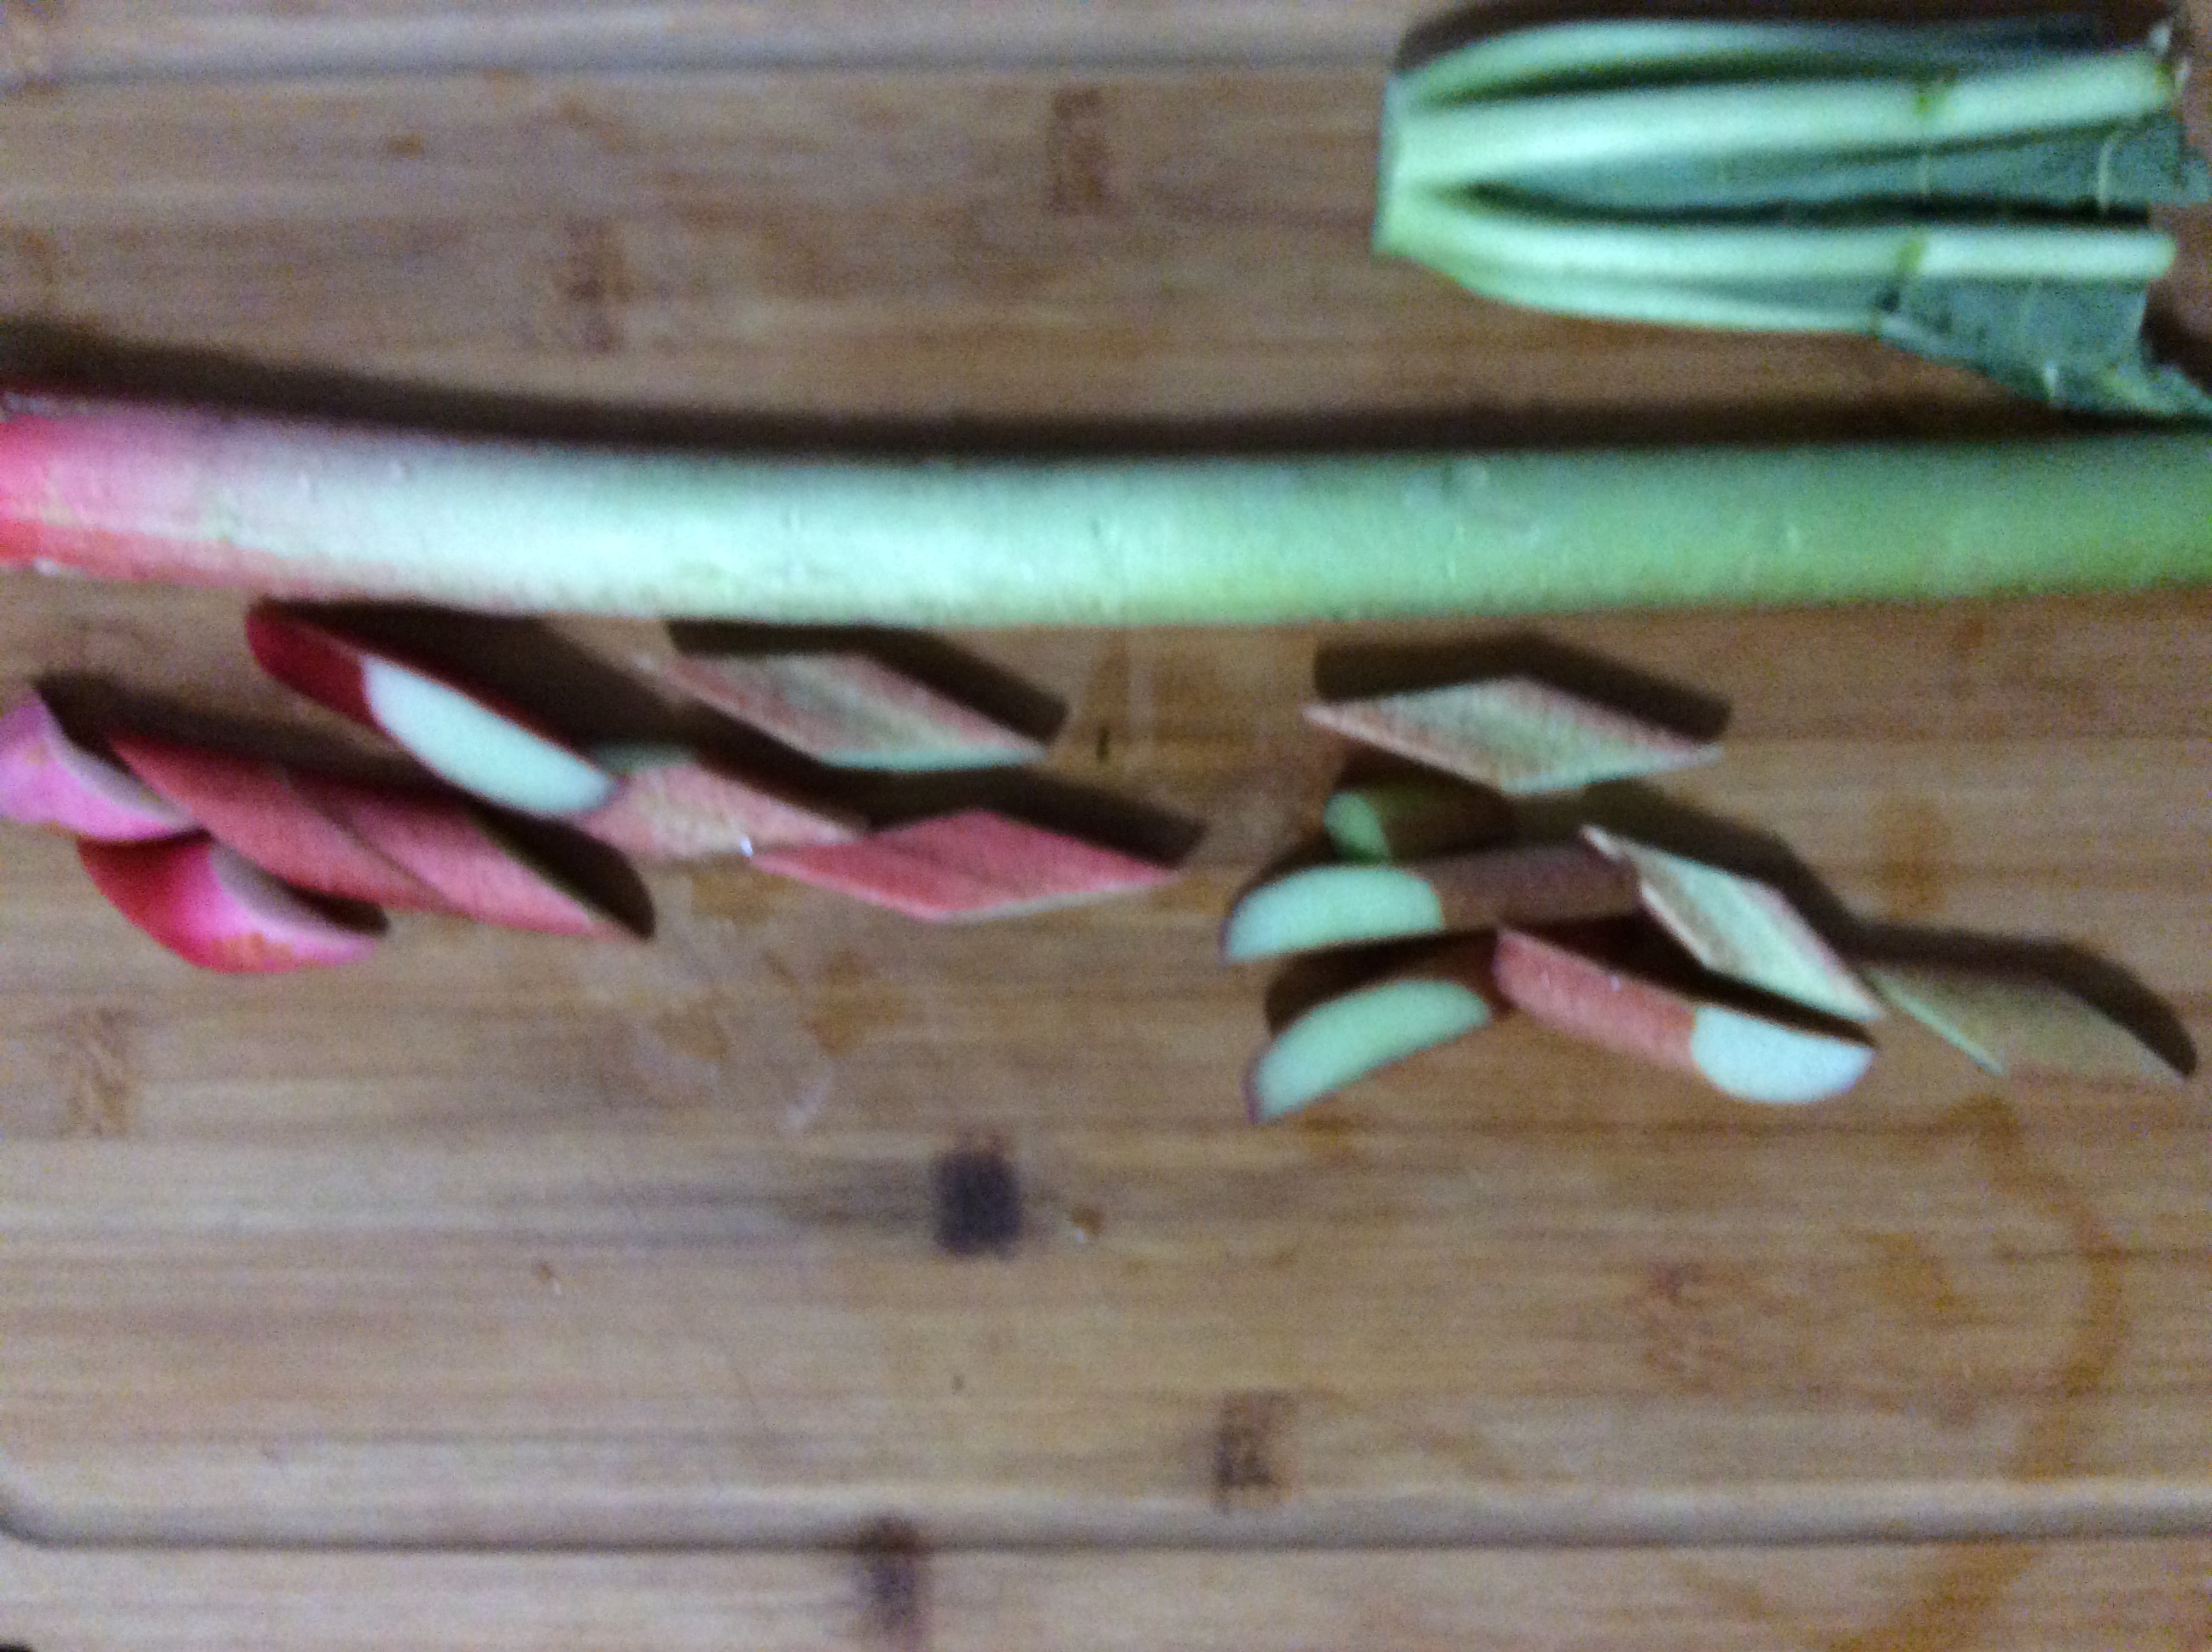
  1. Wash the rhubarb, trim off the leaves and branches, then cut it into 1″ bias slices.
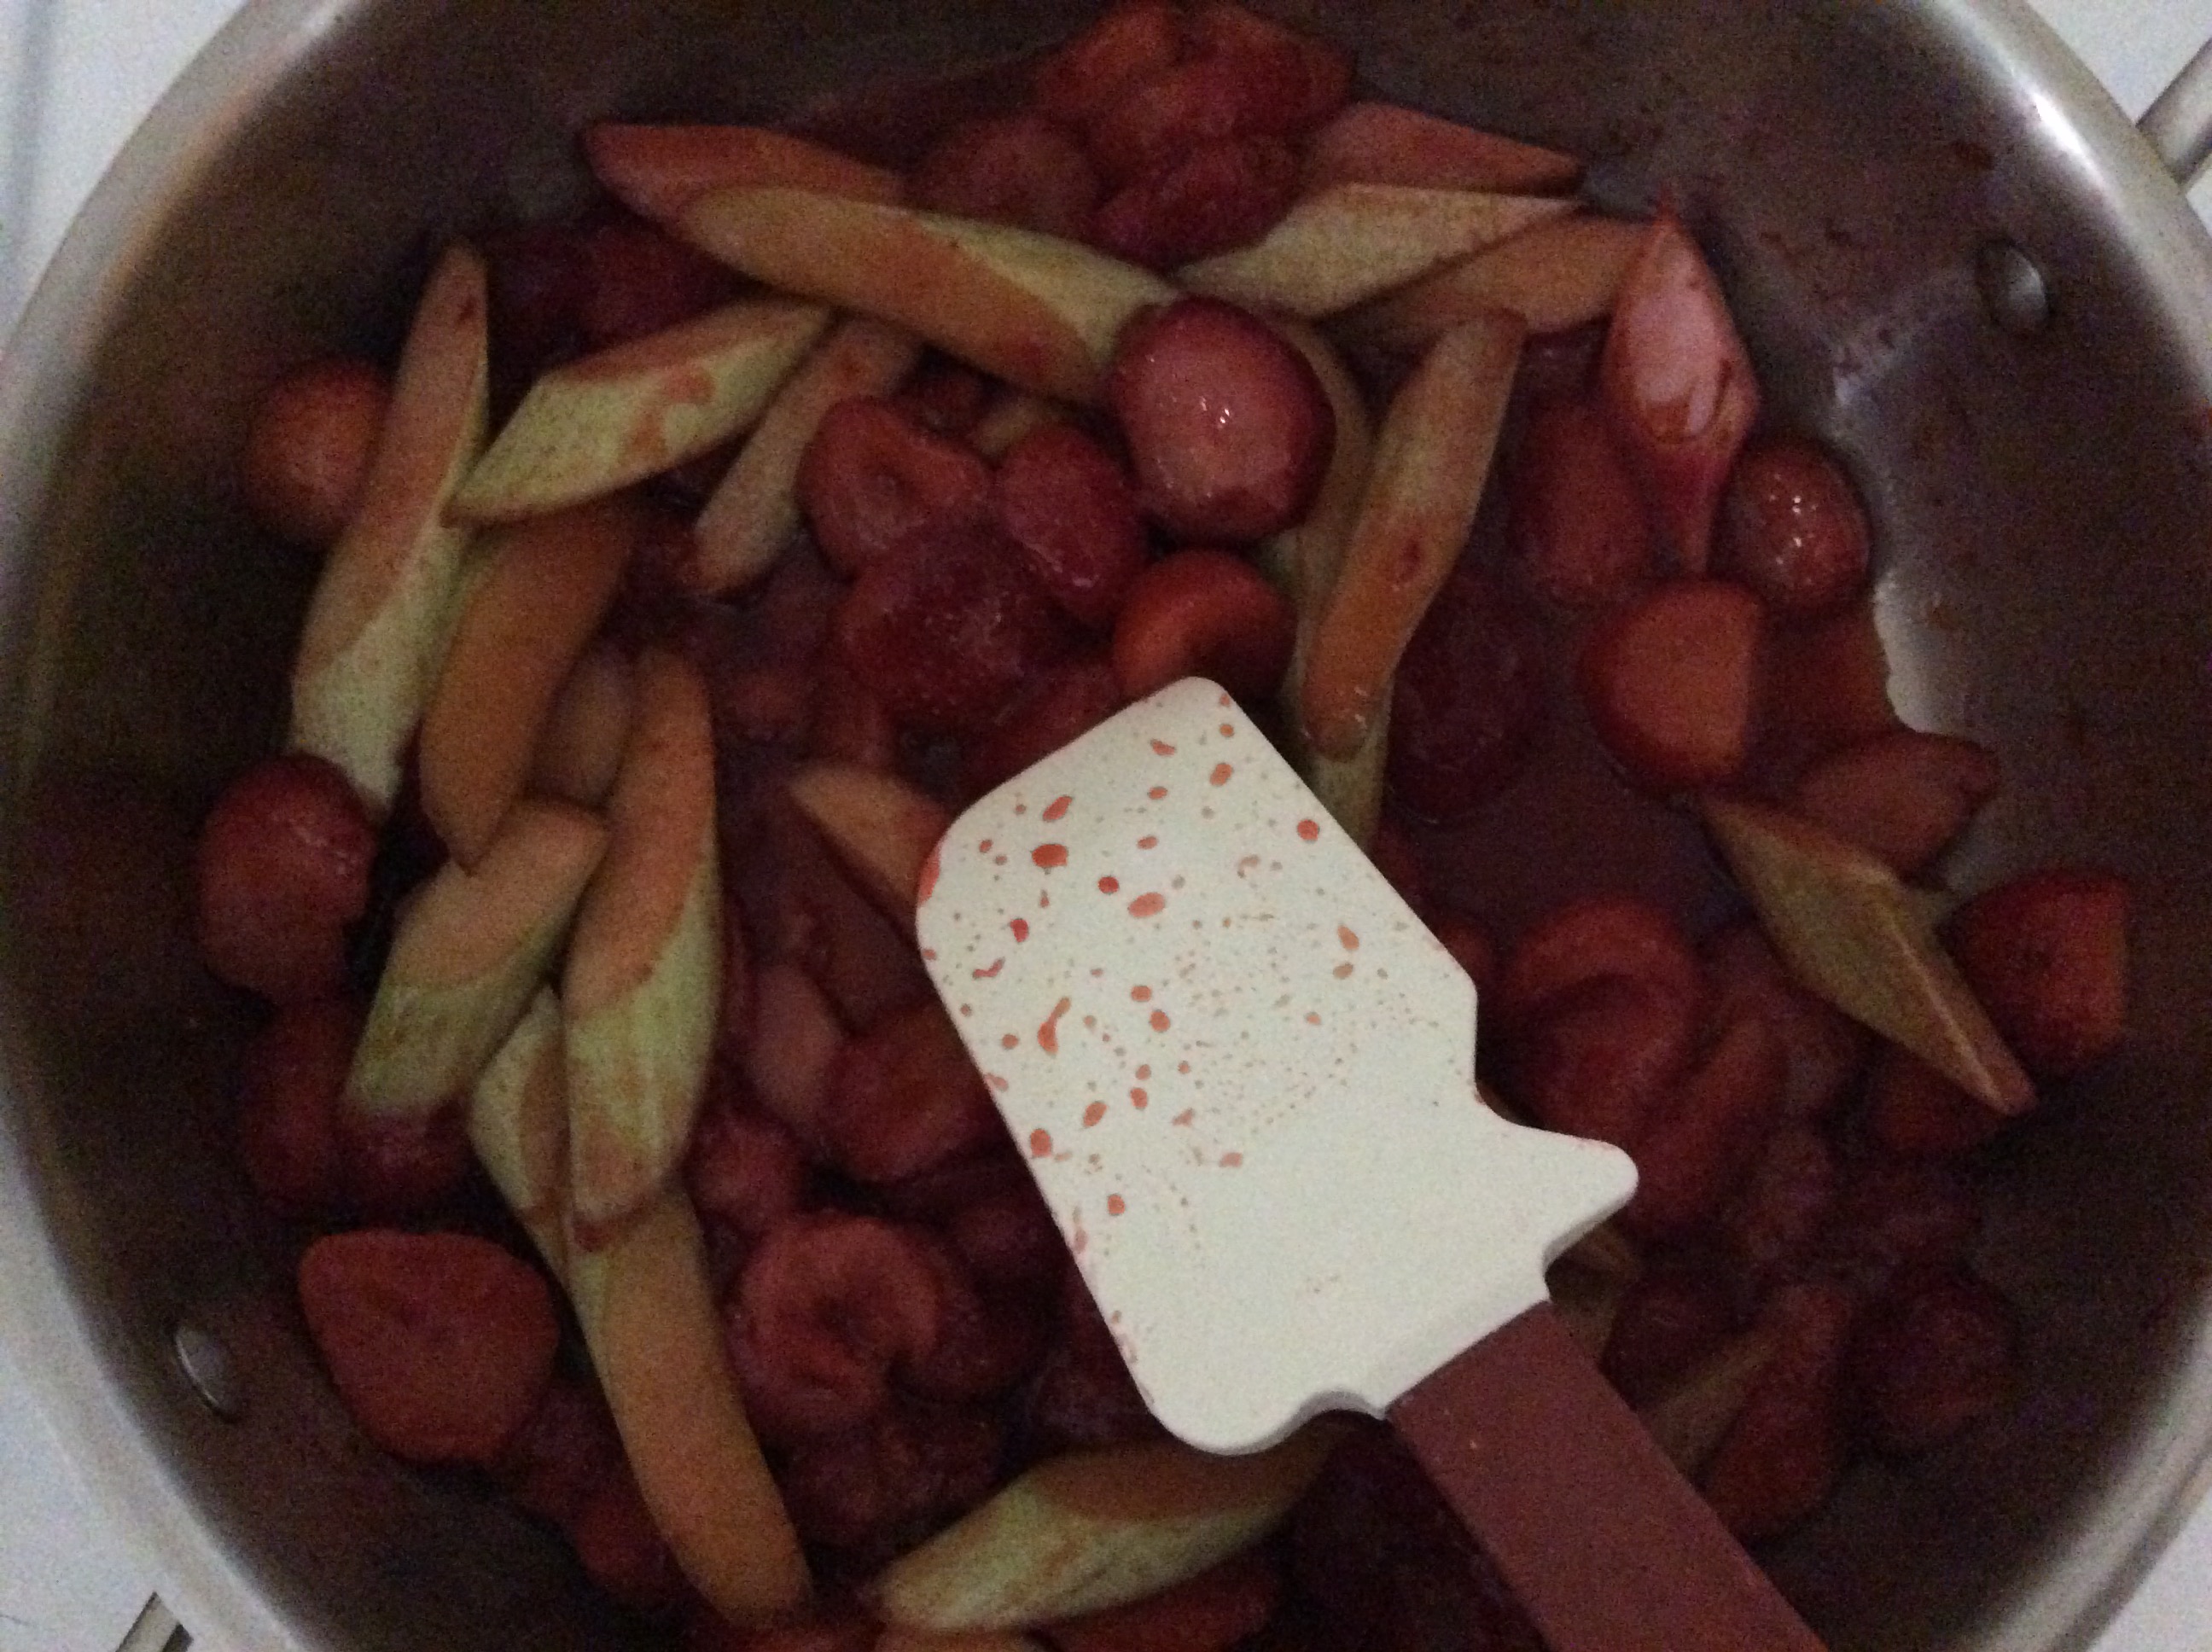
  2. Place the Strawberries and the Rhubarb into a pan on low heat. Mix it occasionally until there is enough liquid to mostly cover the rhubarb and Strawberries, then place the lid on the pan.
  3. Keep lid on pan until the rhubarb becomes becomes really soft.
  4. Remove the lid, and turn up heat to high until the mixtures comes to a rapid boil.
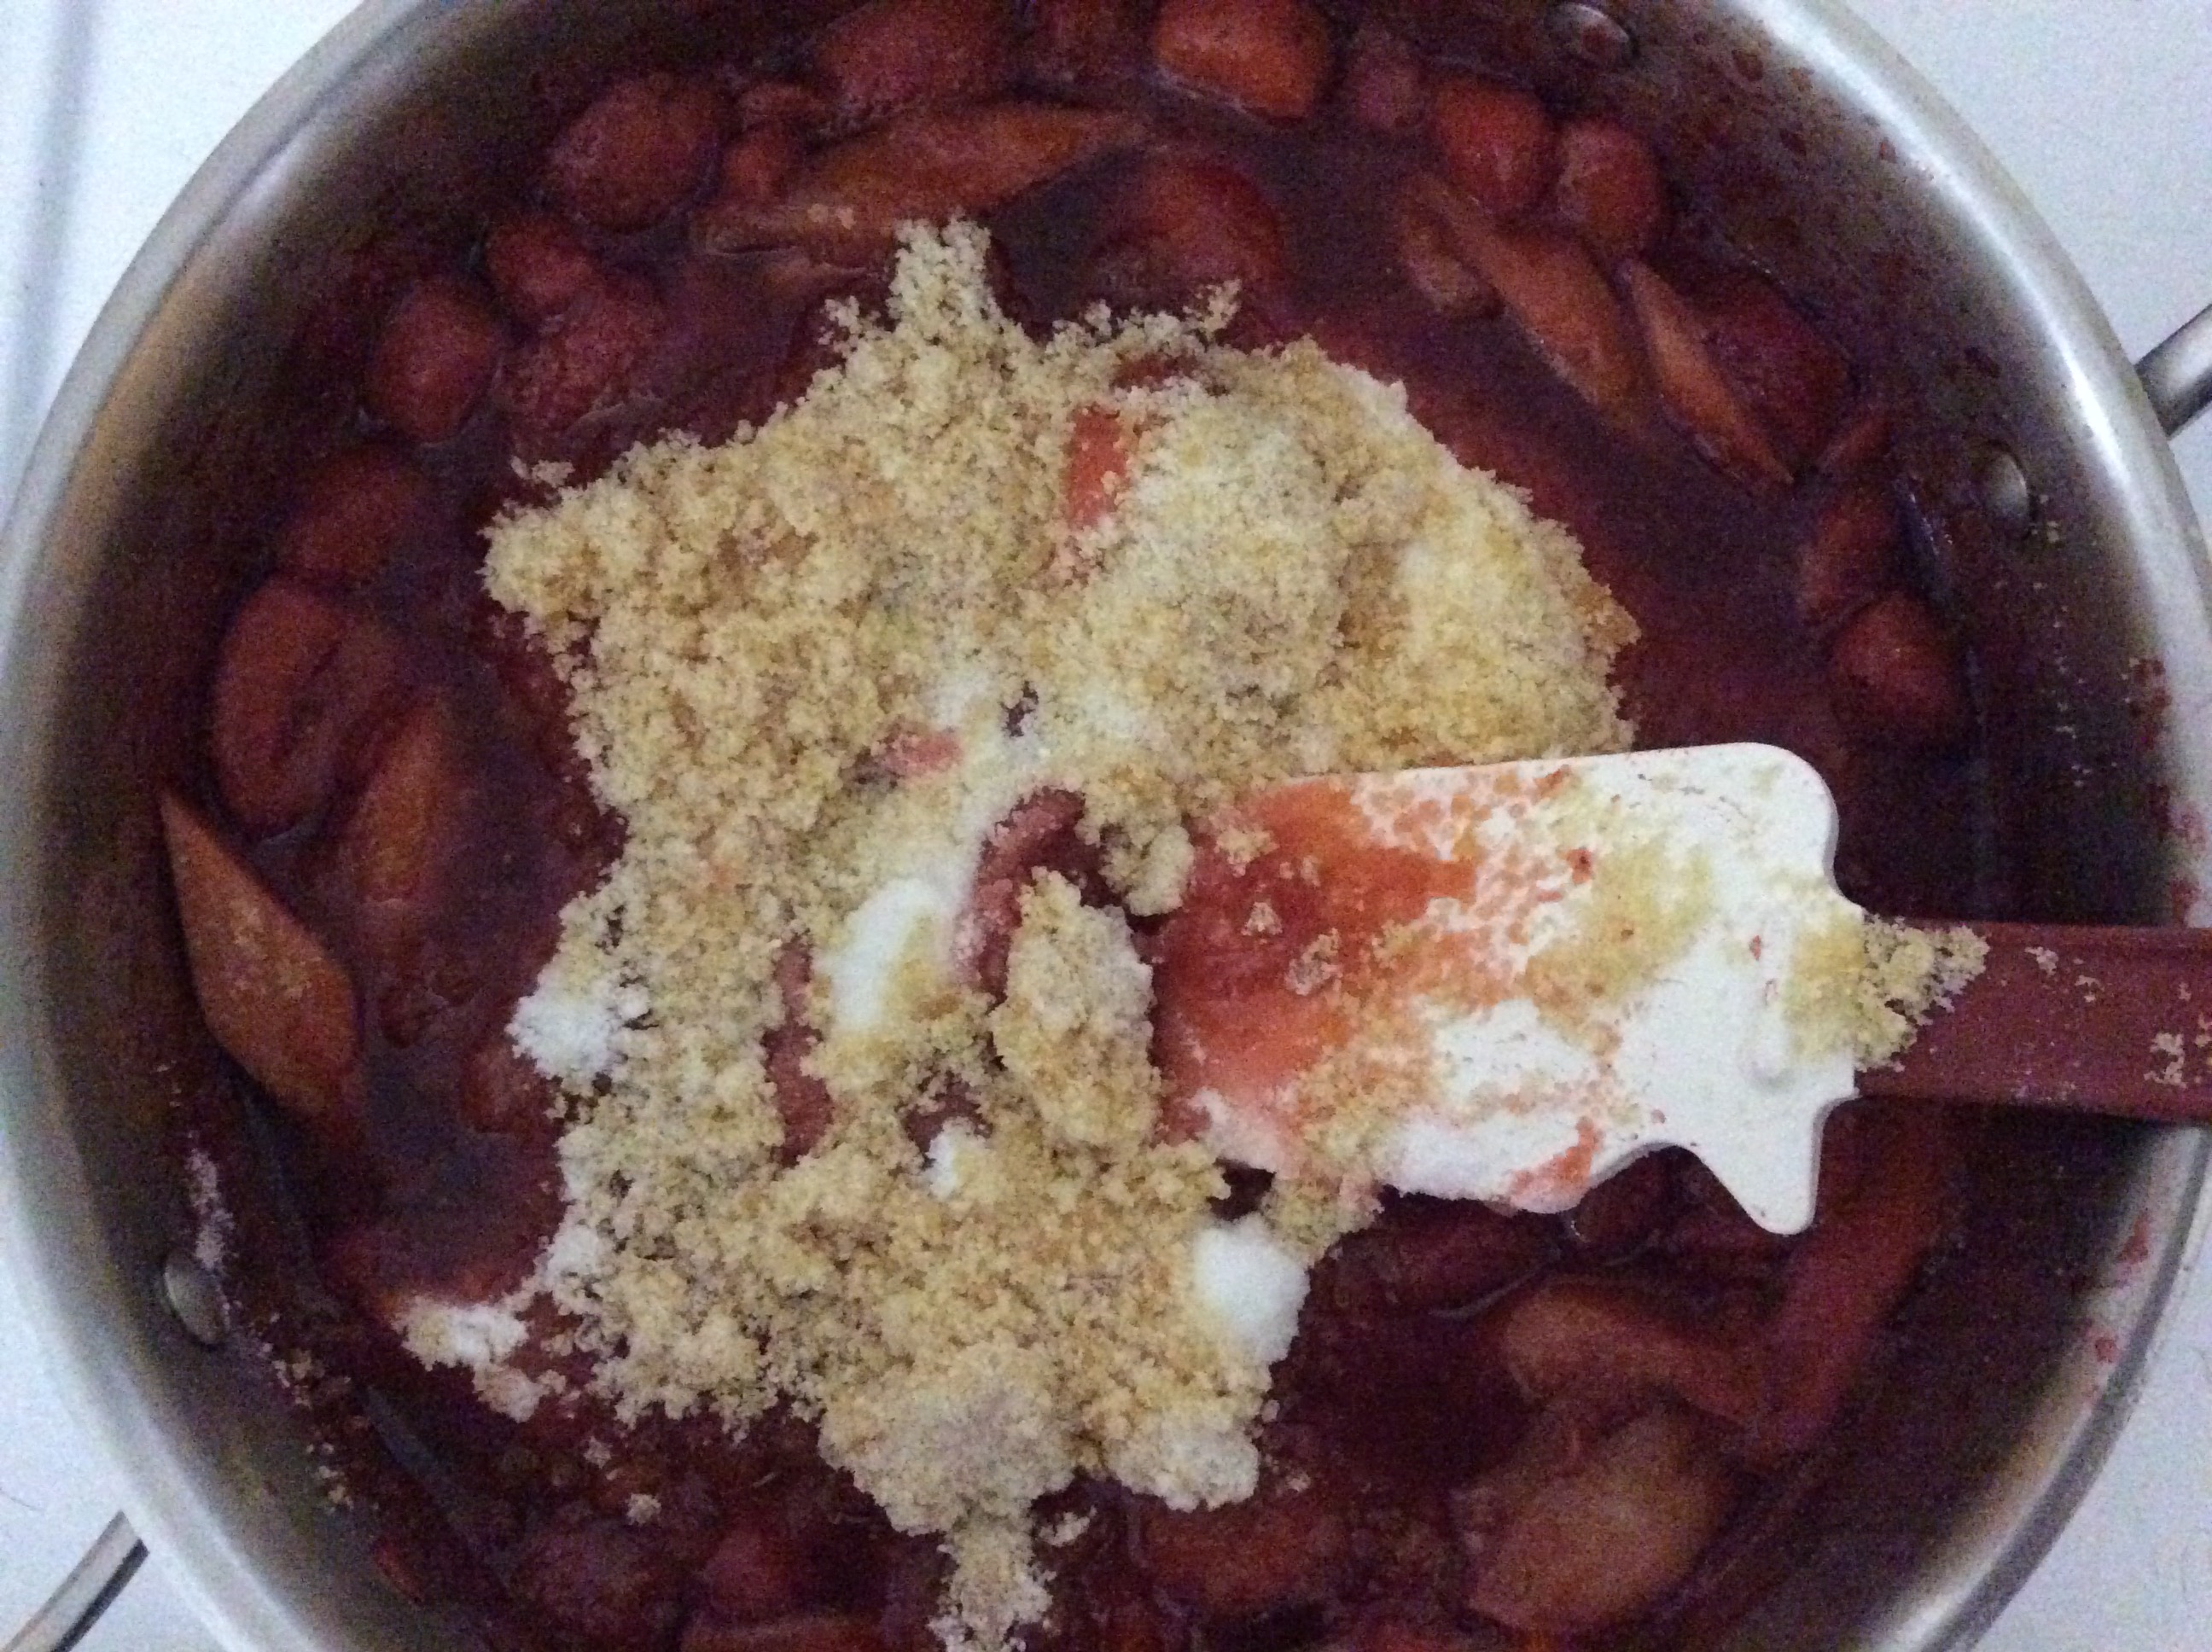
  5. Add Sugar, Browned Sugar, pectin, and Vinegar and mix until incorporated.
  6. Leave mixture on high for 5-10 minutes mixing continuously, then lower heat to medium and make sure mixture stays at a medium boil.
  7. Keep mixing so that it doesn’t burn on the bottom of the pan, and wait until the mixture get viscous. If  the boil starts to become roaring, lower the temperature.
  8. Take a spoon and use it to put a drop of the mixture into ice water. If the drop disintegrates  in the water, leave the mixture to boil longer, if it holds a ball like shape, it’s ready to remove from the heat.
  9. Let mixture cool, then transfer to storage container and put in the fridge
  10. Take a fancy photo, and post it to Instagram with the hashtag #foryourfoulmouth
Sources:
http://harvestontario.com/whatinseason
https://youtu.be/LybfPwCzs3g  
https://www.theguardian.com/science/blog/20 13/oct/03/science-magic-jam-making didn’t use any information directly from here, but it helped me make my recipe

My journey into buying a knife

Recently, I decided to buy a new chef’s knife, and it has been quite a journey. Before I get into what I bought and why, let me preface it by saying: knives’ quality are determined by feel, not back story. If you’re a cook who can do 100% of your work with a sharpened spoon, do it. Don’t let your tools define how you’re going to work or what kind of worker you’re going to be. I want to share the information I learned, because I feel it offers a bigger picture of the knife industry right now. I also want to share some mis-information people believe, that may bias your next knife purchase.

With that, I’m a big fan of Alton Brown, and Chef Ramsey. So the first two knives I looked into were Shun and Wüsthof, because they are endorsed respectibly by the two. I generally don’t put too much weight into celebrity endorsements, but Alton Brown often unofficially endorses restaurants, equipment, books and more… simply because he likes them. As far as I know, the only paid endorsement he does is from Shun because he is such a big fan of the brand. Contrary to that, Gordon Ramsey puts his name on a lot of brands, when I looked into what he had to say about Wüsthof, I felt his claims sounded pretty accurate.

So basically, after I looked up reviews, watched some YouTube videos of the two endorsements, read third party reviews, and asked sales clerks about them… it became pretty apparent that I had stepped into a war zone.

By trying to compare those two brands, I was essentially asking the difference between Western and Asian knives. A topic people are extremely passionate about.

Here are the Coles Notes of the supposed benefits I was told:

Asian(usually Japanese made) knives:

Use harder layered steel, which can have a sharper edge, but need a lot more maintenance to prevent dulling and rusting.
Tend to have wooden handles that will crack with too much moisture exposure.
They use different shapes than western knives. A Santoku and a Nakiri replace the standard Chef’s knife, the petty knife replaces a paring knife, and there are about 5-6 specialty knives that don’t have a western equivalent, usually for very specific jobs. (E.g. a Deba knife is for filleting fish).
Their hard steel makes the blades much thinner, which means your food is going to cut smoother, and give you less resistance. It also makes the blade more brittle, so they are more likely to chip or break if they are dropped.
There is also a sense of superiority when it comes to these Asian knives. A lot of people like Asian knives because they feel they are manufactured with higher standards than any Western knife, and their variety of shapes let you have a better tool for each job
Western (usually german) made knives:

Use a softer stainless steel, that doesn’t need to be sharpened as often.
These knives can only hold a more shallow angle.
Usually have a plastic composite handle that is more resistant to moisture.
You need less knives to do the same jobs. Generally, an 8″ Chef’s knife and paring knife will get you through the day, which means less running to your knife bag to switch knives between jobs.
Their soft metal means the knives are a little thicker, which makes them good for dense food like squash. They can take more abuse, and any damage they do take, can more likely be fixed, and is less extreme.
The feeling around Western knives is a sense of tradition, and pride in doing things the way they have been done for a long time.

And all of the above can be completely true… except for when it’s utterly wrong!

Here is my opinion on the matter. We live in a world where it’s easy for a company to affordably make a very diverse array of products. I did a lot of research and found the following:

  1. The same fondness Westerners have for Japanese knife makers now, the Japanese had for Western knife makers in the 20’s. Santoku and Nakiri where designed to be used by home cooks at the time. They were a mix of the vegetable knives, and Western Chef’s knives. The idea was to be able to have the allure of the Western knives, with the familiarity of their household vegetable knives. The reason they are pushed so heavily here to professional cooks is because they know the more ‘Japanese’ it looks, the better it will sell… which is ironic considering it was made to look more Western.
  2. Professional Japanese cooks usually use Gyutou, not Santoku or Nakiri. Which are basically Western Chef’s knives, made with the Japanese materials and techniques. The exception being, of course, is if they need a specialty knife for a particular job.
  3. Most Western knife makers have a line of Asian knives, made with the same standard you can find from Asian companies. That also includes Gyutous

So here is the point I want to make: you can get a great knife of any shape made by Eastern or Western companies. That’s because companies are going to make what they feel there is a demand for. They are also going to try and overcome any short coming of their products.

The Wüsthof and the Shun both have amazing products, with benefits you wouldn’t normally associate with knives from their respective country.

So which one did I get? Neither! In the end, once I had both in my hand, neither excited me. The Wüsthof had an amazing feeling handle, where as the Shun had hammer marks in the blade, which is great for stopping food from sticking to your knife. But no store I went to actually let me try the those knives. Since this is something I’d use daily and can’t return, I’m not buying without trying. So I went to Knifewear. It’s a small Canadian owned shop. They actually let me try out some knives, and they keep vegetables on hand for people to do so. For the most part, they carry handmade knives from Japanese knife makers. So the two I went in looking for (the Wüsthof and the Shun) weren’t available to try.

I found a knife that I fell in love with.  I have used Santokus and Nakiris before, and have definitely used a French style Chef’s knife before. For me, the shape of the latter is better suited. Which is why I went with a Gyutou made by Fujiwara Nashiji. It had a wooden handle, and the cutting edge is carbon Steel, which both require a little more TLC. However, it cuts beautifully! I didn’t have to learn a new cutting technique to compensate for a blade shape not suited for professional use, and the results are beautiful.

So, what did I learn from my journey,

When it comes to buying a knife, use the product that makes you happy. The rest is just fluff.

Sources:
http://www.cheftalk.com/t/56934/some-basics-on-japanese-knife-history-long
https://en.wikipedia.org/wiki/Japanese_cutlery#Design_and_Use

Less Is More… More Or Less: My Opinion On “Gourmet” Cooking

Gourmet used to mean something was made with care, and with the highest standards. Something weird has happened; it’s changed over the last little while. It now means mediocre food with boat loads of lifeless processed toppings and ingredients. So while having a paragraph of 20 items listed under a menu item might feel like you’re getting a bang for your buck, I ask an important question: Since when did more start meaning better?

No one would say “more aids, that’s better!” or even something that is generally considered good in a culinary sense, like salt. We never associate ‘an abundance of salt’ with being positive!

So while I couldn’t care less if food is “gourmet,”  I do care that it’s flavourful and delicious. I believe something as simple as a salad can become amazing with only a handful of ingredients, properly prepared and picked for the flavour, texture and general contribution to the overall dish. It’s more “haute-cuisine” than anything you’d see in a “gourmet” eatery.

While the mise en place for this may look a little long for a salad, there are only 5 components.

Greens, garlic parm sourdough croutons, marinated Heirloom tomatoes, red onions and white balsamic vinaigrette.

Imagine seeing that on a menu. Doesn’t it just give you the imagery of crunchy croutons and spinach that just compliments the softness of other ingredients? The sweetness, bitterness, and tanginess from the onions, mixed greens, and vinaigrette mixing with the explosion of flavour that skinless marinated tomatoes will give you?

Give it a try! Mother’s Day is soon, and I’m sure your mom will love this. I know mine will!  Let me know what both of you think!

Peeled Marinated Heirloom Tomatoes

  • 1 Pint Cherry Heirloom Tomatos
  • 7 Grams Fresh Basil
  • 1 Lemon
  • 1 teaspoon Salt
  • 1/2 teaspoon Pepper
  • 5 teaspoon of diced sweet onions
  • 1 Cup Extra Virgin Olive Oil

White Balsamic Vinaigrette:

    Grainy Dijon mustard

  • 1 Large Sweet Onion
  • 3 cloves garlic whole, skin removed.
  • 1 Tablespoon Grainy Mustard
  • 3/4 Cup Strained Marinade from Tomatoes
  • 3/4 Cup Canola
  • 2 Basil Leafs
  • 1/2 Cup White Balsamic Vinegar

Sour Dough Croutons:

  • Slice of Sough dough Bread (Mine was 116g)
  • 2 Tablespoons Canola Oil
  • 11g Parmesan (freshly grated, the stuff in the bottle will not work)
  • Salt and Pepper to taste

Final Ingrdients:

  • Spinach to taste
  • Arugula to taste
  • Red onion 3/8″ x 1/2″ to taste

The Marinated Tomatoes are the star of the show here, and being the diva ingredient they are, they need the most alone time, so let’s start with these:

  1. Wash the heirloom Tomatoes. These things spend most of their life on a truck, in open containers. Would you want to lick someone who spent that much time in the back of a truck? Exactly, wash them!
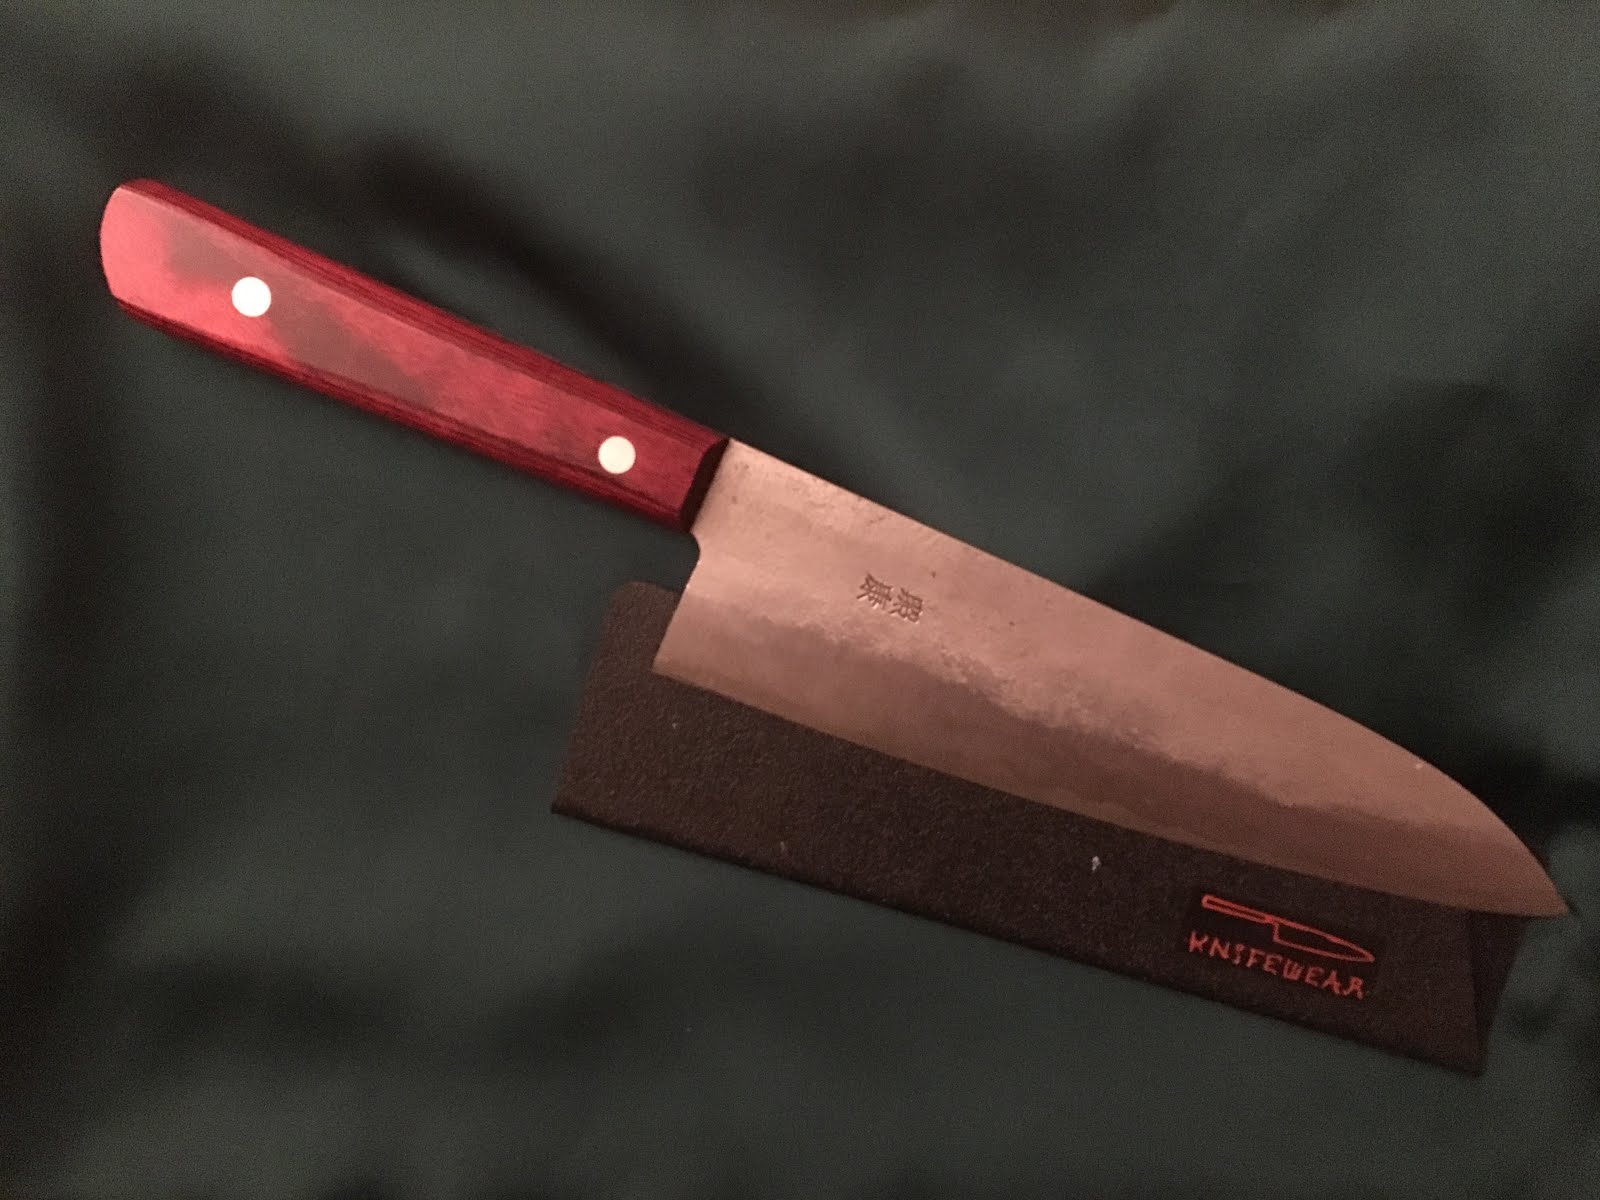
  2. Cut little crosses on the bottom of each Tomato. Do your best to cut the skin, and not into the flesh of your tomato. A Pearing knife, or small serrated knife will work well.
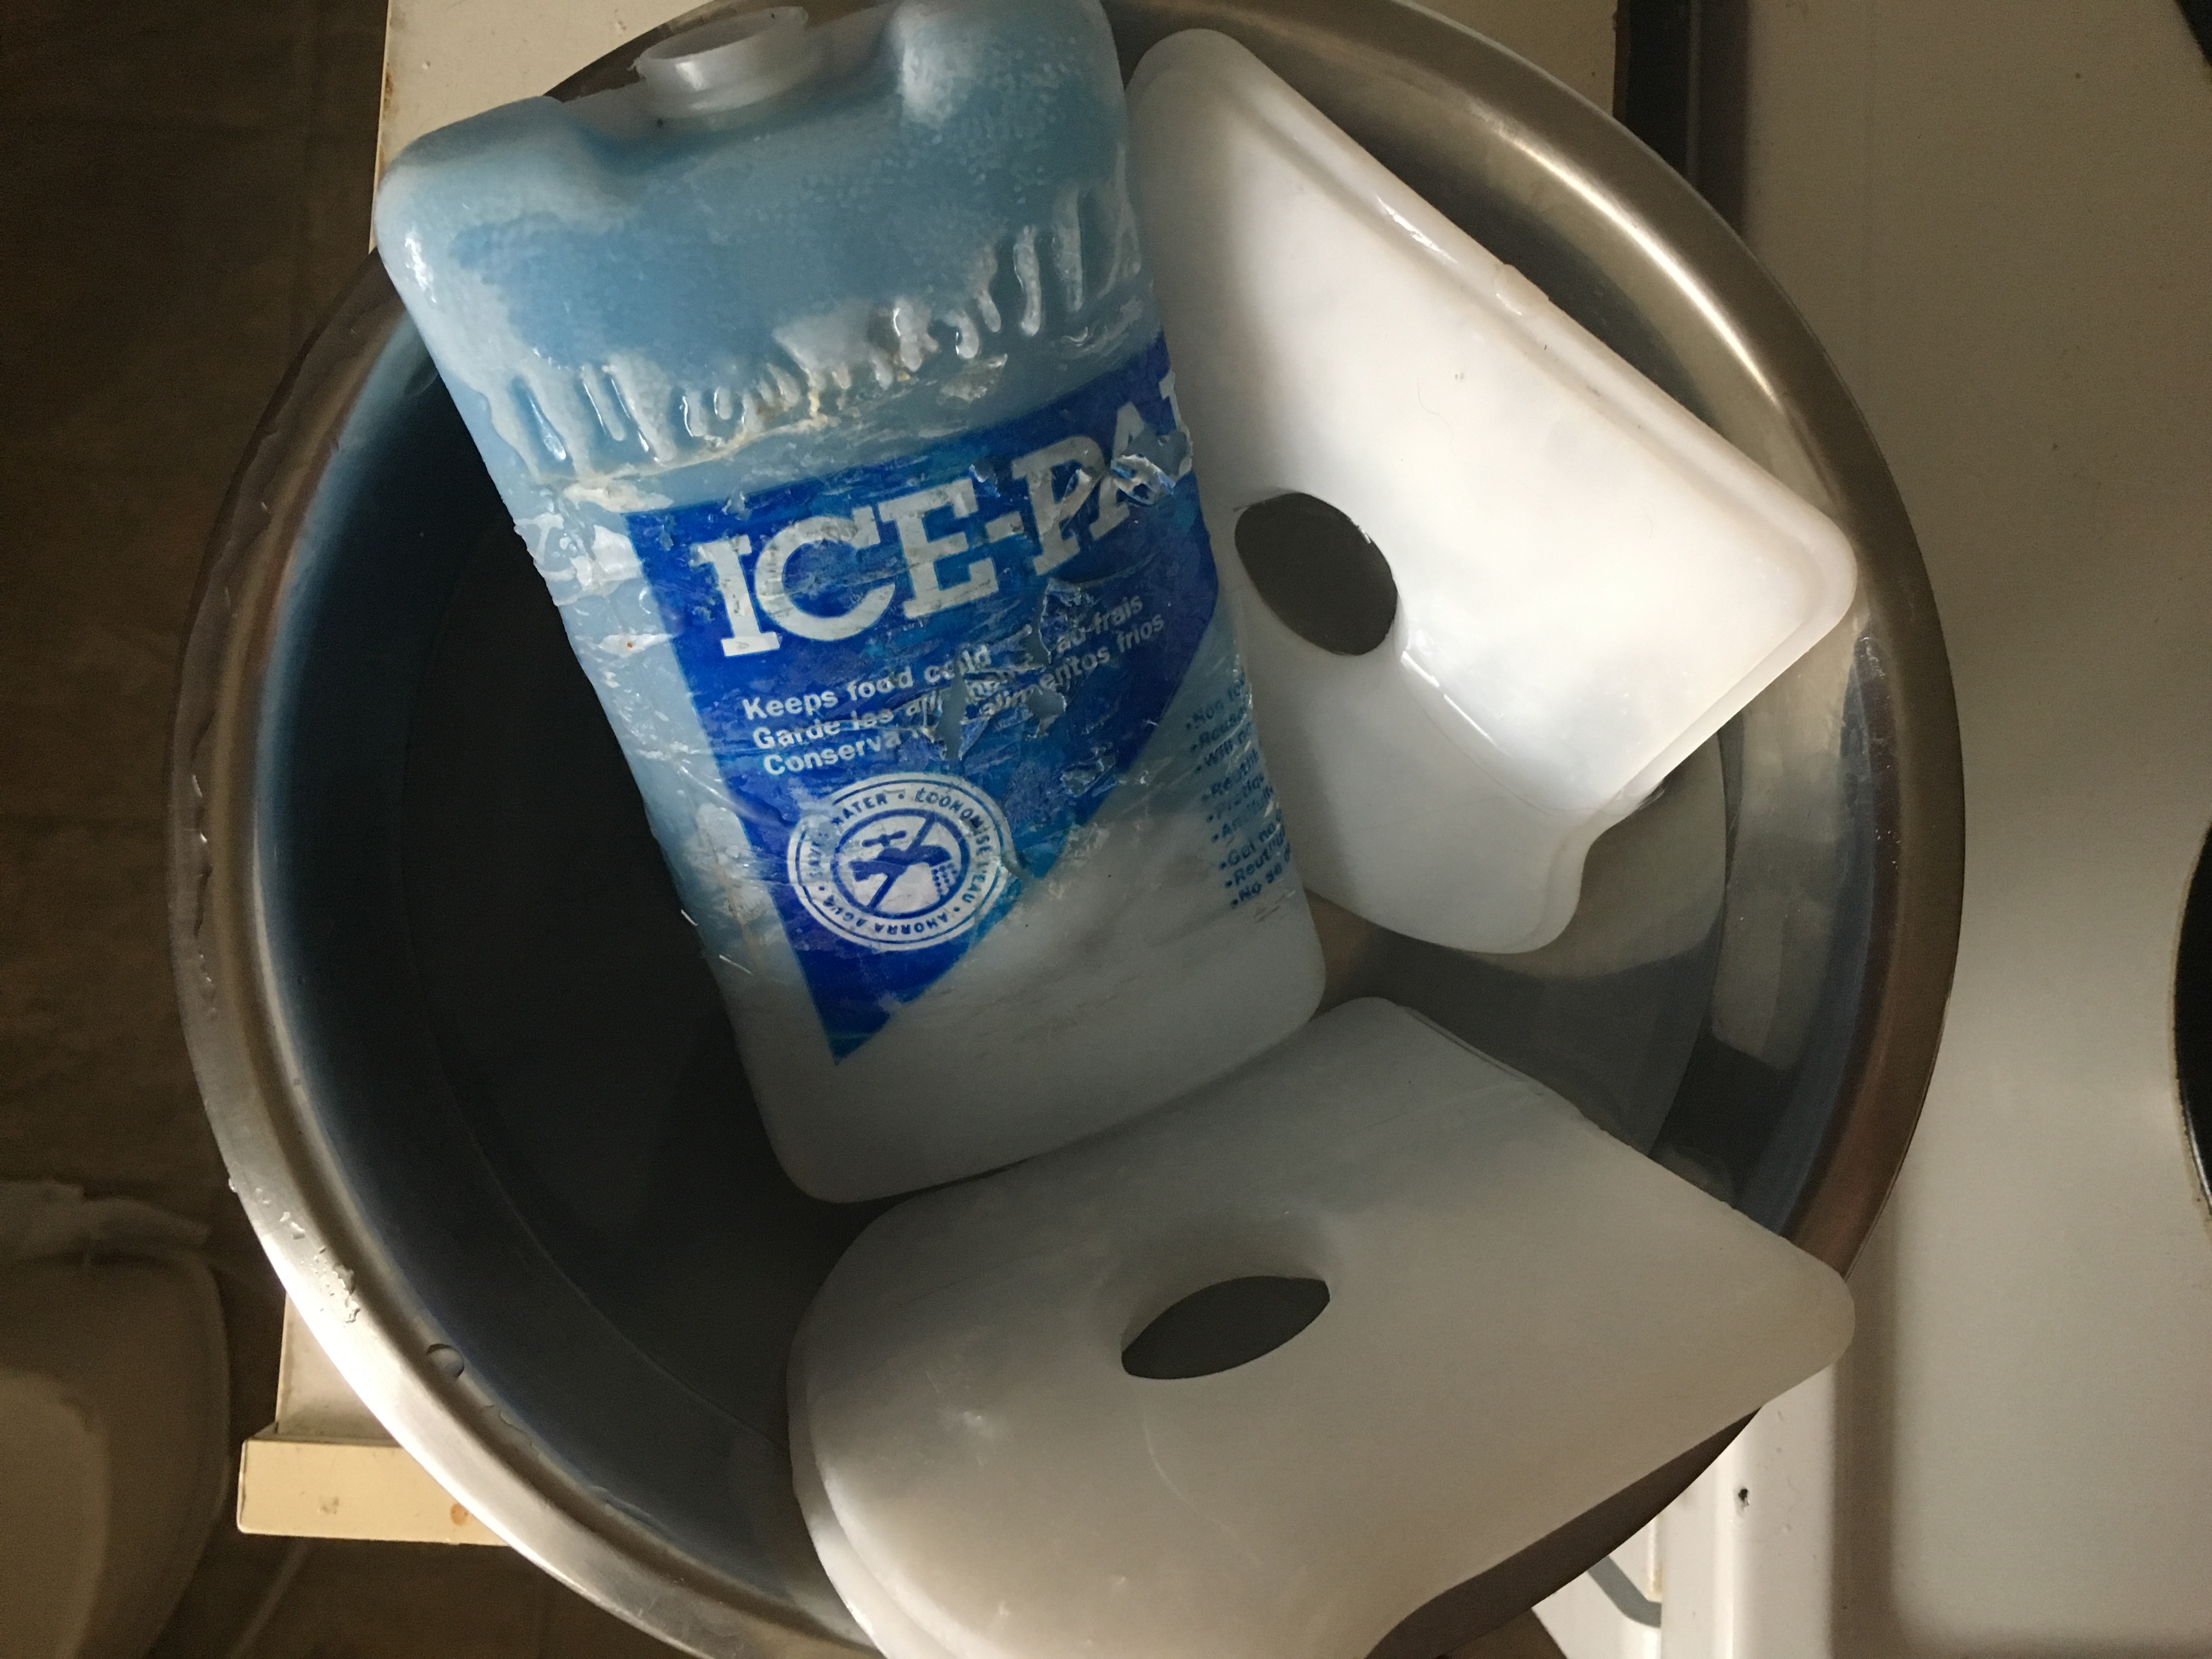
  3. Fill up a big bowl with ice water. I didn’t have ice, so I used ice packs, which worked well.
  4. Bring a big pot o’water to a boil, then put your Tomatoes in the pot.
  5. Using a slotted spoon, move the Tomatoes around until you see the skin near the ‘cross cuts’ starting to peel away. Quickly take the Tomatoes out of the boiling water, and place them into the ice water. The whole process should take about 30 seconds from when you put them in, to when you remove them. We don’t want these Tomatoes to cook, we just want the skin to loosen. The ice water stops the cooking, and shocks the skin.
  6. After a few minutes of the Tomatoes cooling down, gently peel the skins from each Tomatoe. Discard the skin, and place the ‘naked’ Tomatoes aside.
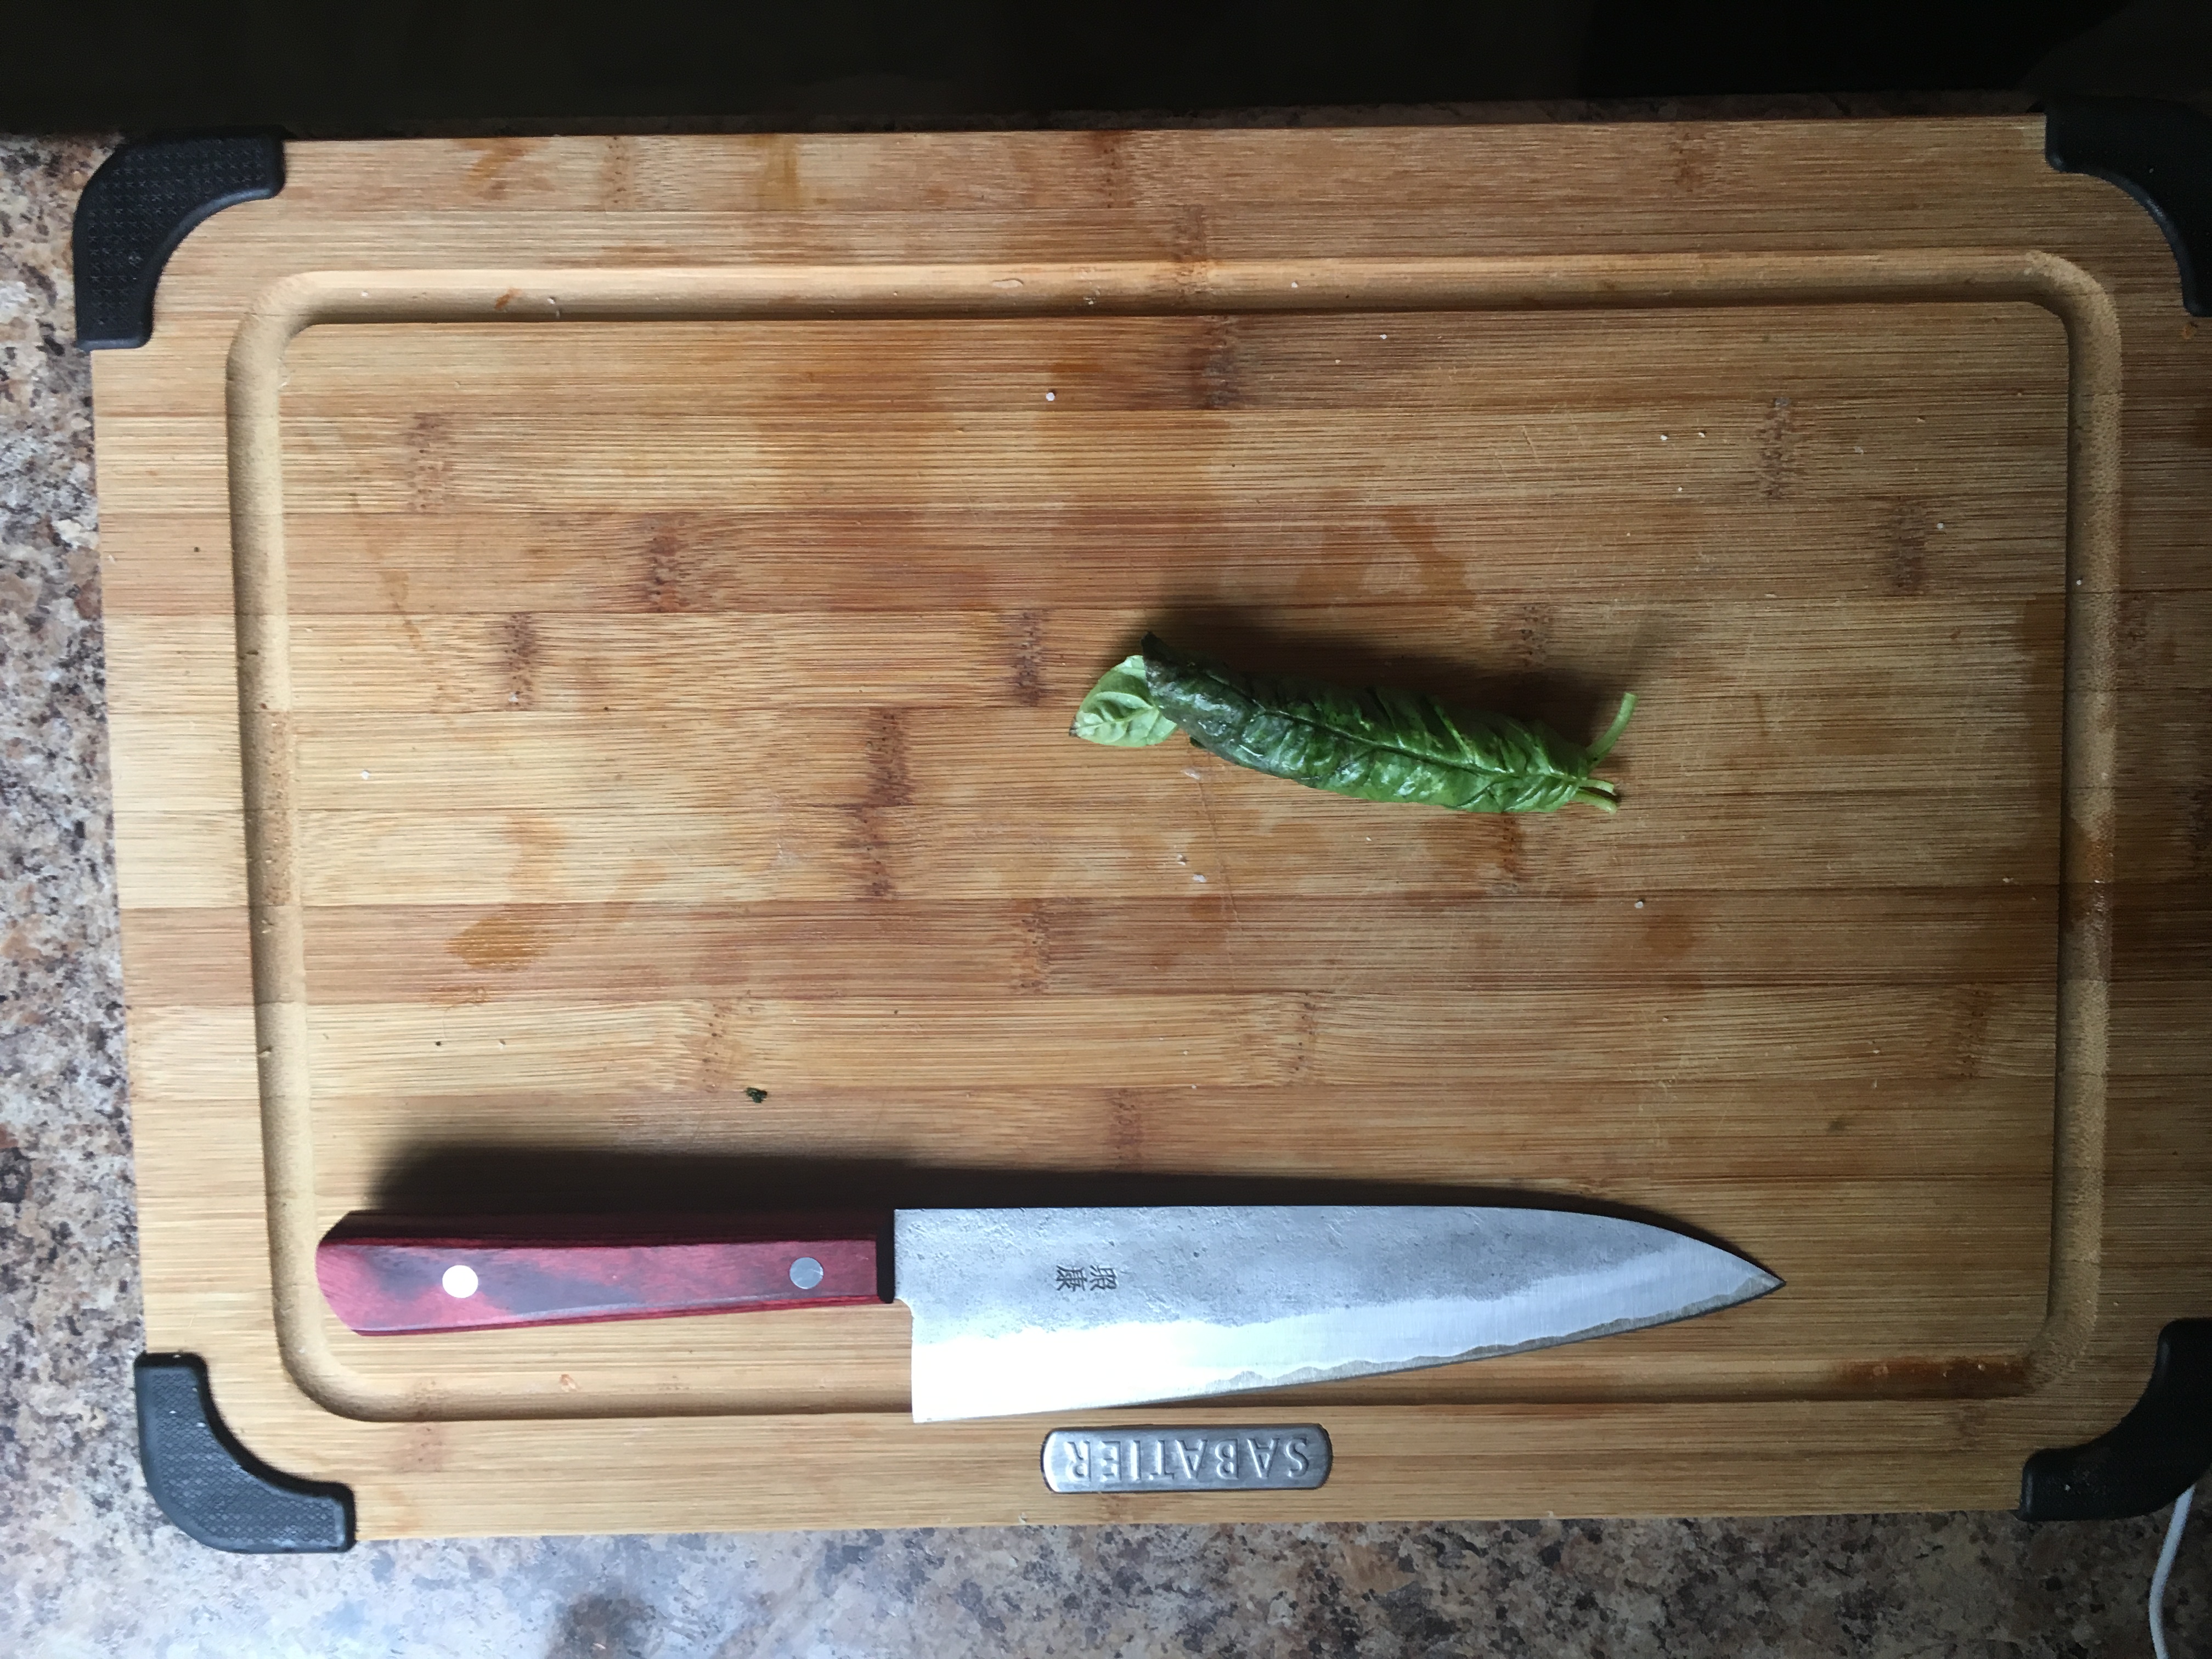
  7. Roll all the Basil together, then cut them as thinly as possible. You should end up with little strips of basil. Place basil into a mixing bowl big enough to hold the Tomatoes.
  8. Juice the lemon, and Zest half of it. Place both of these items into the same bowl as the Basil.
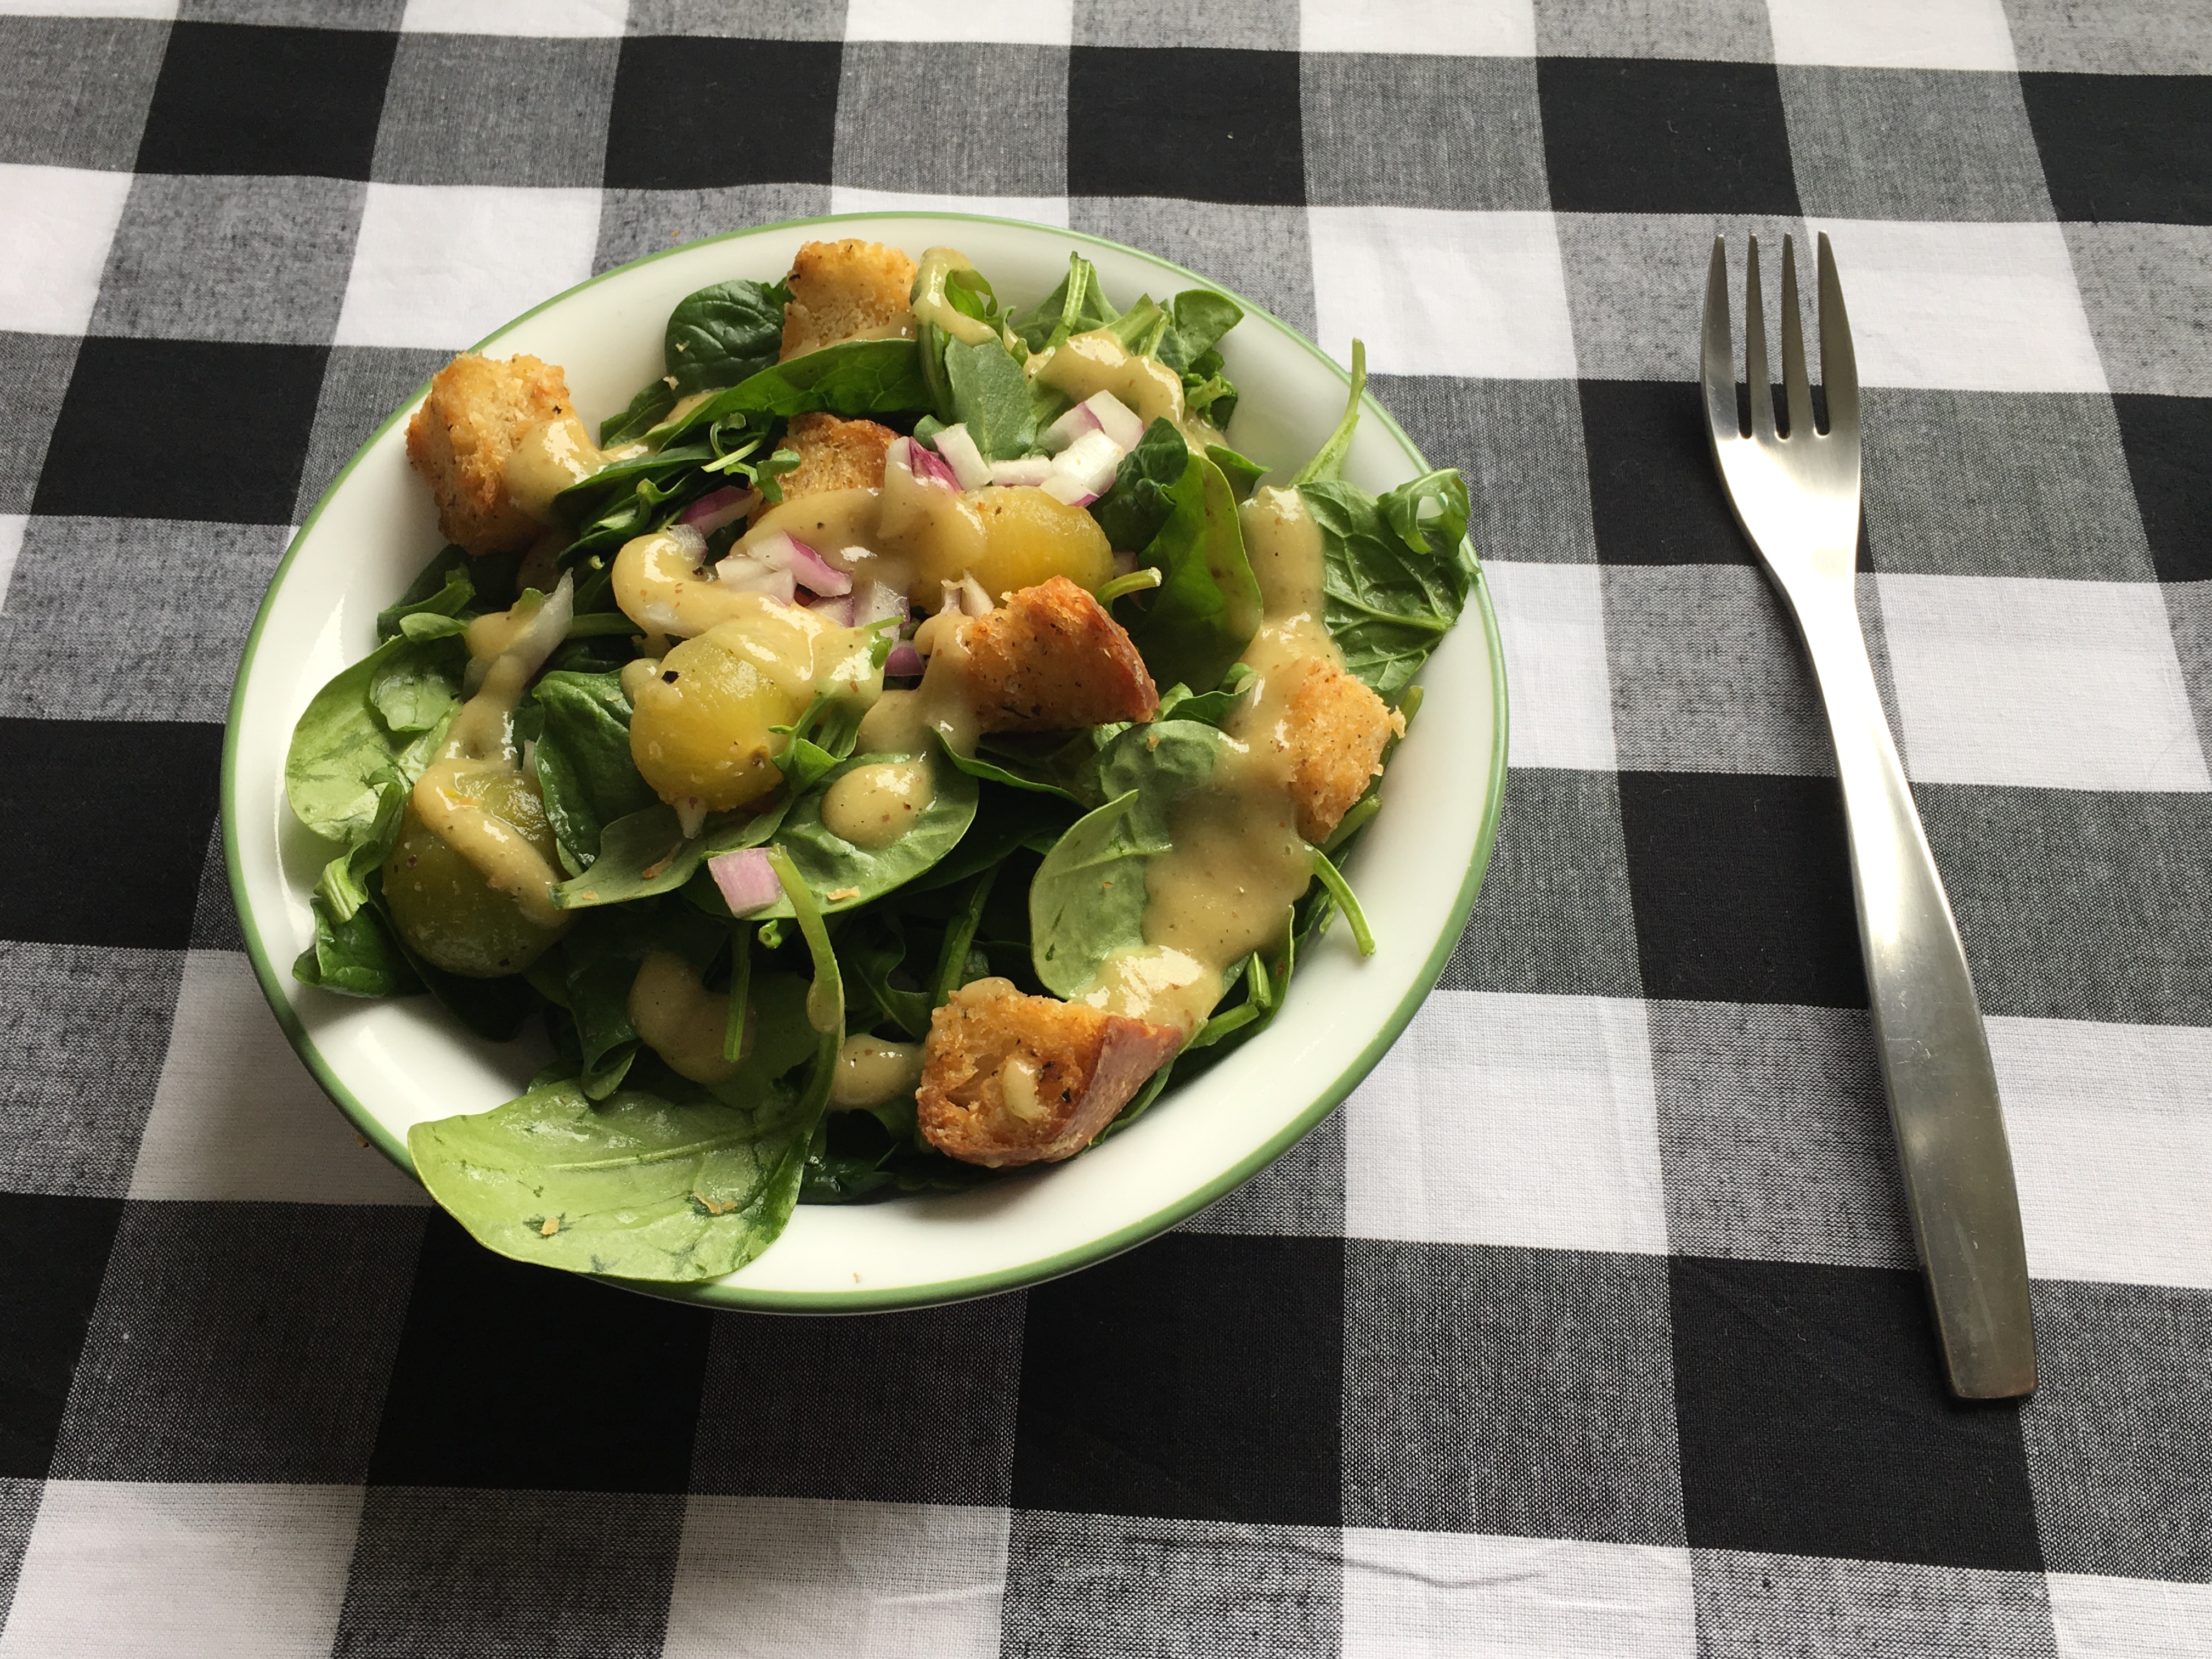
  9. Into the same bowl as the Lemon and the Basil, whisk together the Olive Oil, Salt, pepper, and diced Onions.
  10. Place the Naked Tomatoes into the mixing bowl, and gently mix until they are covered. Place in fridge for a minimum of 2 hours, but no longer than 12 hours.
  11. Remove the Naked Tomatoes from the marinade, and place covered in a clean bowl or Tupperware. Let them sit in the fridge over night. The excess oil will drop off, so you’re left with an end product that isn’t too greasy, and is just perfect. Meanwhile, save the marinade for your White Balsamic Vinaigrette.

Next, let’s work on the Sour Dough Croutons:

  1. Pre-heat your convection oven to 400 degrees Fahrenheit, or your non-convection oven to 425 degrees Fahrenheit.
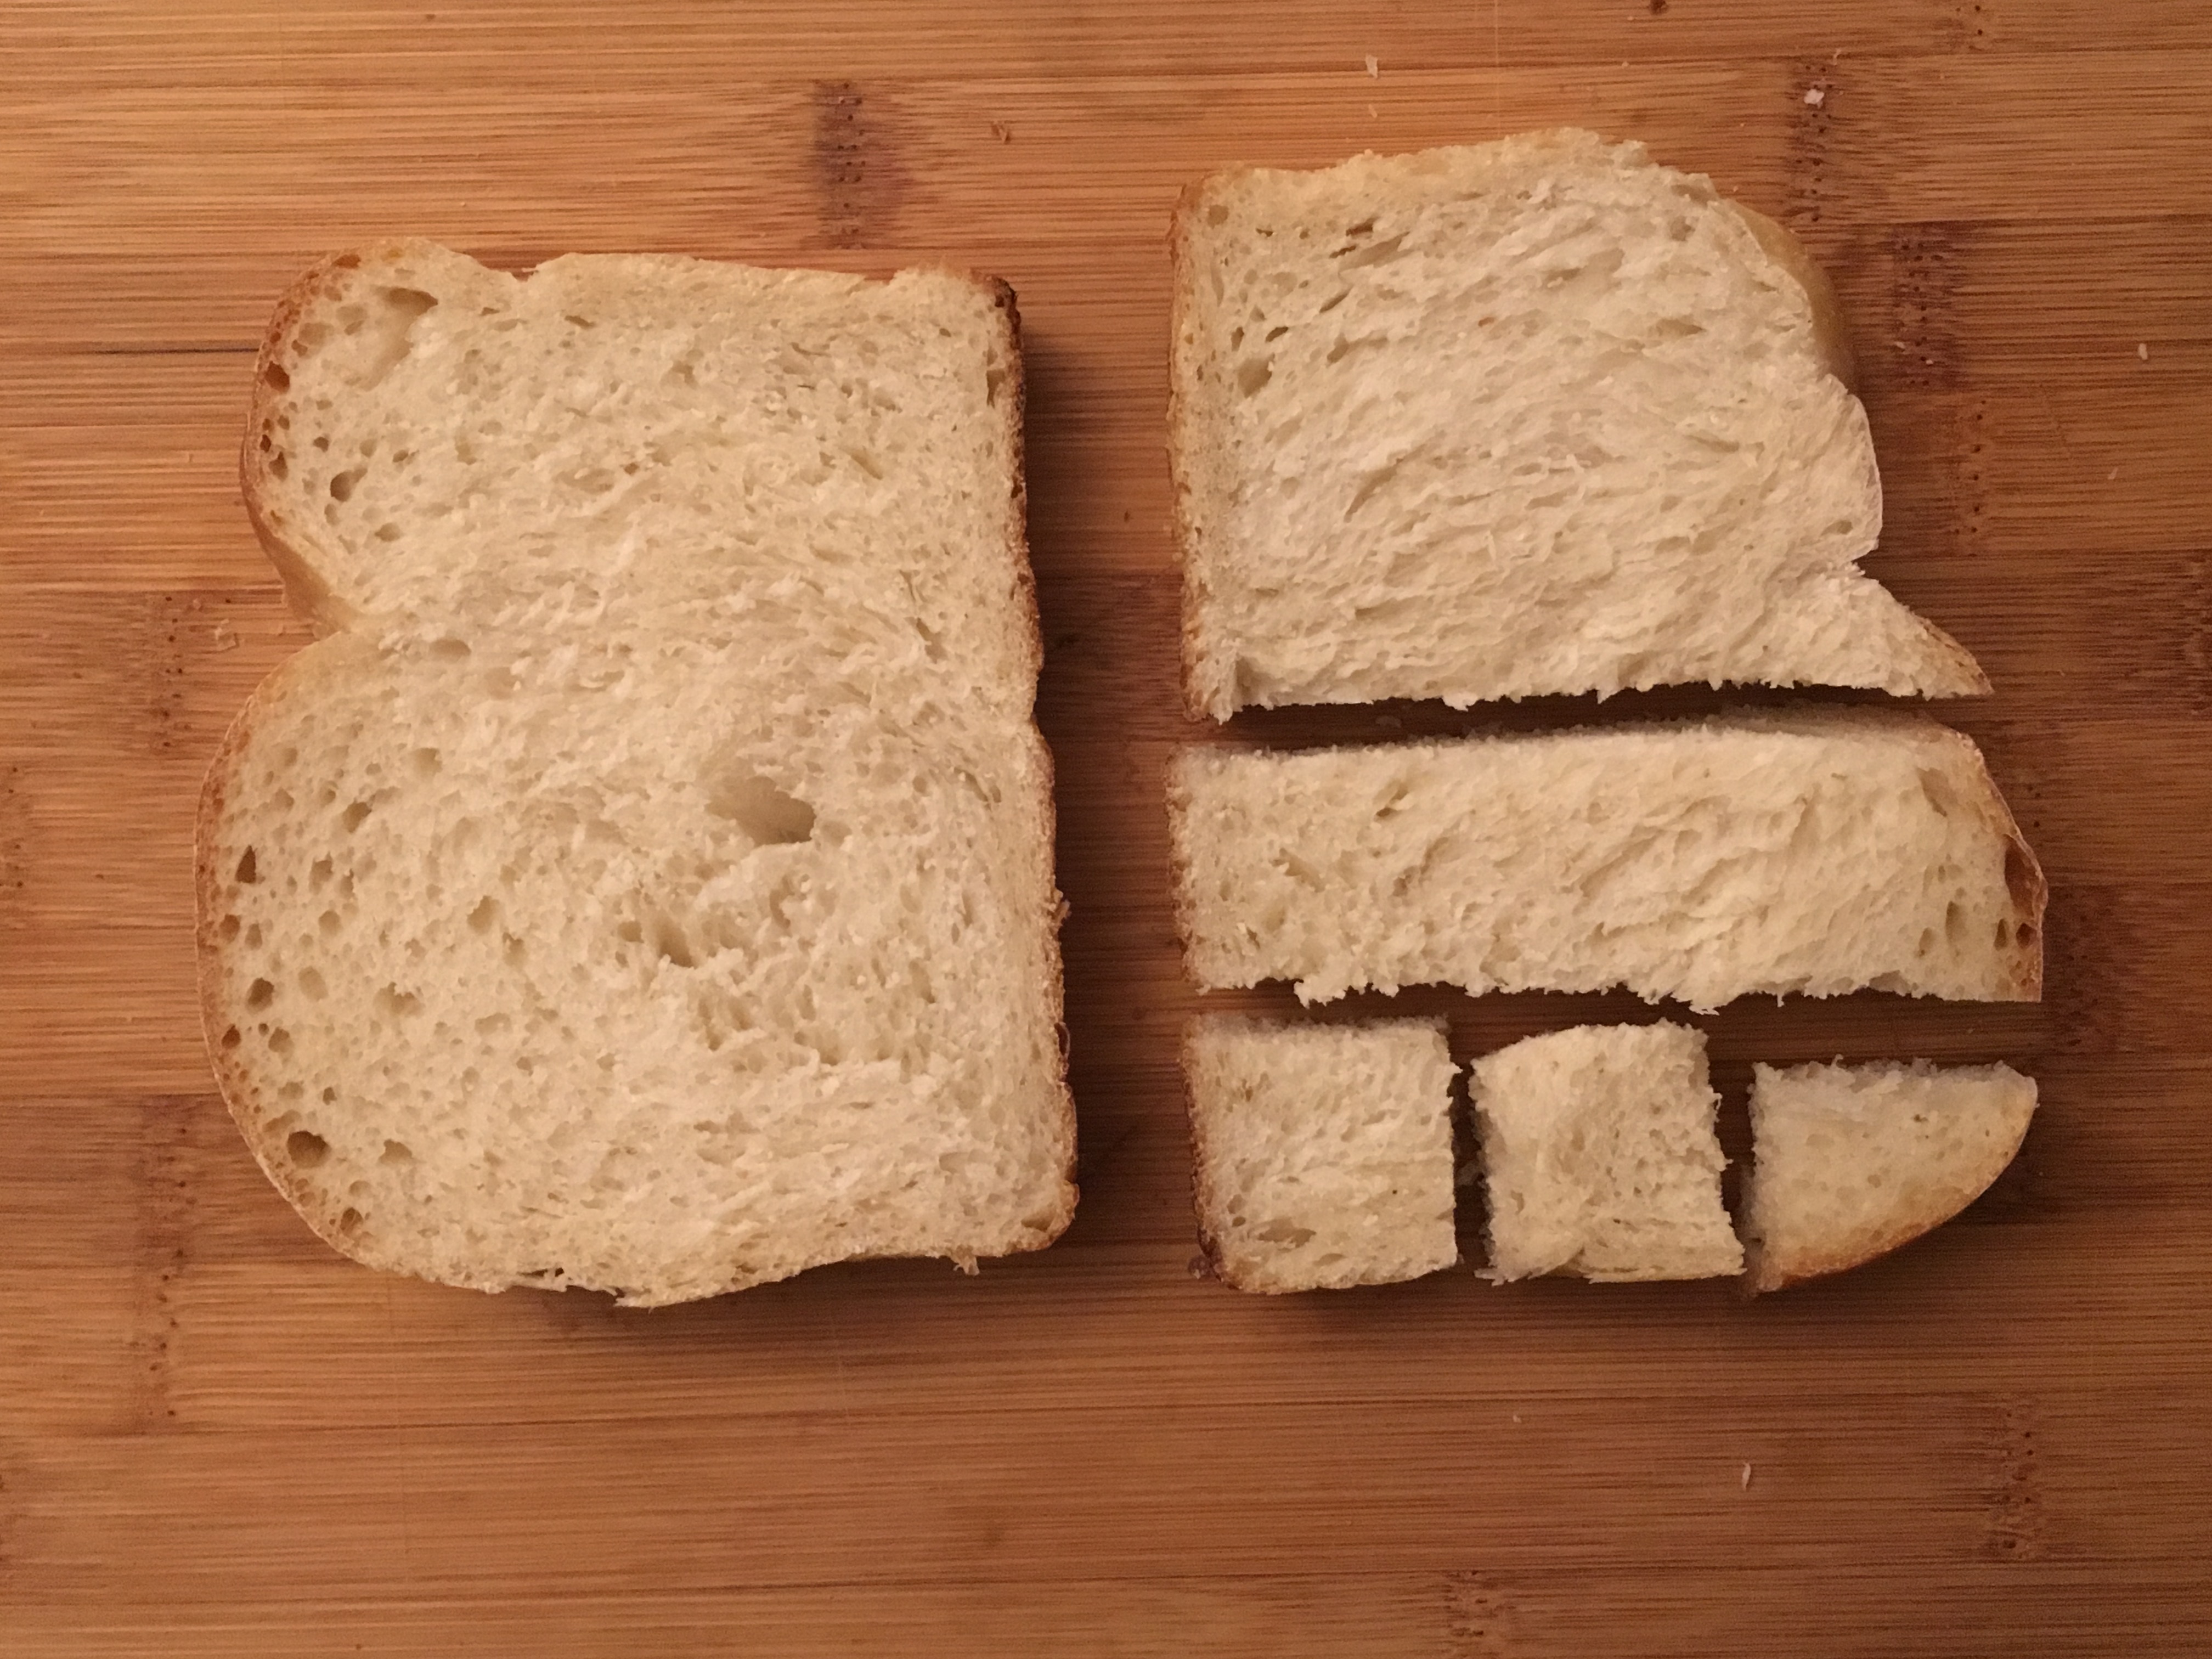
  2. Take some 1/2″ slices of Sough Dough Bread. I used two, and cut them into 1/2″ cubes, then put them into a large mixing bowl.
  3. Next mix in canola oil, and mix until every price of bread is evenly coated. Next cover with Pepper and mix again, you want beautiful black specks covering the bread evenly.
  4. Mix in your grated Parmesan. Only do a little at a time, it absorbs oil very fast, so doing it this way will prevent it from clumping together.
  5. Taste a piece of your seasoned bread. Parmesan is very salty, so don’t add the salt until you’ve tasted it at this stage. Remember, cooking these will remove the moisture making it saltier. So you’re better off adding less than you think you’ll need. Once you’ve accounted for all that, add salt to taste.
  6. Put the seasoned bread on a parchment lined baking sheet. And place in the oven for 5 to 10 minutes. You’re looking for a nice colour to form, and that will vary depending on different factors. So don’t walk away.
  7. Lower your oven temp to 200 degrees Fahrenheit in a convection oven, or 175 degrees Fahrenheit in a non convection oven. If you’re using the latter, I’d suggest leaving your oven door open a for about 5 minutes. Do this for about 10 minutes, or until the croutons are nice and crunchy.
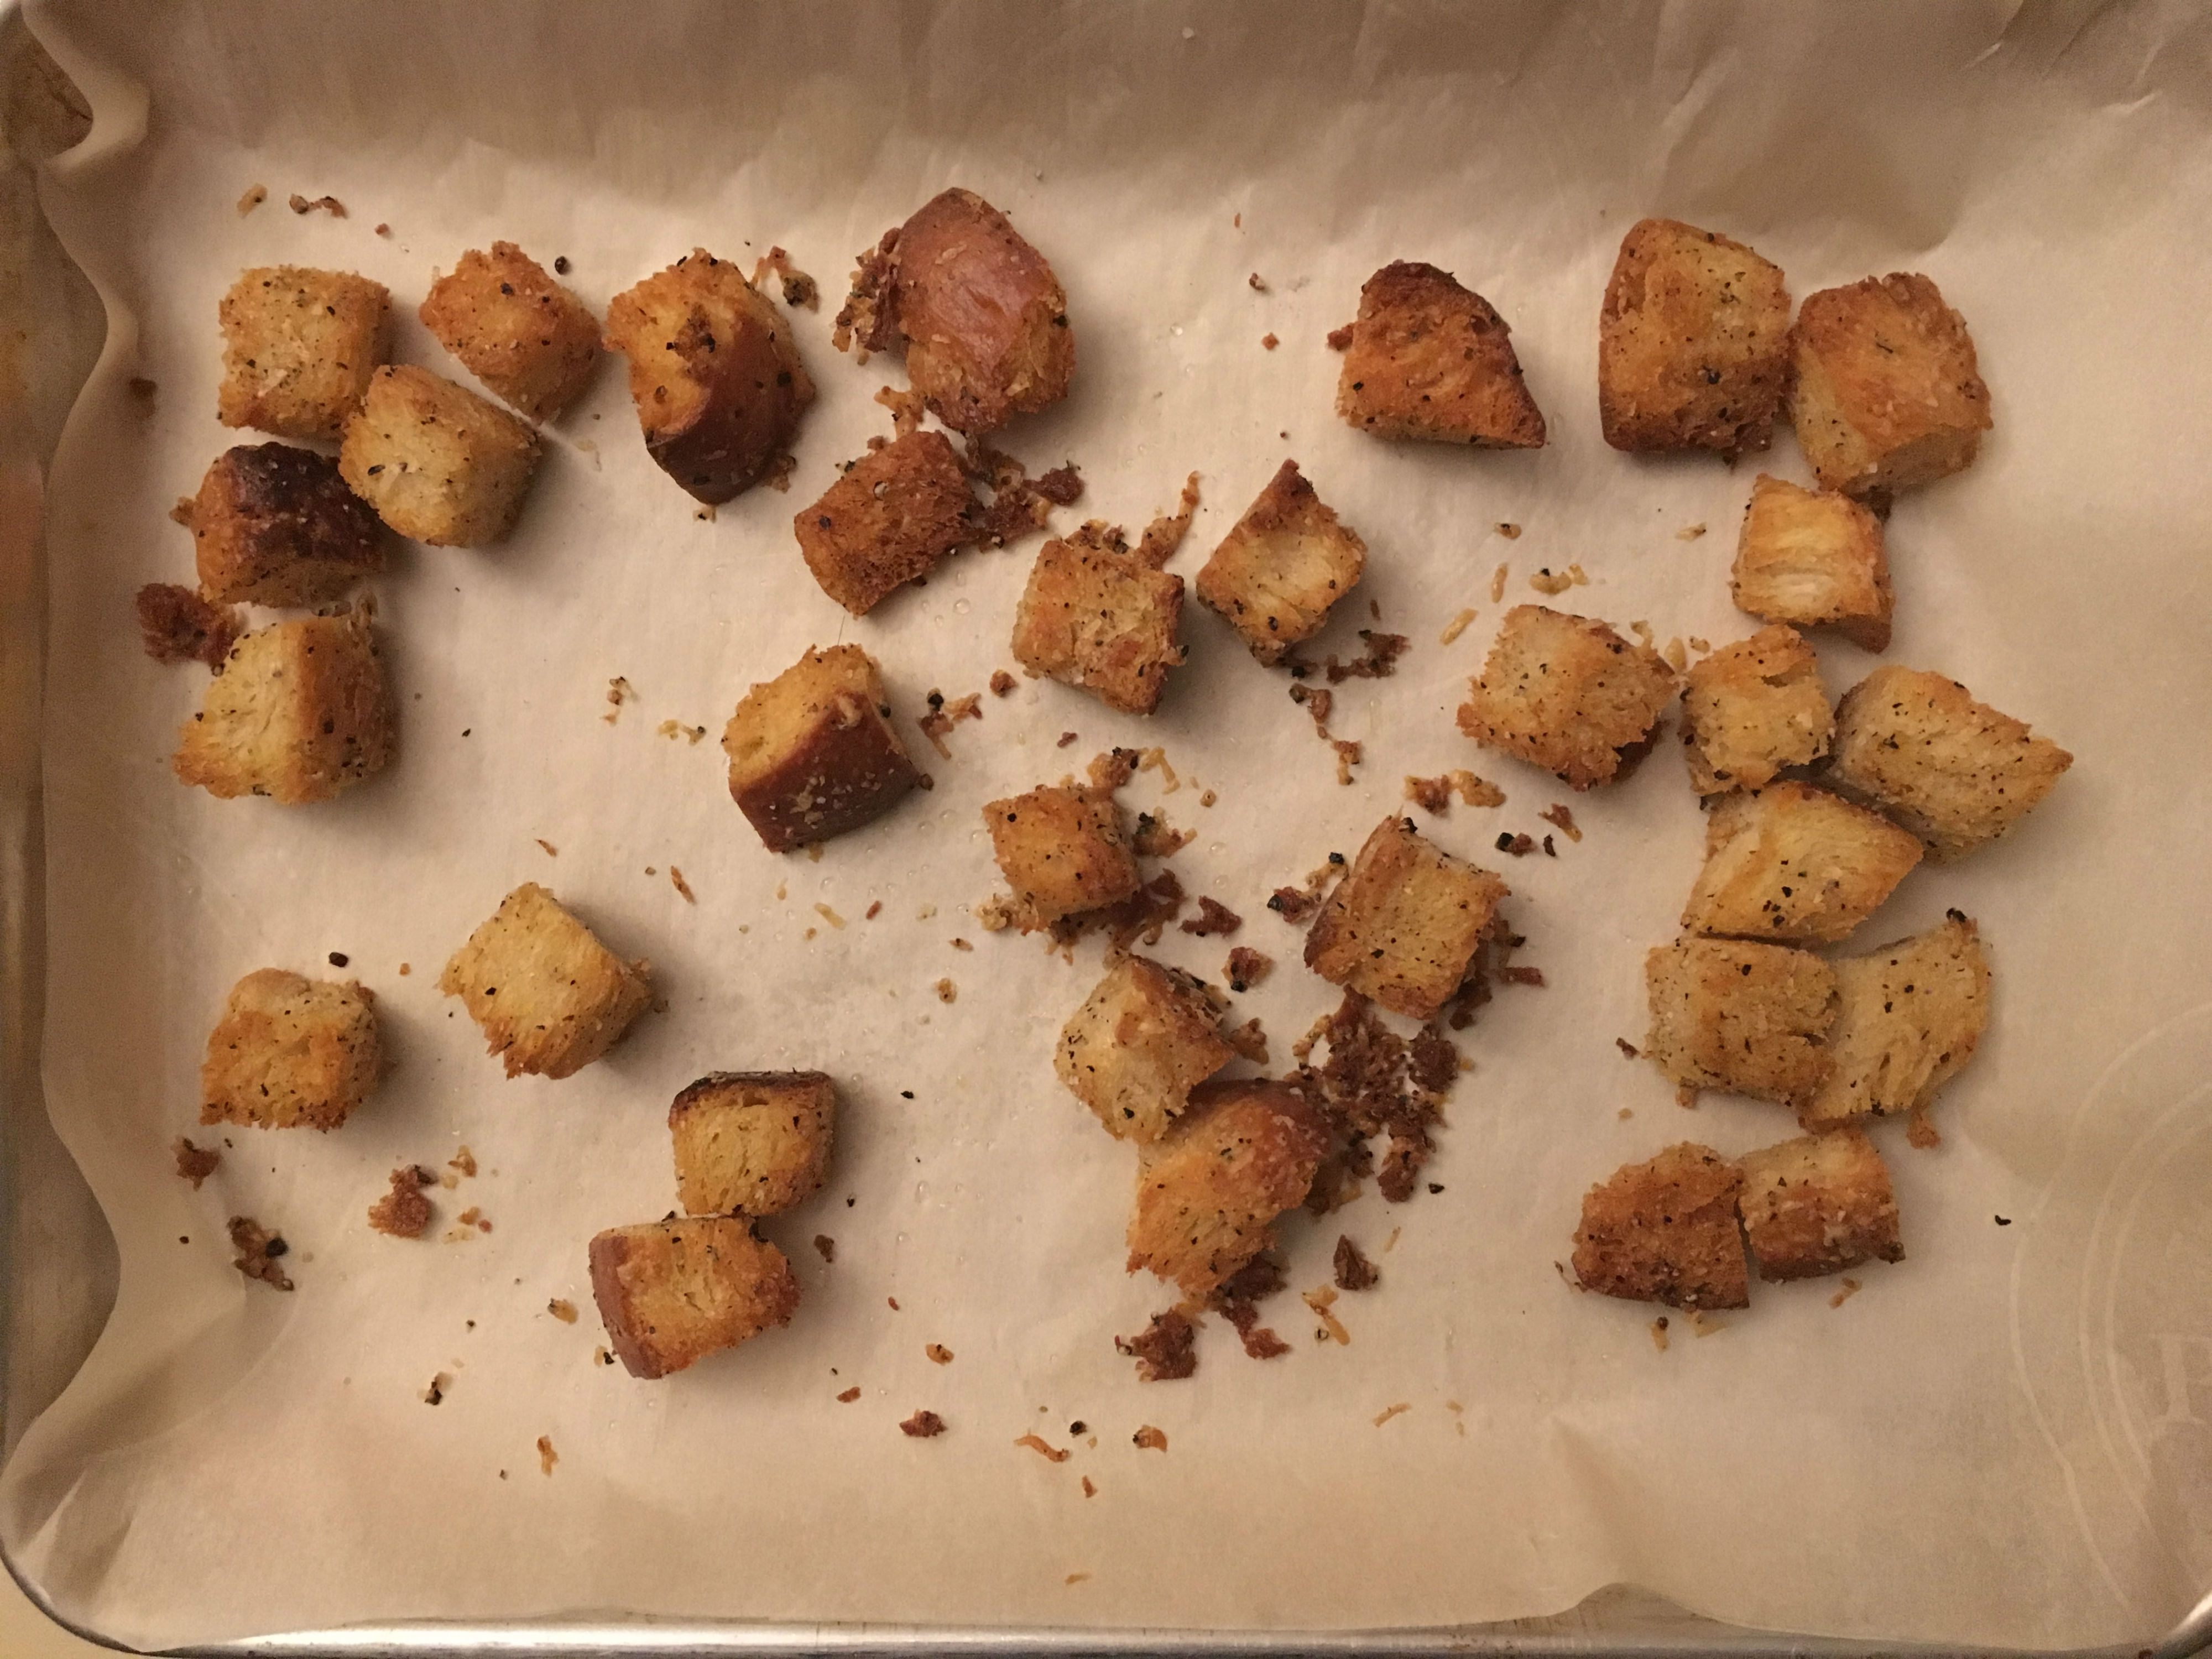
  8. Remove from baking sheet, and let cool on the side until needed.

Finally, the White Balsamic Vinaigrette! This stuff is amazingly good. If you don’t have White Balsamic, you can use any decent tasting Vinegar, as long as it’s not syrupy. So Regular Balsamic isn’t a good idea.

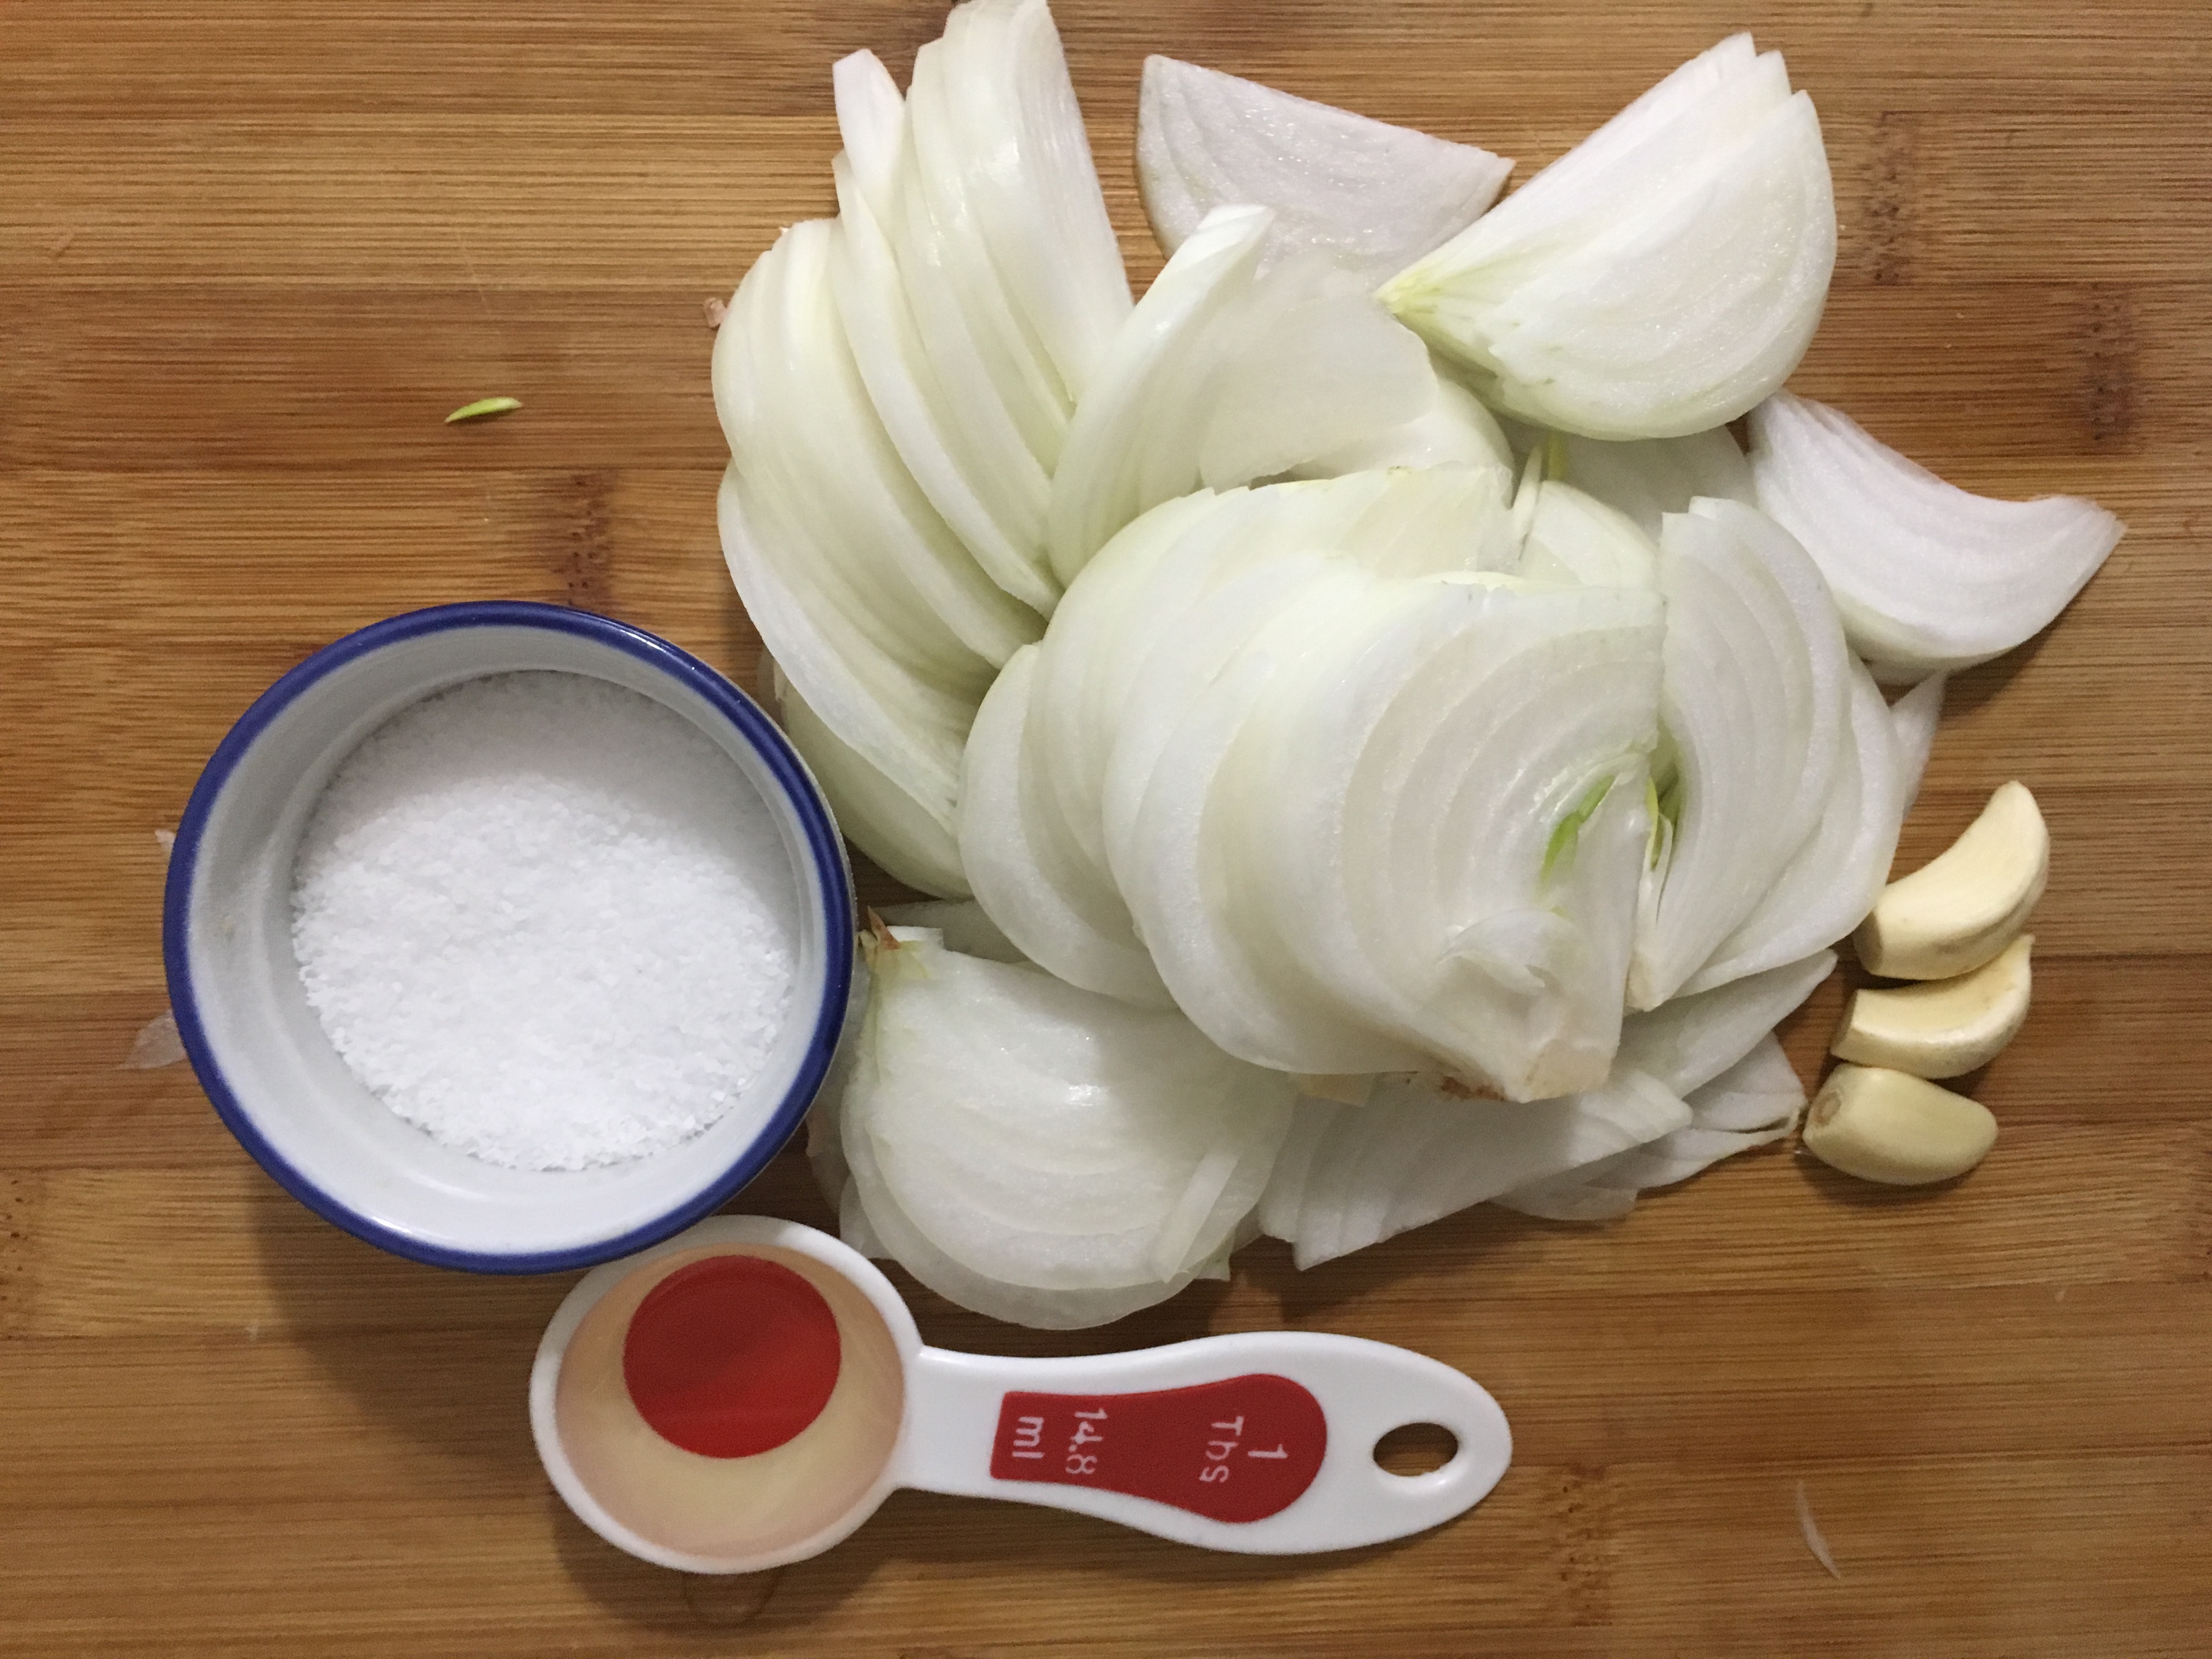
  1. Remove skin from the onion and garlic, and slice Onion into 1/4″ rounds.
  2. Put a cast iron pan on high, with enough oil to cover the bottom of the pan. Once it’s nice and hot, place the in the onions and garlic and sauté for 1 minute.
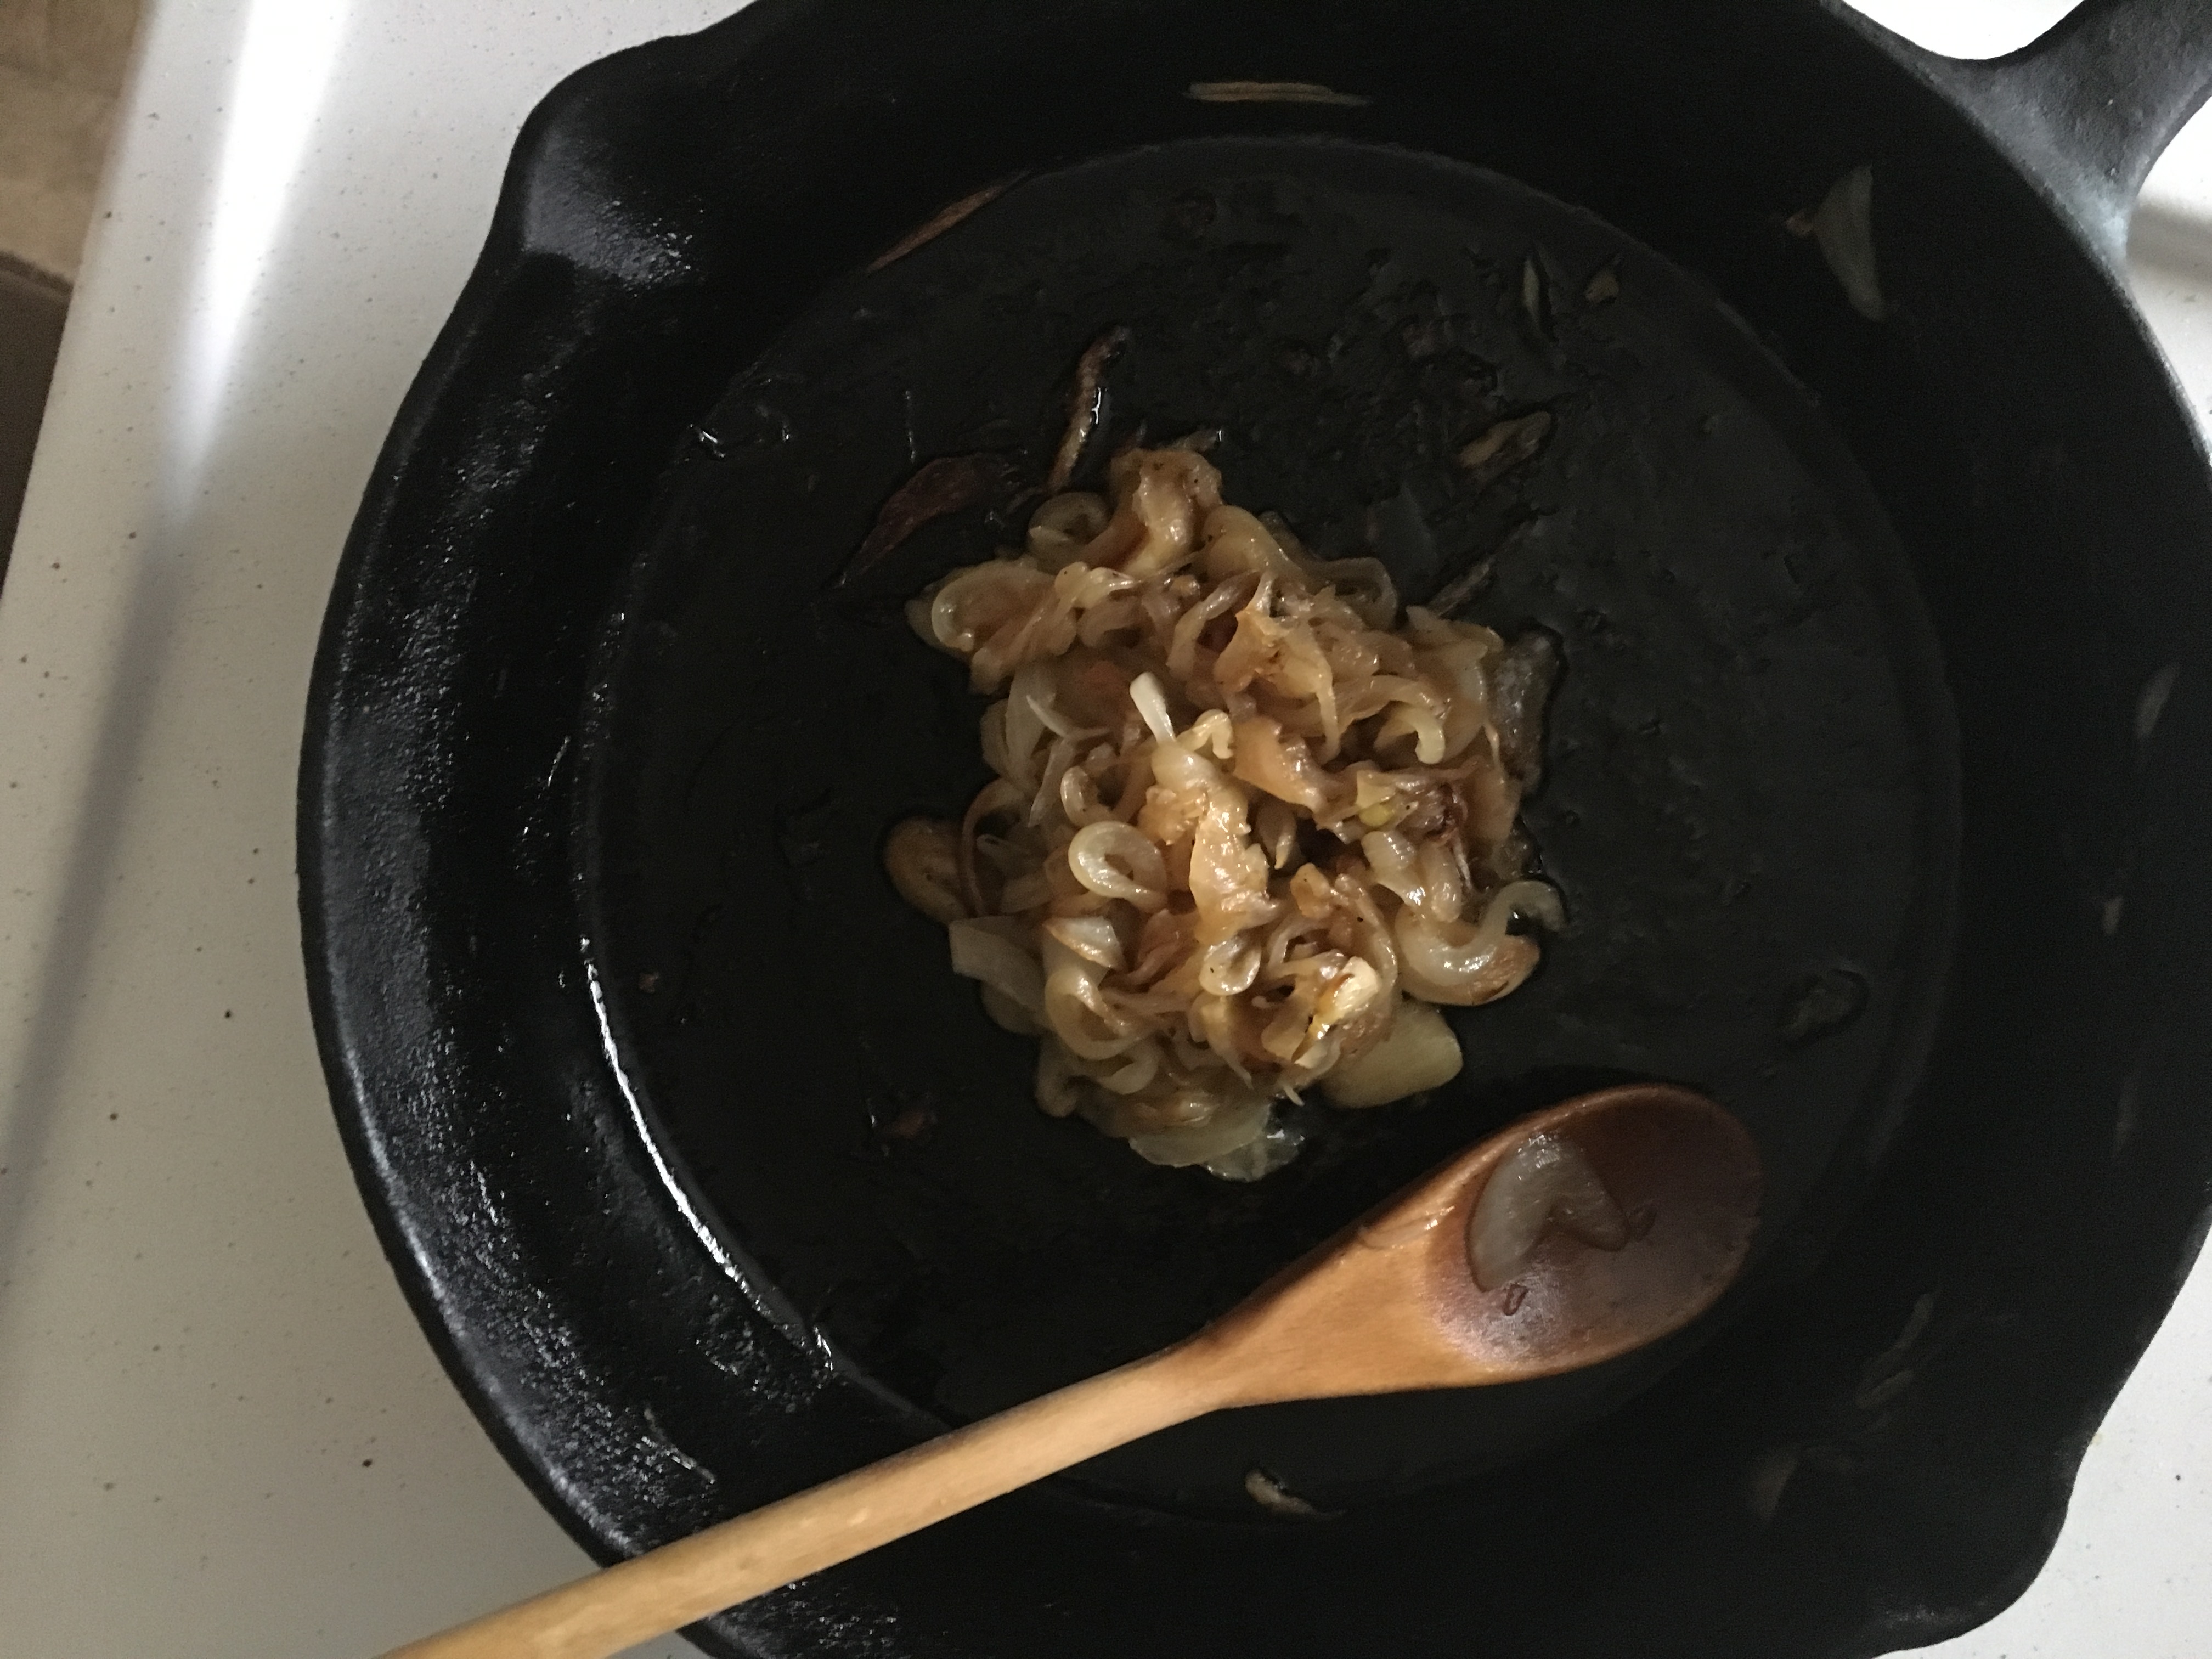
  3. Lower the temperature down to medium low. Stir occasionally, until the onions and garlic become golden and caramelized. This is going into a dressing, so I bring them down into a paste.
  4. Place a moist tea cloth down on the counter, and make a doughnut shape. Place a big mixing bowl in the hole of the ‘doughnut’.
  5. Using a Whisk or an immersion blender, mix all the White Balsamic Vinaigrette ingredients together, except the Canola oil, salt and the marinade from the Tomatoes. Continue until throughly incorporated.
  6. Slowly add in the Canola Oil. A few drops at a time at first, then as the mixture starts to emulsify, a little faster. Once all the oil is mixed in, repeat process with Marinade mixture.
  7. Add salt to taste. Remember, only Salt it a little at this stage. You’re going to serve it cold, so do the final seasoning after it’s been chilled. Which remind me….
  8. Place into clean container, and chill in fridge for a minimum of 2-3 hours.
    Taste and adjust for seasoning

Finally, let’s make the final product. I didn’t give measurement for the mixed greens. It’s a salad; use your best judgment. I personally love Arugula, so I put more of it then most people do, but here is how you should construct it.

  1. Wash your spinach and mixed greens. I don’t care if the bag says ‘pre-washed’. This week alone, I found a moth in a bag labeled pre-washed and last week I found a lady bug. Seriously, it’s for your mom, and you know she’d wash it for you.
  2. Mix the greens together in a large salad bowl along with the onion and croutons.
  3. The Tomatoes are fragile, so mix them in last, along with the dressing.
  4. Take a fancy photo, and post it to Instagram with the hashtag #foryourfoulmouth

I Haddock a Big Hankering

I was in the mood for some fish tacos, which was perfect because Cinco de Mayo was just around the corner! This dish, I originally assumed, started it’s life as tex-mex. In actuality it’s originally from Baja-California, Mexico and was originally called Tacos de Pescad, or Codnoscenti. It was basically a traditional taco, with battered fish in place of the pork/beef. From what I can tell, since then it has been given an English name and adopted by pub and resto bar menus across America and Canada. It’s my assumption that it’s northern migration was what lead it to evolve into what we know today here north of the mexican border. There is something about the mix of crispy, savoury, and sweet, with a Mexican twist, that’s just unparalleled.

Apple Slaw, Rum Battered Haddock, and Homemade Corn Taco shells were the main things I wanted to experiment with. As stated above, I feel this is known more as pub fair than authentic Mexican cuisine, so I wasn’t too worried about ingredients usaly found in Mexico. However, since there is something wrong with my brain, I also felt that home-making the corn tortilla and the mayo for the slaw was non-negotiable. This is a long recipe, but nothing is overly complicated about it. I urge any new cooks to try making it. Most of it can be made in advance, which means you can make this over a day or two, and not have to try so many new things at once.

I don’t know how other food blogs manage to have long stories before they get to their recipes, so let’s get right into the guts of this.

Corn Taco Shells:

  • 1 cup Massa
  • Juice and zest from 1/2 lime
  • 1 to 1 1/2 cups of hot tap water
  • Salt to taste

Apple Slaw and Dressing:

  • 1 Egg yolk
  • 3/4 canola oil
  • 1 Tablespoon Dijon mustard
  • 3 Tablespoons White Wine Vinegar
  • Salt/pepper to taste
  • 1 Honey Crisp Apple
  • 2 Jalapeño Peppers
  • 1 Small Stock of Celery
  • 3 Heirloom Carrots
  • 1 Yellow Onion

Pico de Gallo:

  • 1 Hot House Tomato
  • 1 Yellow Onion
  • 3 cloves Garlic
  • 1/2 a Lime
  • Salt and pepper to taste

Crispy Haddock and Seasoning:

  • 1 Tablespoon Chili Powder
  • 2 1/2 teaspoon Paprika
  • 1 1/4 teaspoon Cumin
  • 1/8 teaspoon Cayenne
  • 1 1/4 teaspoon Onion Powder
  • 1 1/4 teaspoon Garlic Powder
  • 2 Pieces of Haddock
  • 1 Cup Bread Flour
  • 2 Tablespoons Corn Starch
  • 2 teaspoons Baking Powder
  • Rum to colour
  • Water To Consistency
  • Salt and pepper

First, let’s make the Tortilla that we will make into a Taco shell

  1. In a big mixing bowl add the Massa, 2 pinches salt, and the lime’s zest and juice.
  2. While lightly, but continuously, mixing with a spatula, slowly add about 1/3 of the hot water. The mixture should should start to clump together. At this point, you can start working the dough with your hand while you slowly add little bits of water. Once the dough can form a ball that doesn’t crumble you can discard the remaining water. The final dough ball should be soft, and feel a bit moist to the touch. if it feels a dry put it back in the bowl and work in more hot water. a little too moist is better then too dry. Really it should feel like Play-Doh. If you never used play-doh, let your mom know she failed you. This is officially part of the recipe, so you have to do it, or it won’t work.
  3. Place ball under a damp towel, or in plastic wrap for twenty minutes. this will give the Masa time to evenly distribute the liquid. this can also be left in the fridge for a day or two covered in plastic.
  4. Massa Dough right After Formed
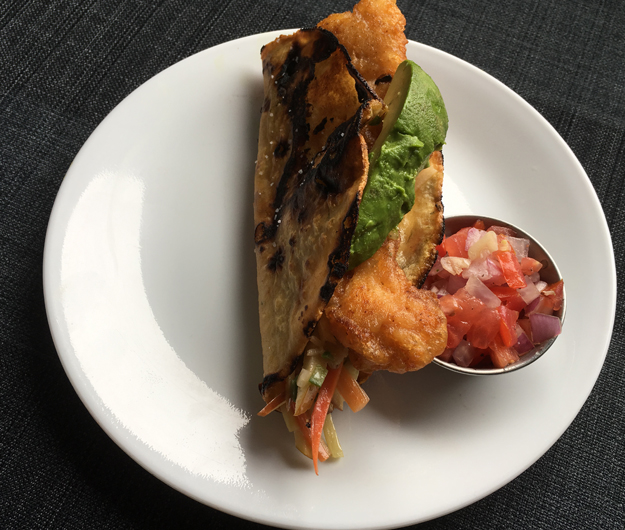
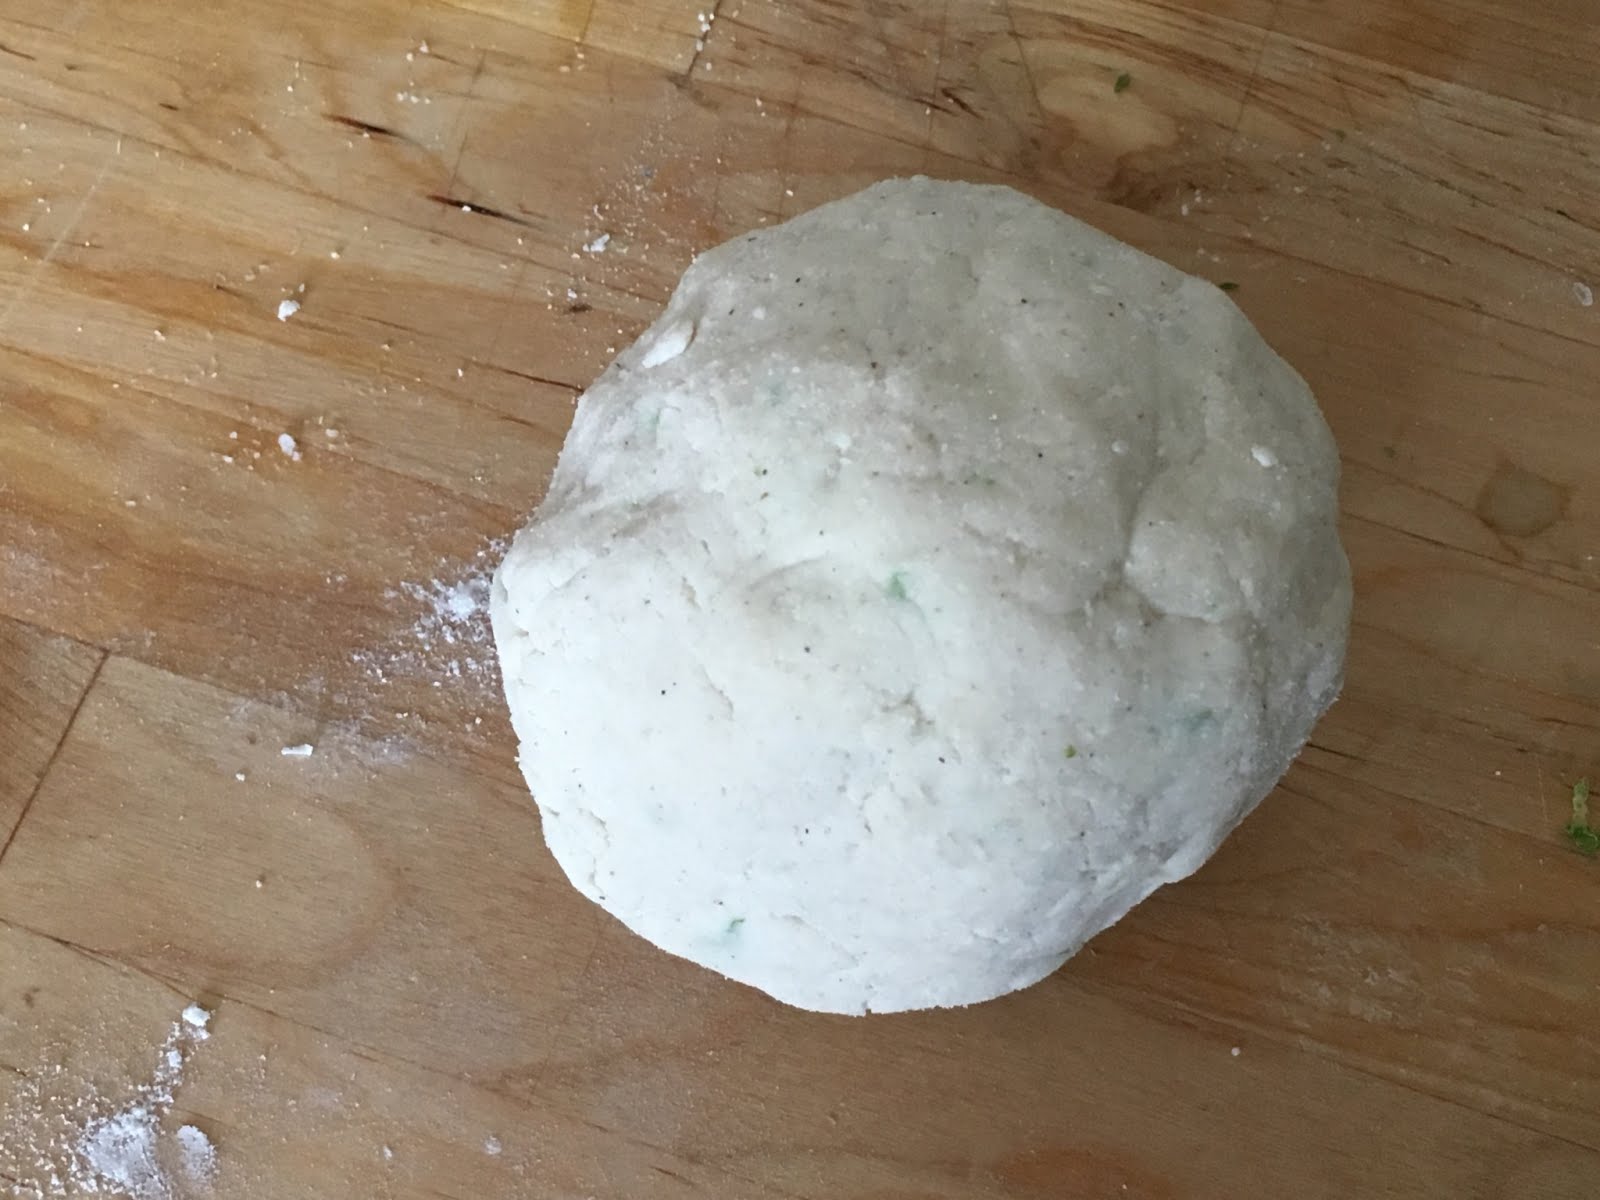
Divide the ball into 4, and roll each section into its own ball. Cover all of them with plastic wrap.
  5. If you have a Tortilla press, follow the directions that came with it to make your dough into tortillas, then skip to step 13.
  6. Masa disk on sheet of 2
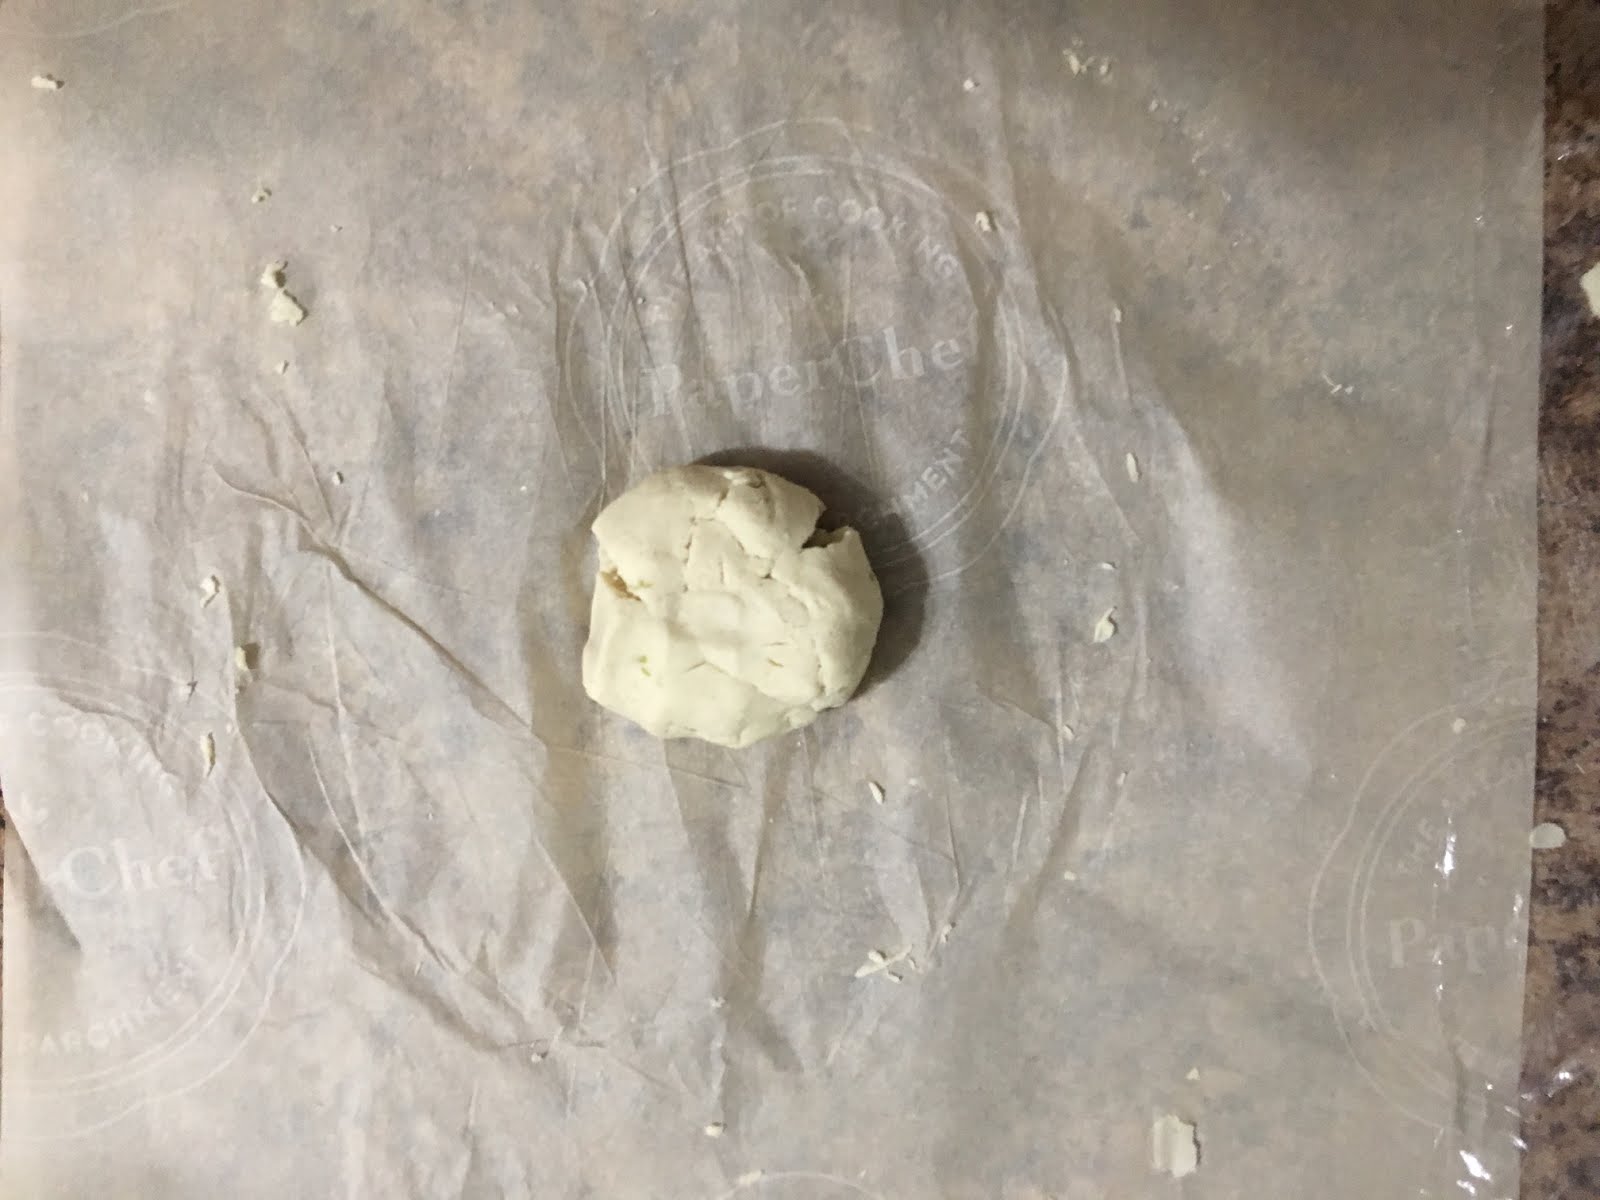
I personally don’t believe in buying things I will use twice a year, unless its a matter of safety or necessity. So I don’t own a tortilla press, however I have come up with a way to make perfect tortillas. Lay out a 1.5′ sheet of Parchment, and put your 1 dough ball in the centre.
  7. Push the dough ball with your palm so it’s a disk shape then cover with a 1.5′ sheet of plastic wrap
  8. Massa rolled out slightly bigger than my bowl
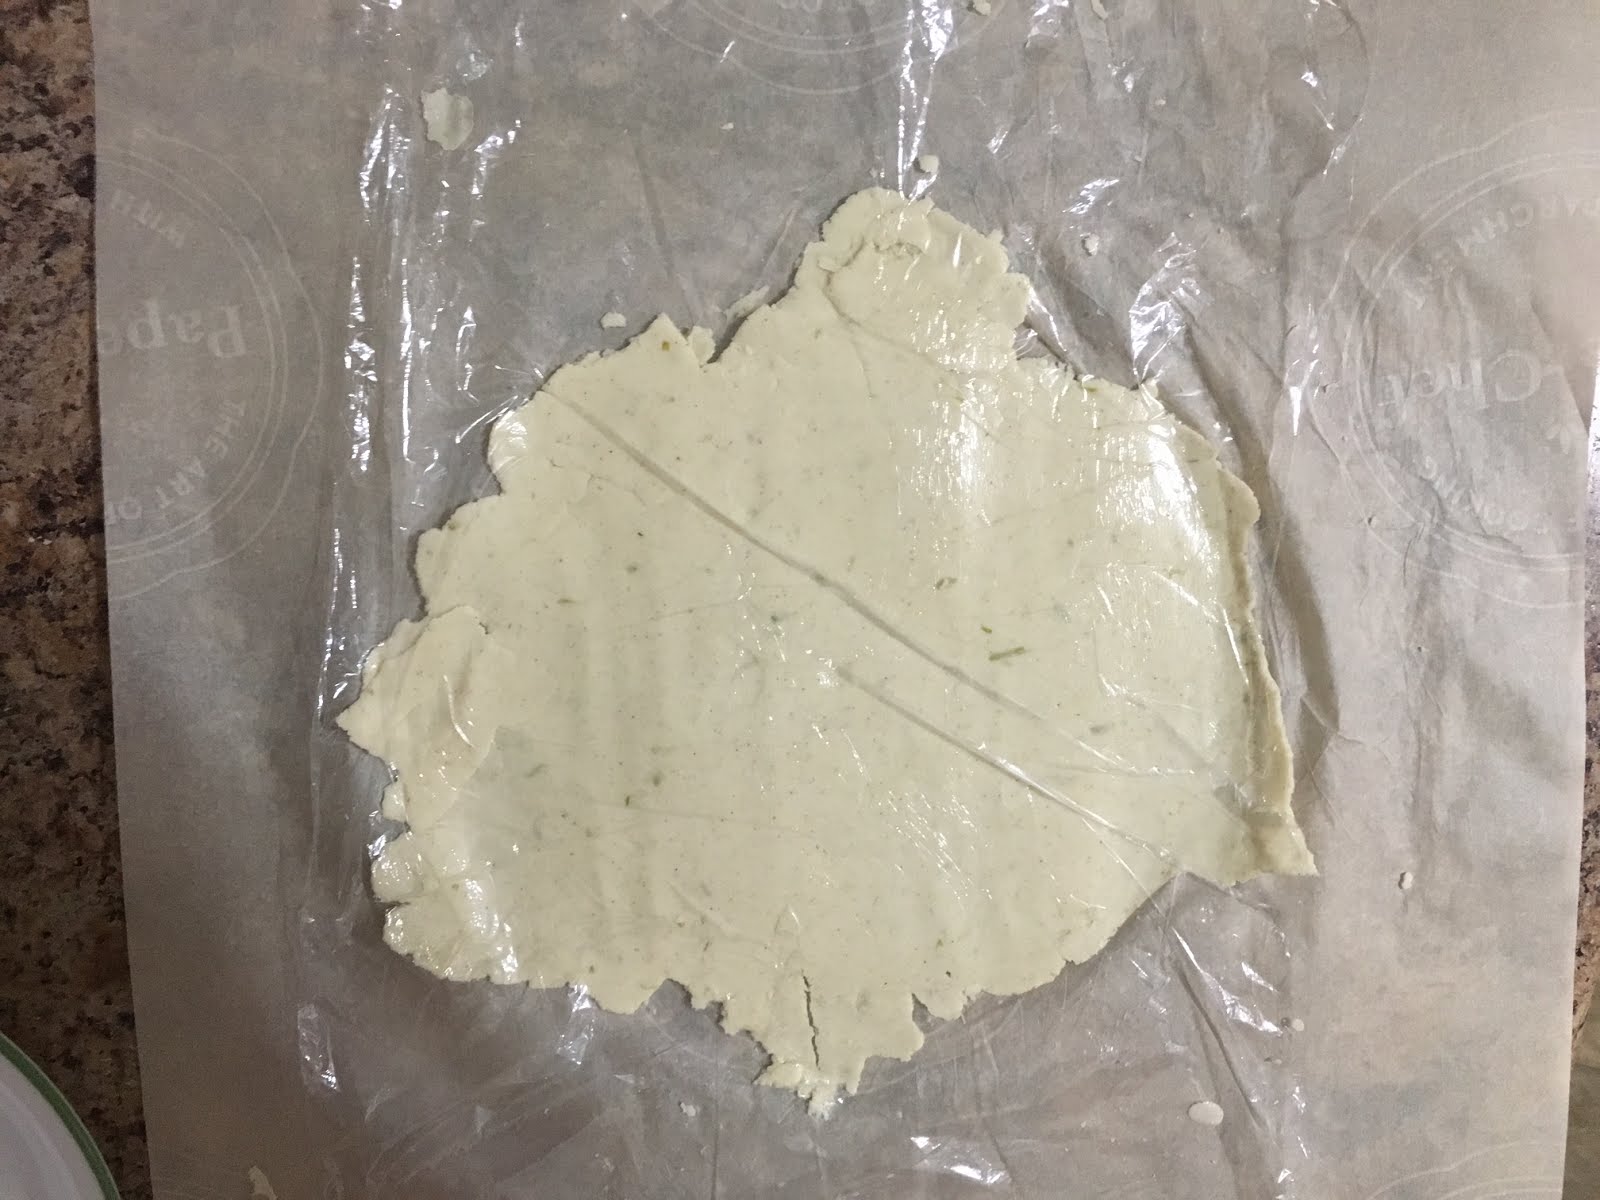
Use a rolling pin to roll the dough ball just until it’s wider than a soup bowl. Make sure to roll back and forth and side to side. FYI: At first your plastic wrap may cling to the dough causing it to curl upward. Simply lift the plastic wrap off the dough, gently place the dough down and put the plastic back. If the parchment becomes wrinkled, simply pull its corners.
  9. Using a bowl to get my tortilla the perfect shape
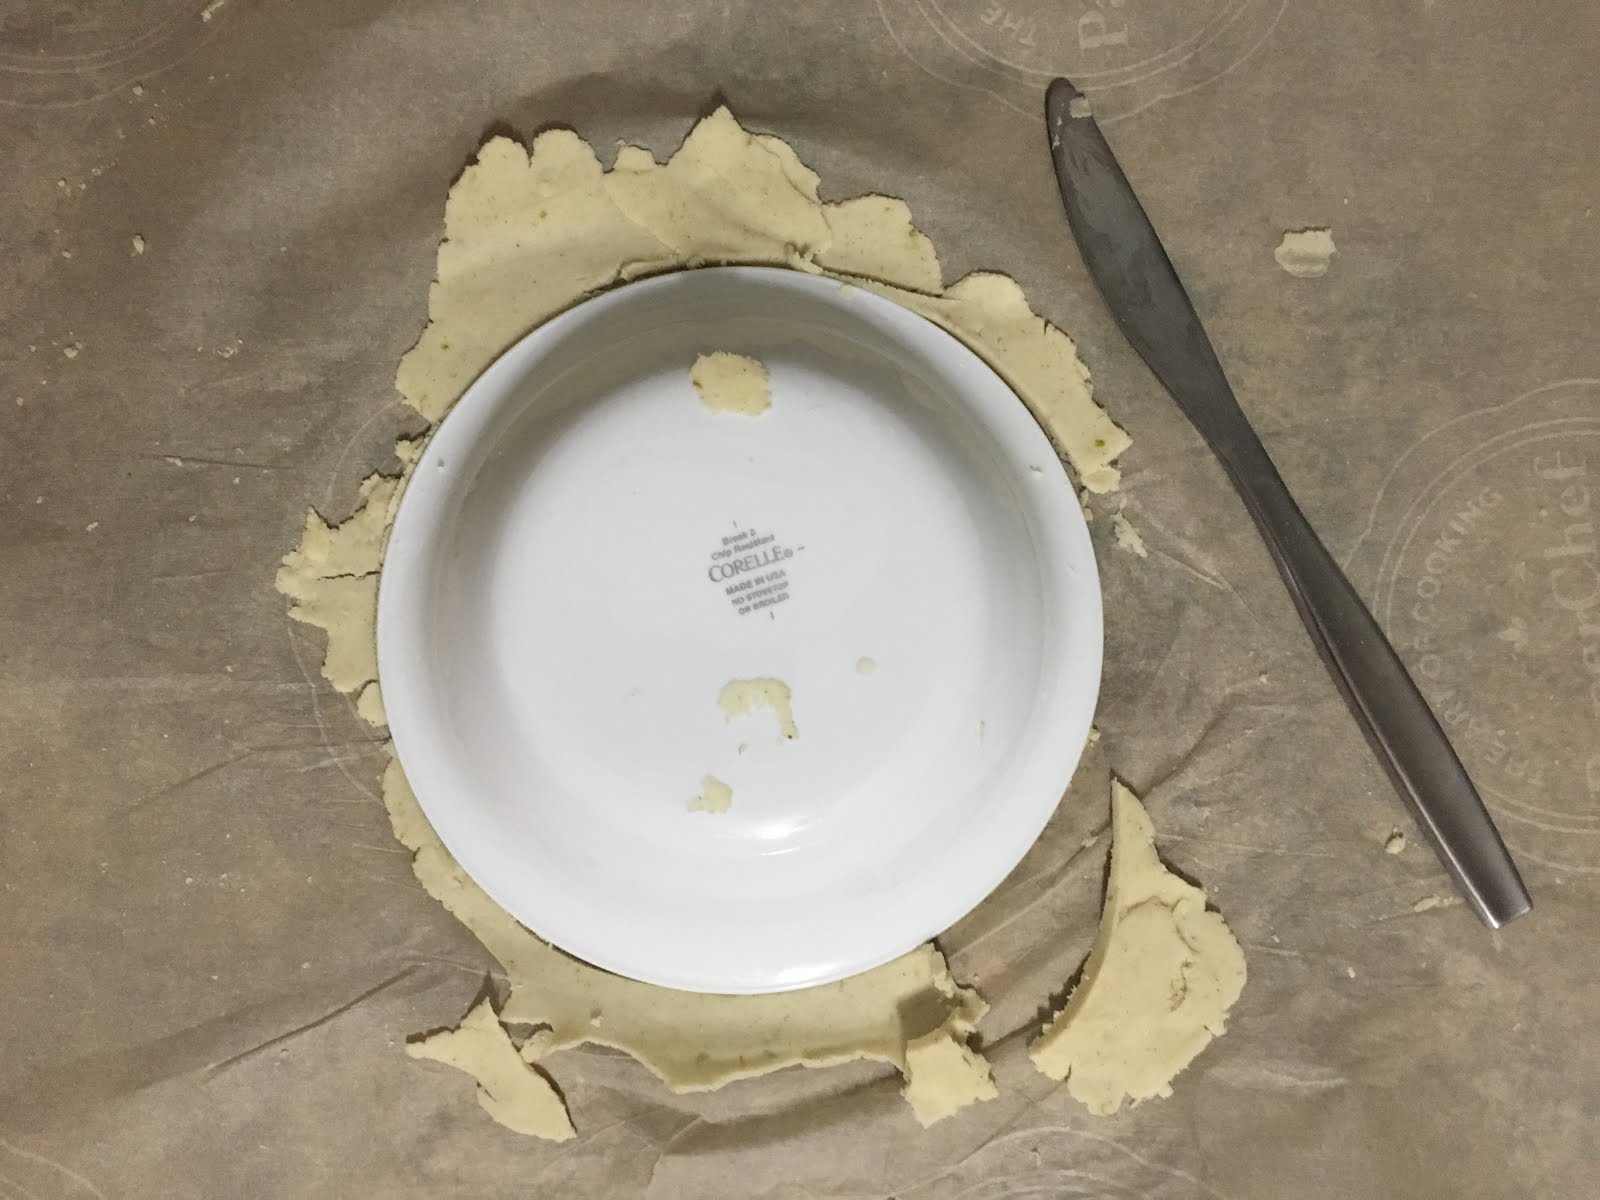
Gently remove your plastic wrap and place a bowl upside down on your dough, using a butter knife cut around the rim of your bowl, this will give you perfectly shaped tortillas. Use the scrap pieces to fill any cuts, are place the rest to the side. There is no gluten in Masa, so you don’t have to worry about over working it.
  10. The Masa after second rolling. It finally looks like a Tortilla
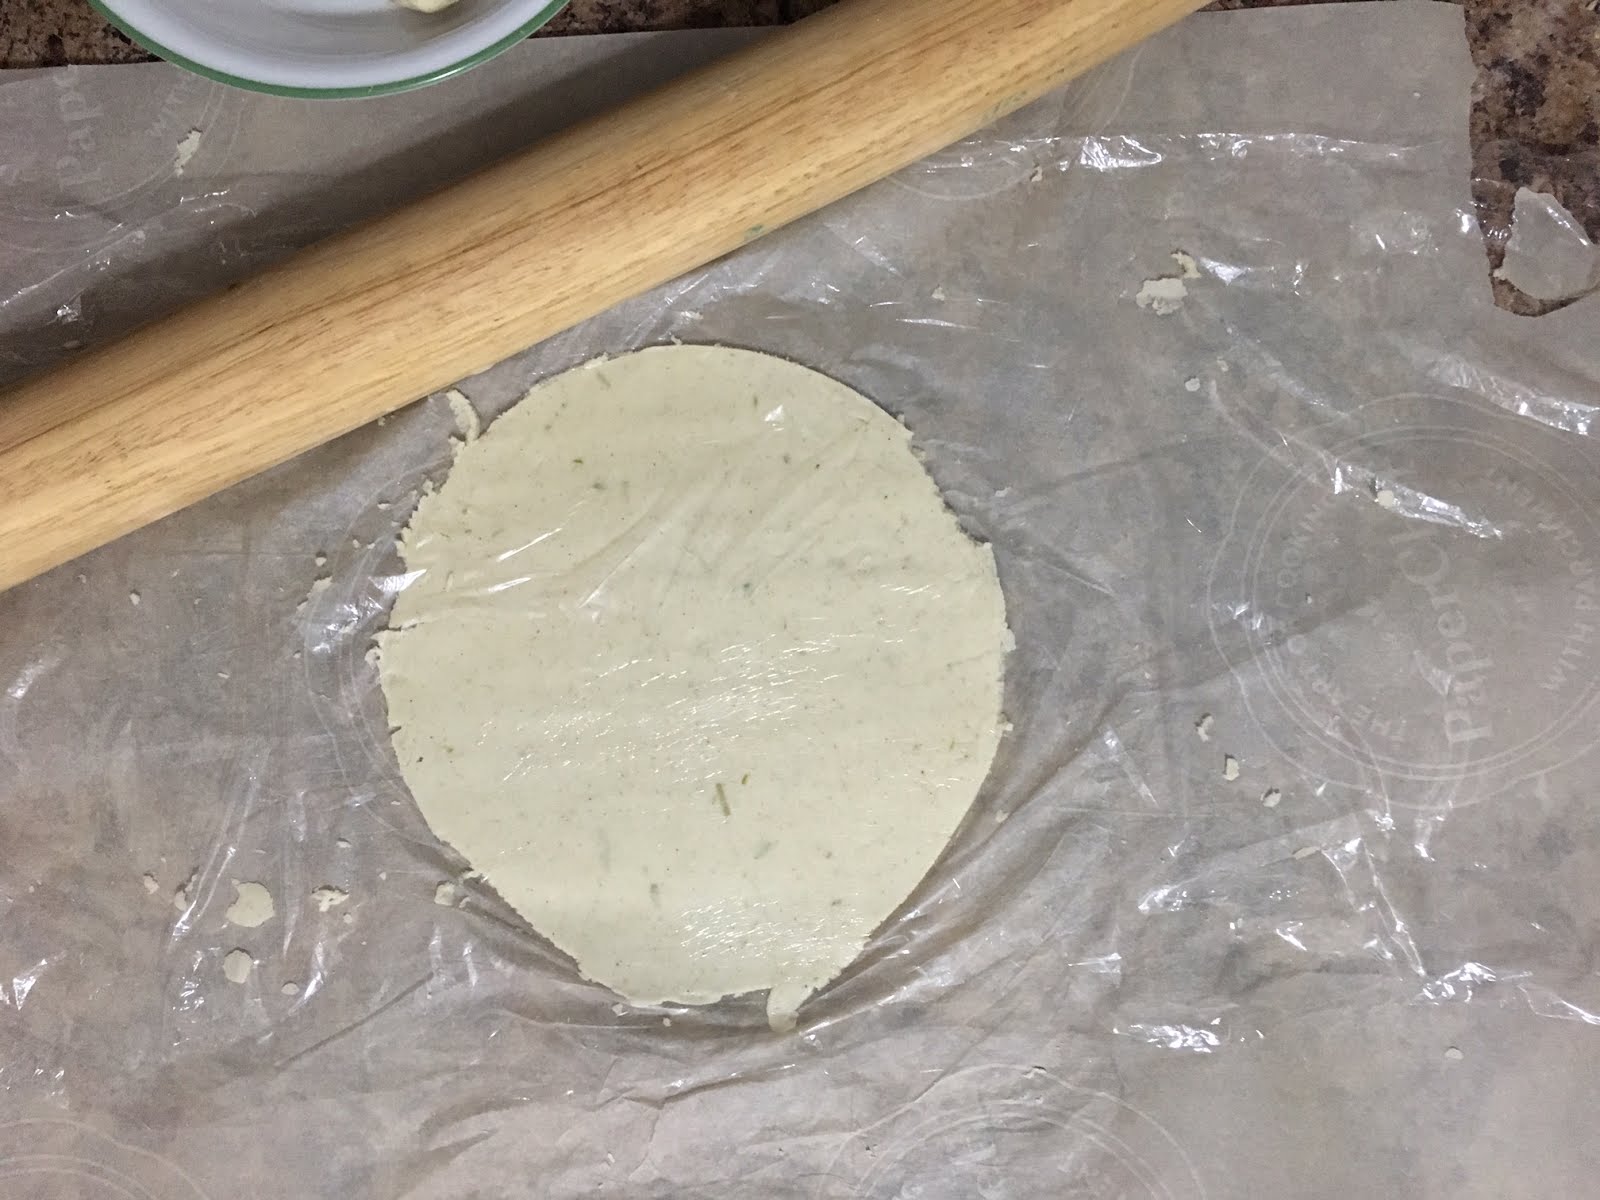
Place the plastic wrap back on top of the dough and use rolling pin thing out the tortilla to about 1/6″
  11. Repeat step 9.
  12. My pile of Tortilla dough waiting to be cooked
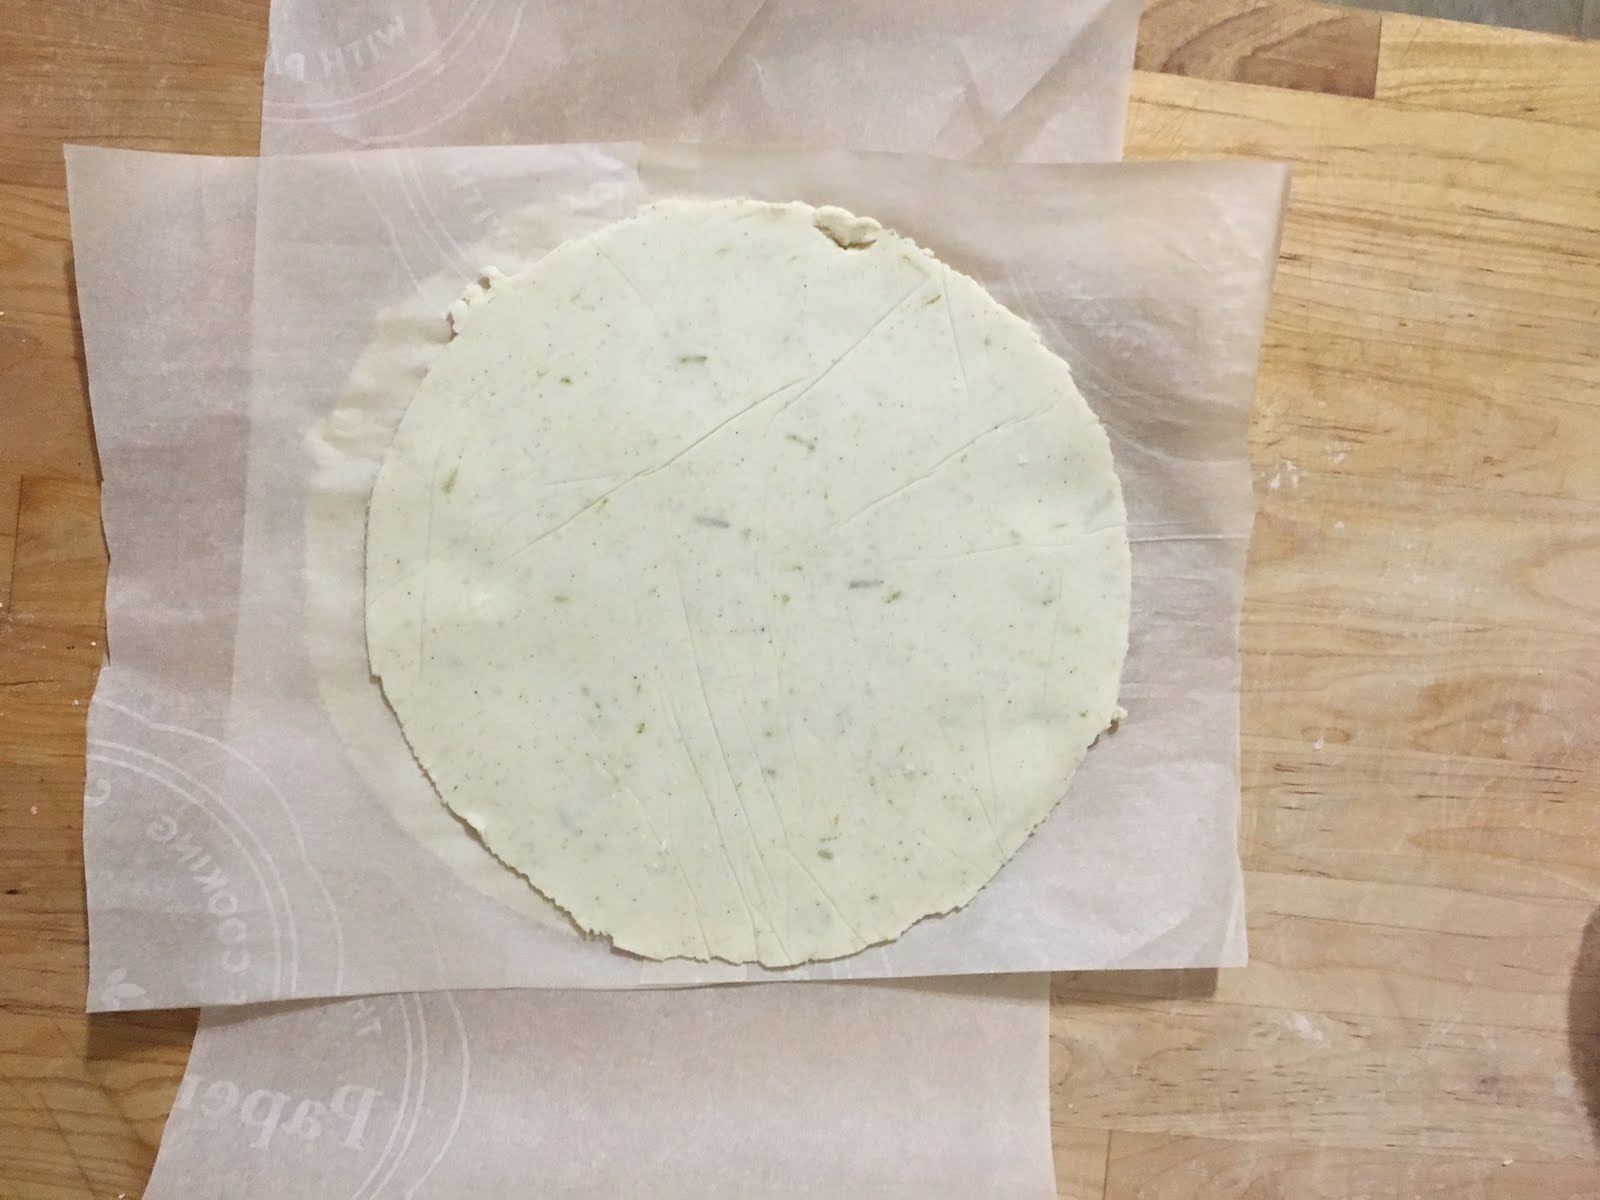
Slowly peel the tortilla off the parchment, and place on the side till you’re ready to cook them. I place all the tortillas on top of each other with a piece of parchment paper to separate them. Cover with plastic wrap, or damp cloth.
  13. Repeat steps 6 – 12 until all the dough balls are gone.
  14. Finally It's a tortilla! you want those beautiful spots on them. Sadly only the first side will have them that perfect.
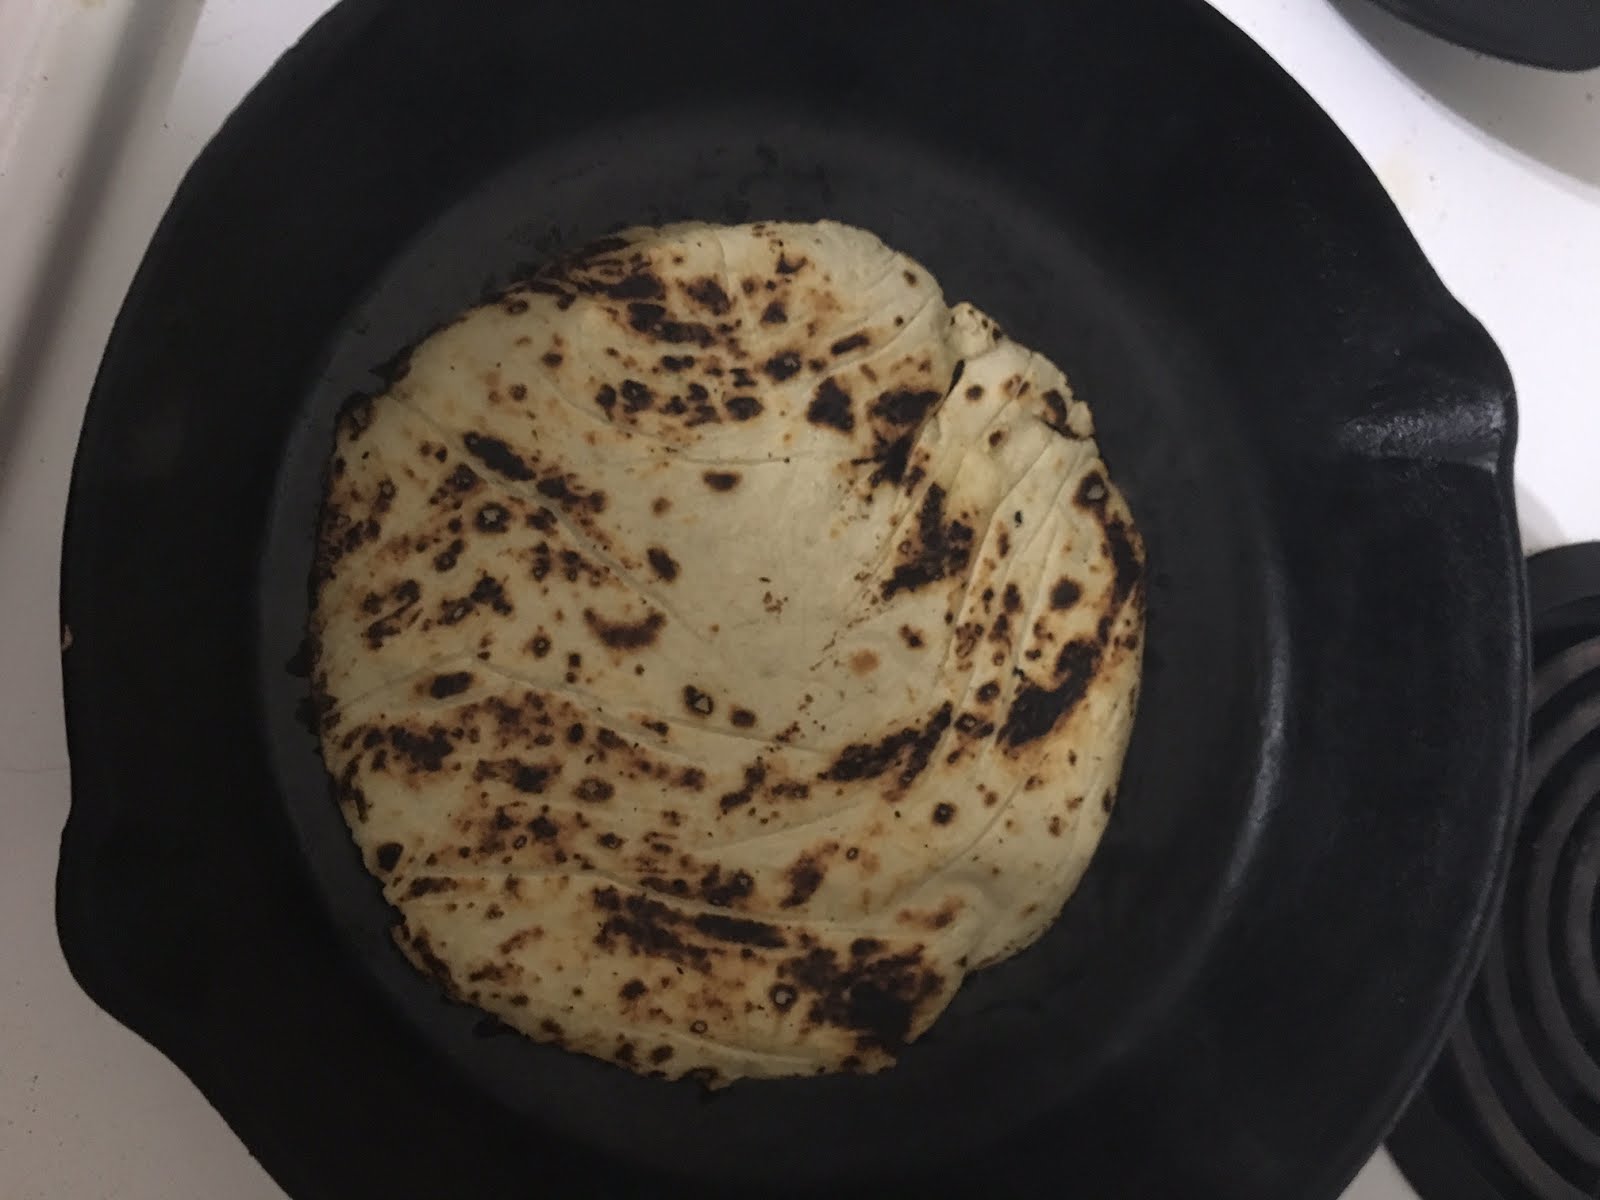
Cook each tortilla one at a time on a non greased cast iron pan set to high heat. If you don’t have cast iron, you can use a stainless steel pan, but you will have to wait longer in between cooking each tortilla for the stainless to regain its heat. It should take about 30-40 seconds on the first side, and about 20 seconds on the other side. They may puff up, thats a good thing, it means they are well rolled.
  15. Let cool for about 5 minutes, and then place in zip -loc bag until you’re ready to fry them.
  16. Heat up a pot with filled with 1/4″ of canola oil. You’re looking to reach around 400 degrees Fahrenheit, or about 200 degrees Celsius.
  17. I use the corner of the pot to hold the tortilla in shape.
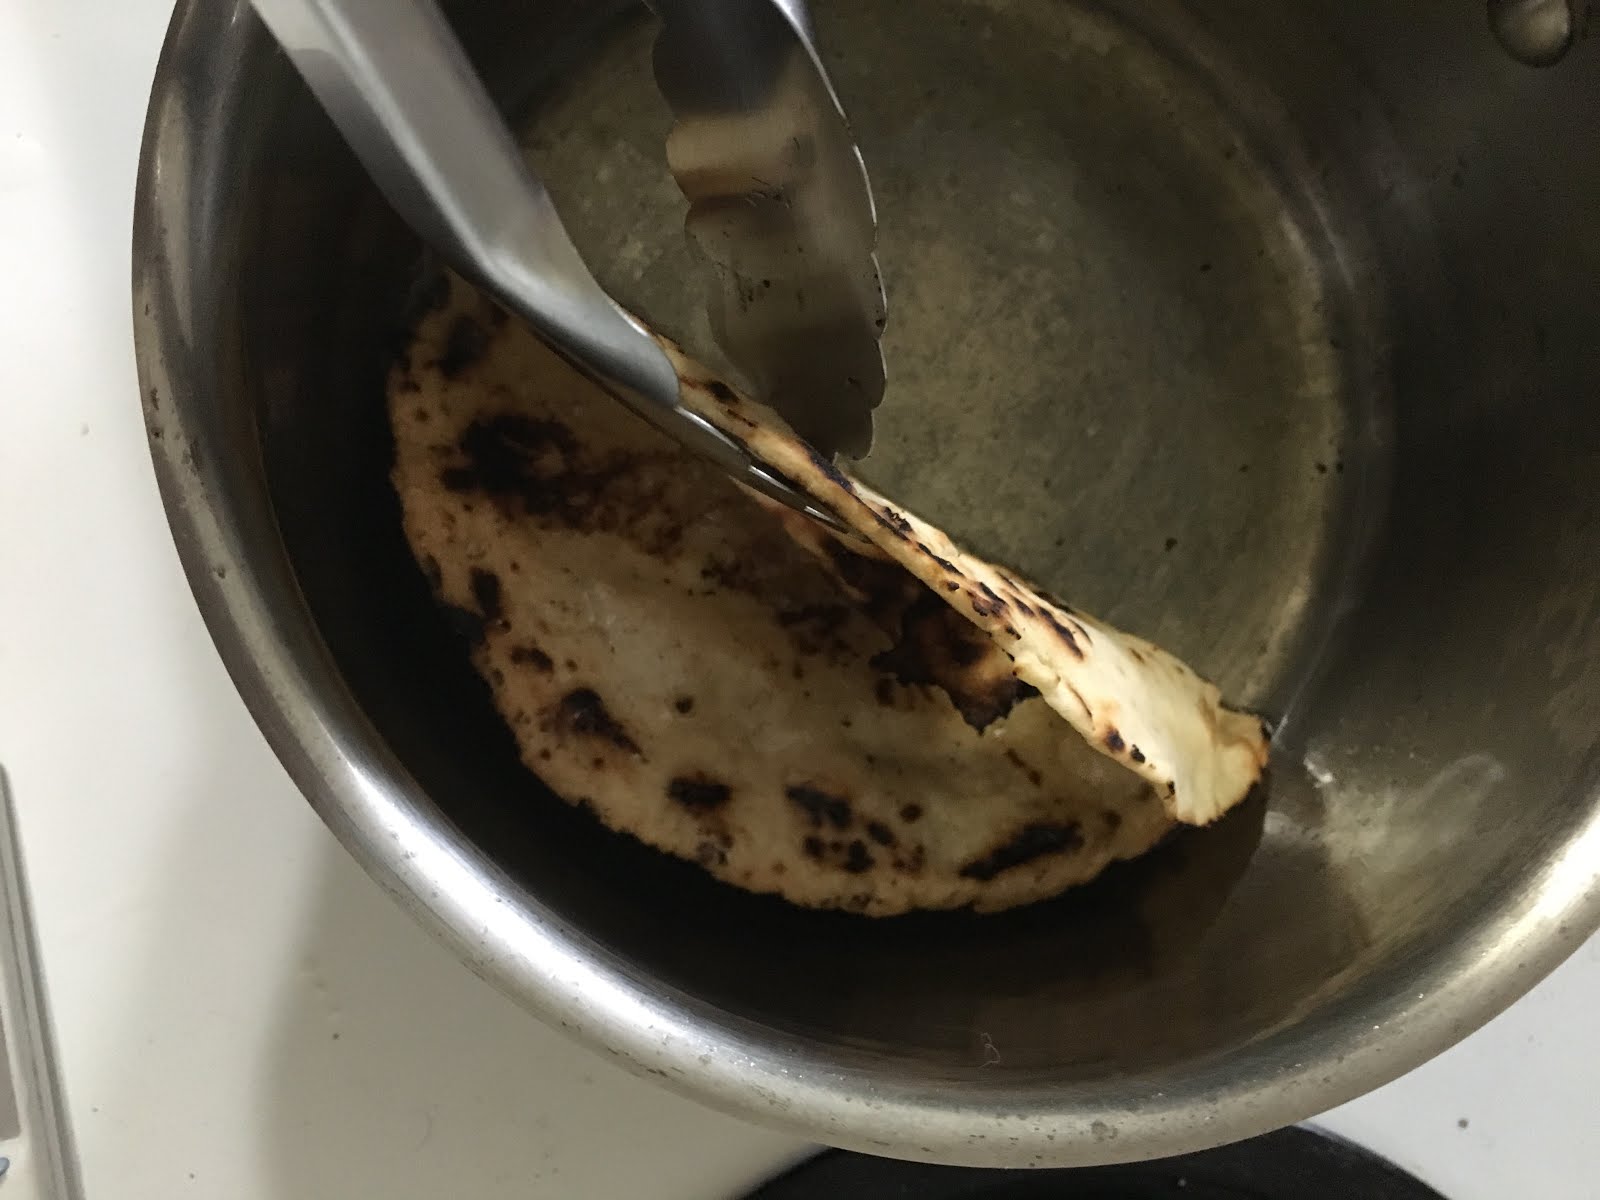
Using tongs, pick up a cooked tortilla, and lower it into the oil so that only half of it is frying. Using the a wooden spoon push down any big bubbles that form.
  18. Using the tongs, tun the tortilla 180 degrees, and fold so it’s shaped like a taco shell.
  19. Corn Tortillas are just amazing. The Subtle addition of Lime just makes them out of this world.
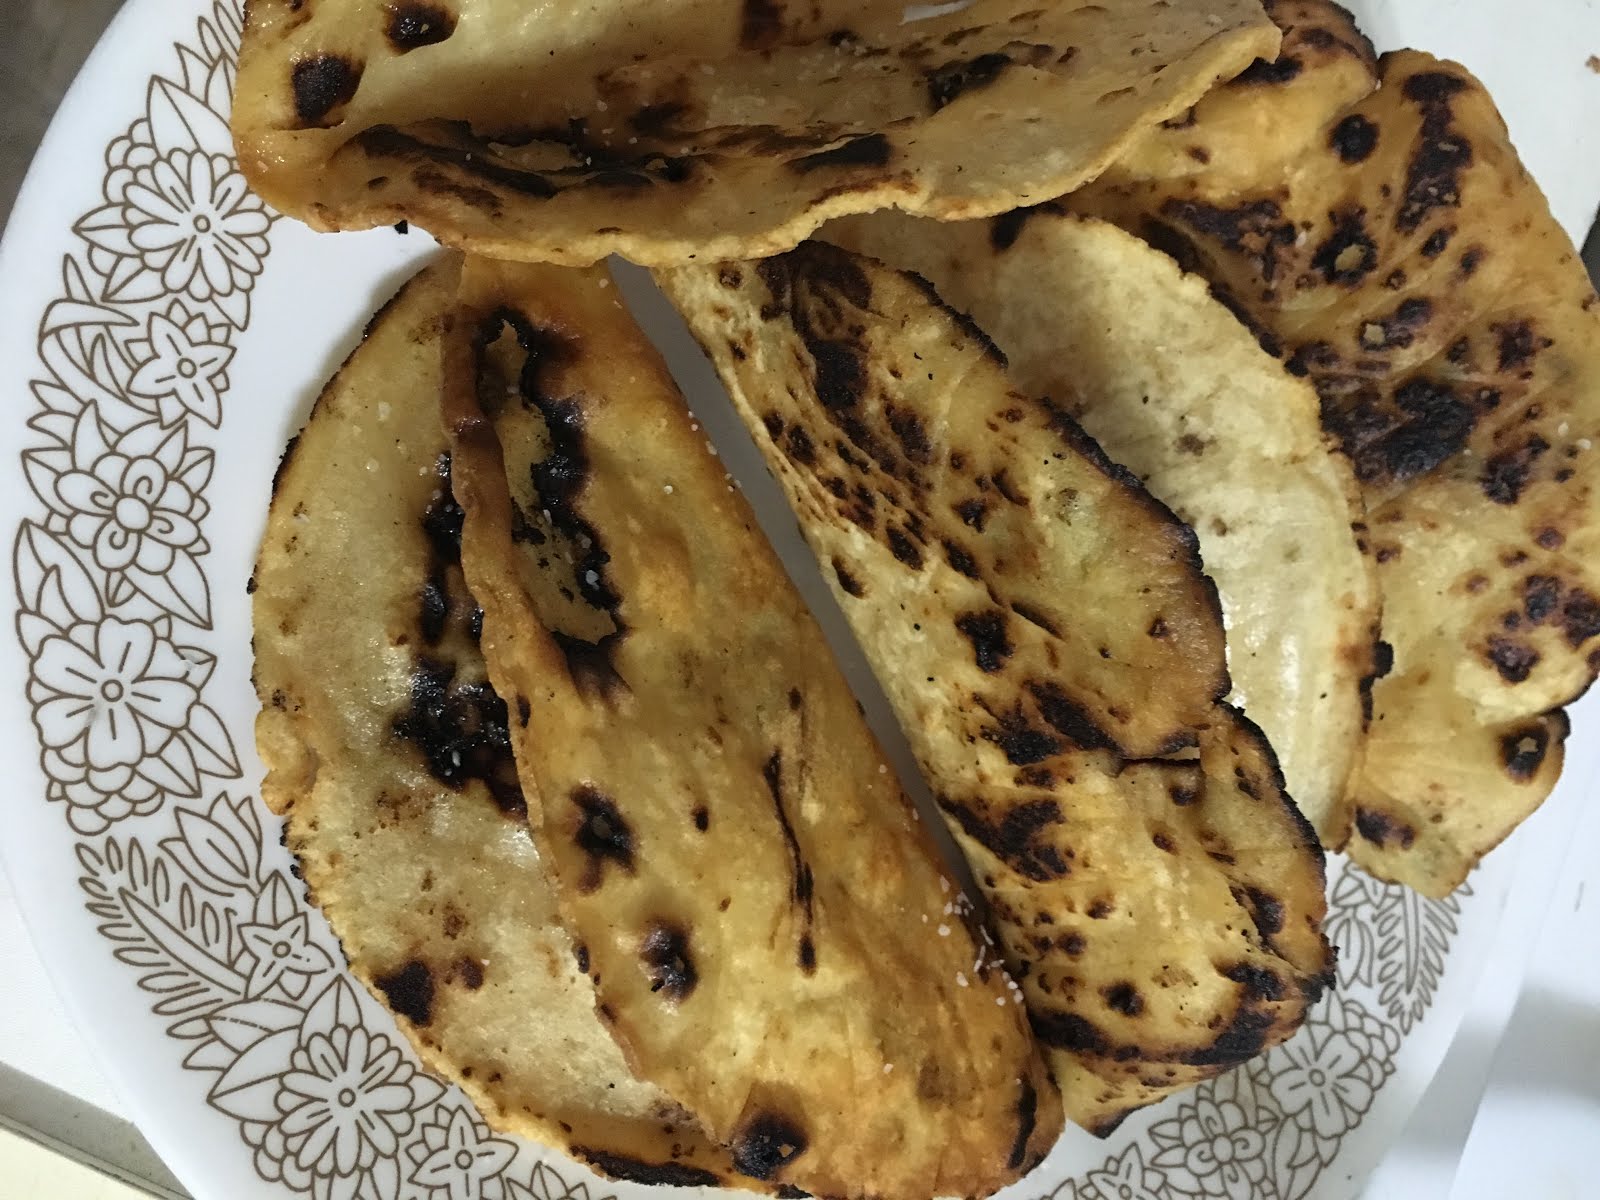
Once the shell holds its shape, move to the side and sprinkle with salt.

Next, the Pico de Gallo

  1. Dice up the Hot House Tomato and Red Onion into a 1/8″ cubes
  2. Cut the garlic into a Fine dice
  3. Juice Lime and set aside
  4. Mix the Tomatoes, Onions, Garlic in a large bowl
  5. Add Lime Juice, Salt and Pepper a little at a time until you’re happy with the taste. You want this to be slightly on the stronger side, because the other ingredients will slowly release liquid and water down the intensity.
  6. Put in fridge to chill, minimum an hour, ideally overnight.

Let’s not forget the Apple Slaw

  1. Place a damp tea towel in a circle shape on the counter, and place large mixing bowl on top. This will hold the bowl still while you’re working.
  2. Add Egg yolk, Dijon mustard and White Wine Vinegar into the large bowl, and whisk until you have a mixture that’s a solid colour.
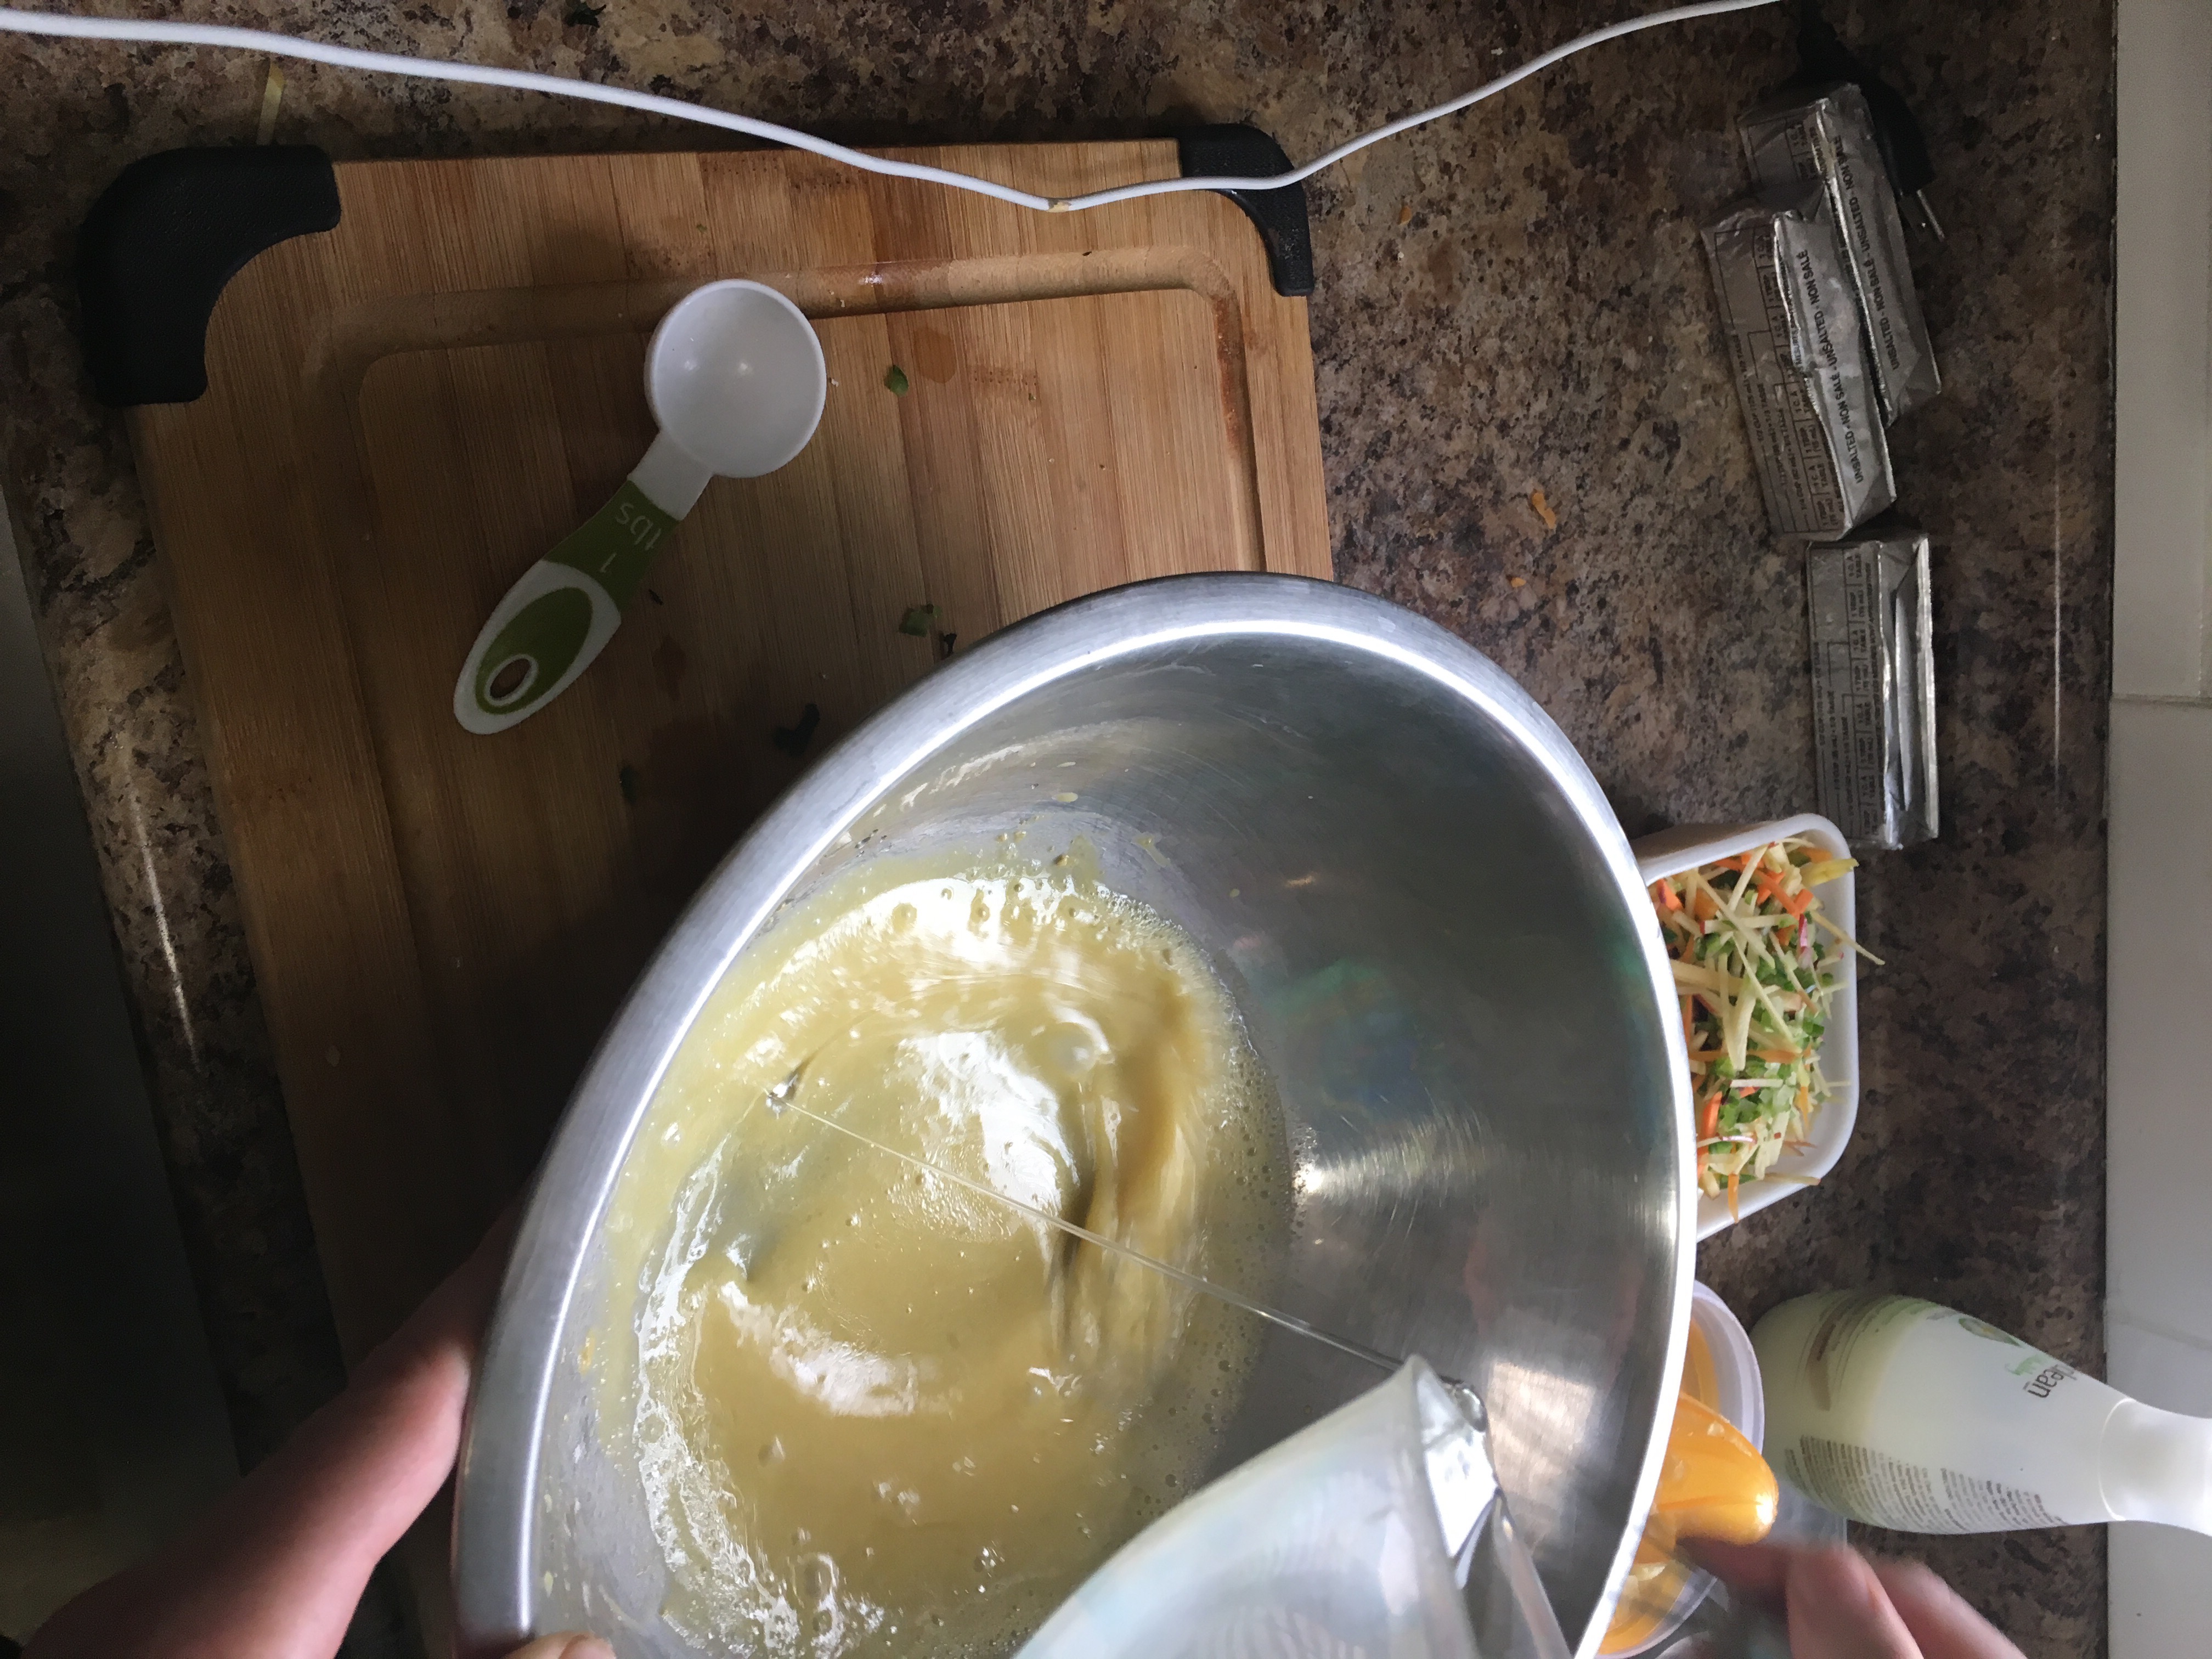
  3. Slowly add Canola Oil into mixture while whisking. The oil should emulsify into the mixture so you have a solid consistent dressing. You don’t want the mixture to break, so you’re better off adding it too slowly, than too fast.
  4. Hot House Tomato Sliced into rounds, then sticks then diced
    When about 3/4 of the oil is added, stop and add salt and pepper to taste. You will season again at the end, but this will better distribute the seasoning, and give you a bench mark of what it should taste like when you do your final seasoning.
  5. Add the rest of the oil while whisking just as before
  6. Once all the oil is added, taste and adjust for final seasoning.
  7. Put dressing into fridge until needed
  8. Apple Sliced the same way as the Tomato for the Pico de Gallo
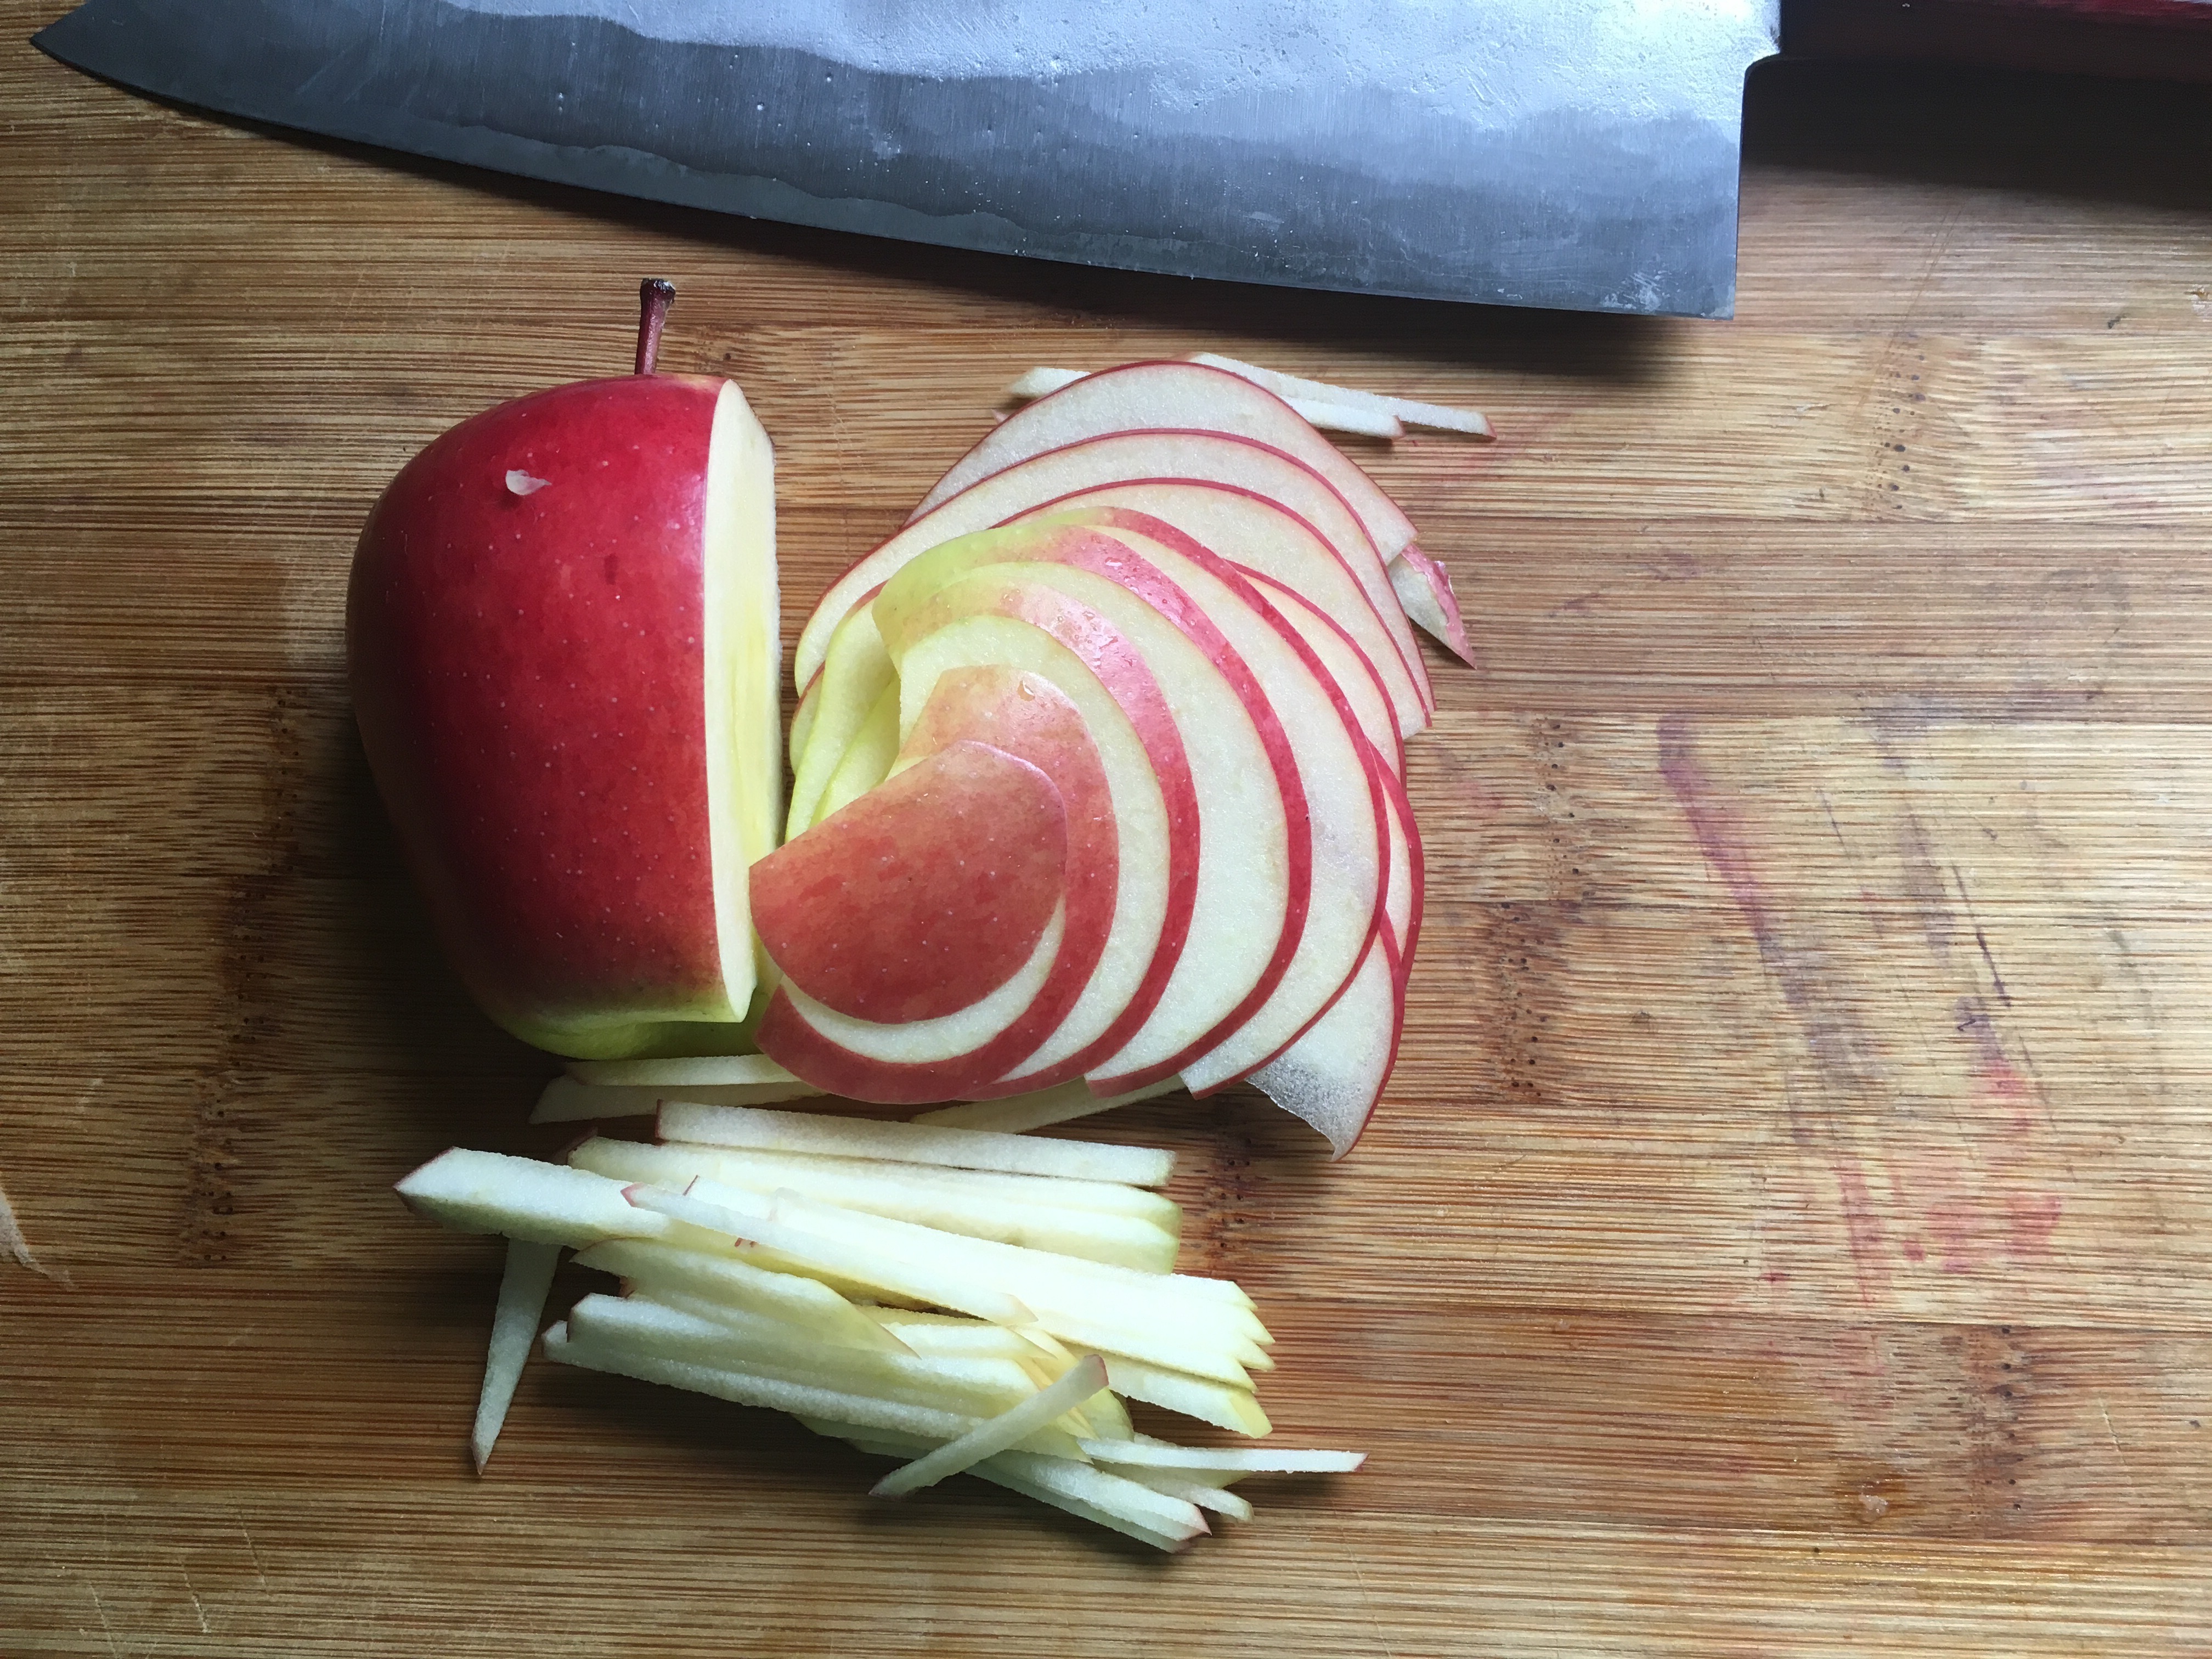
Apple Sliced the same way as the Tomato for the Pico de Gallo, into 1/8″ rounds, then cut into sticks. The apple should have a little bit of peel on both ends.
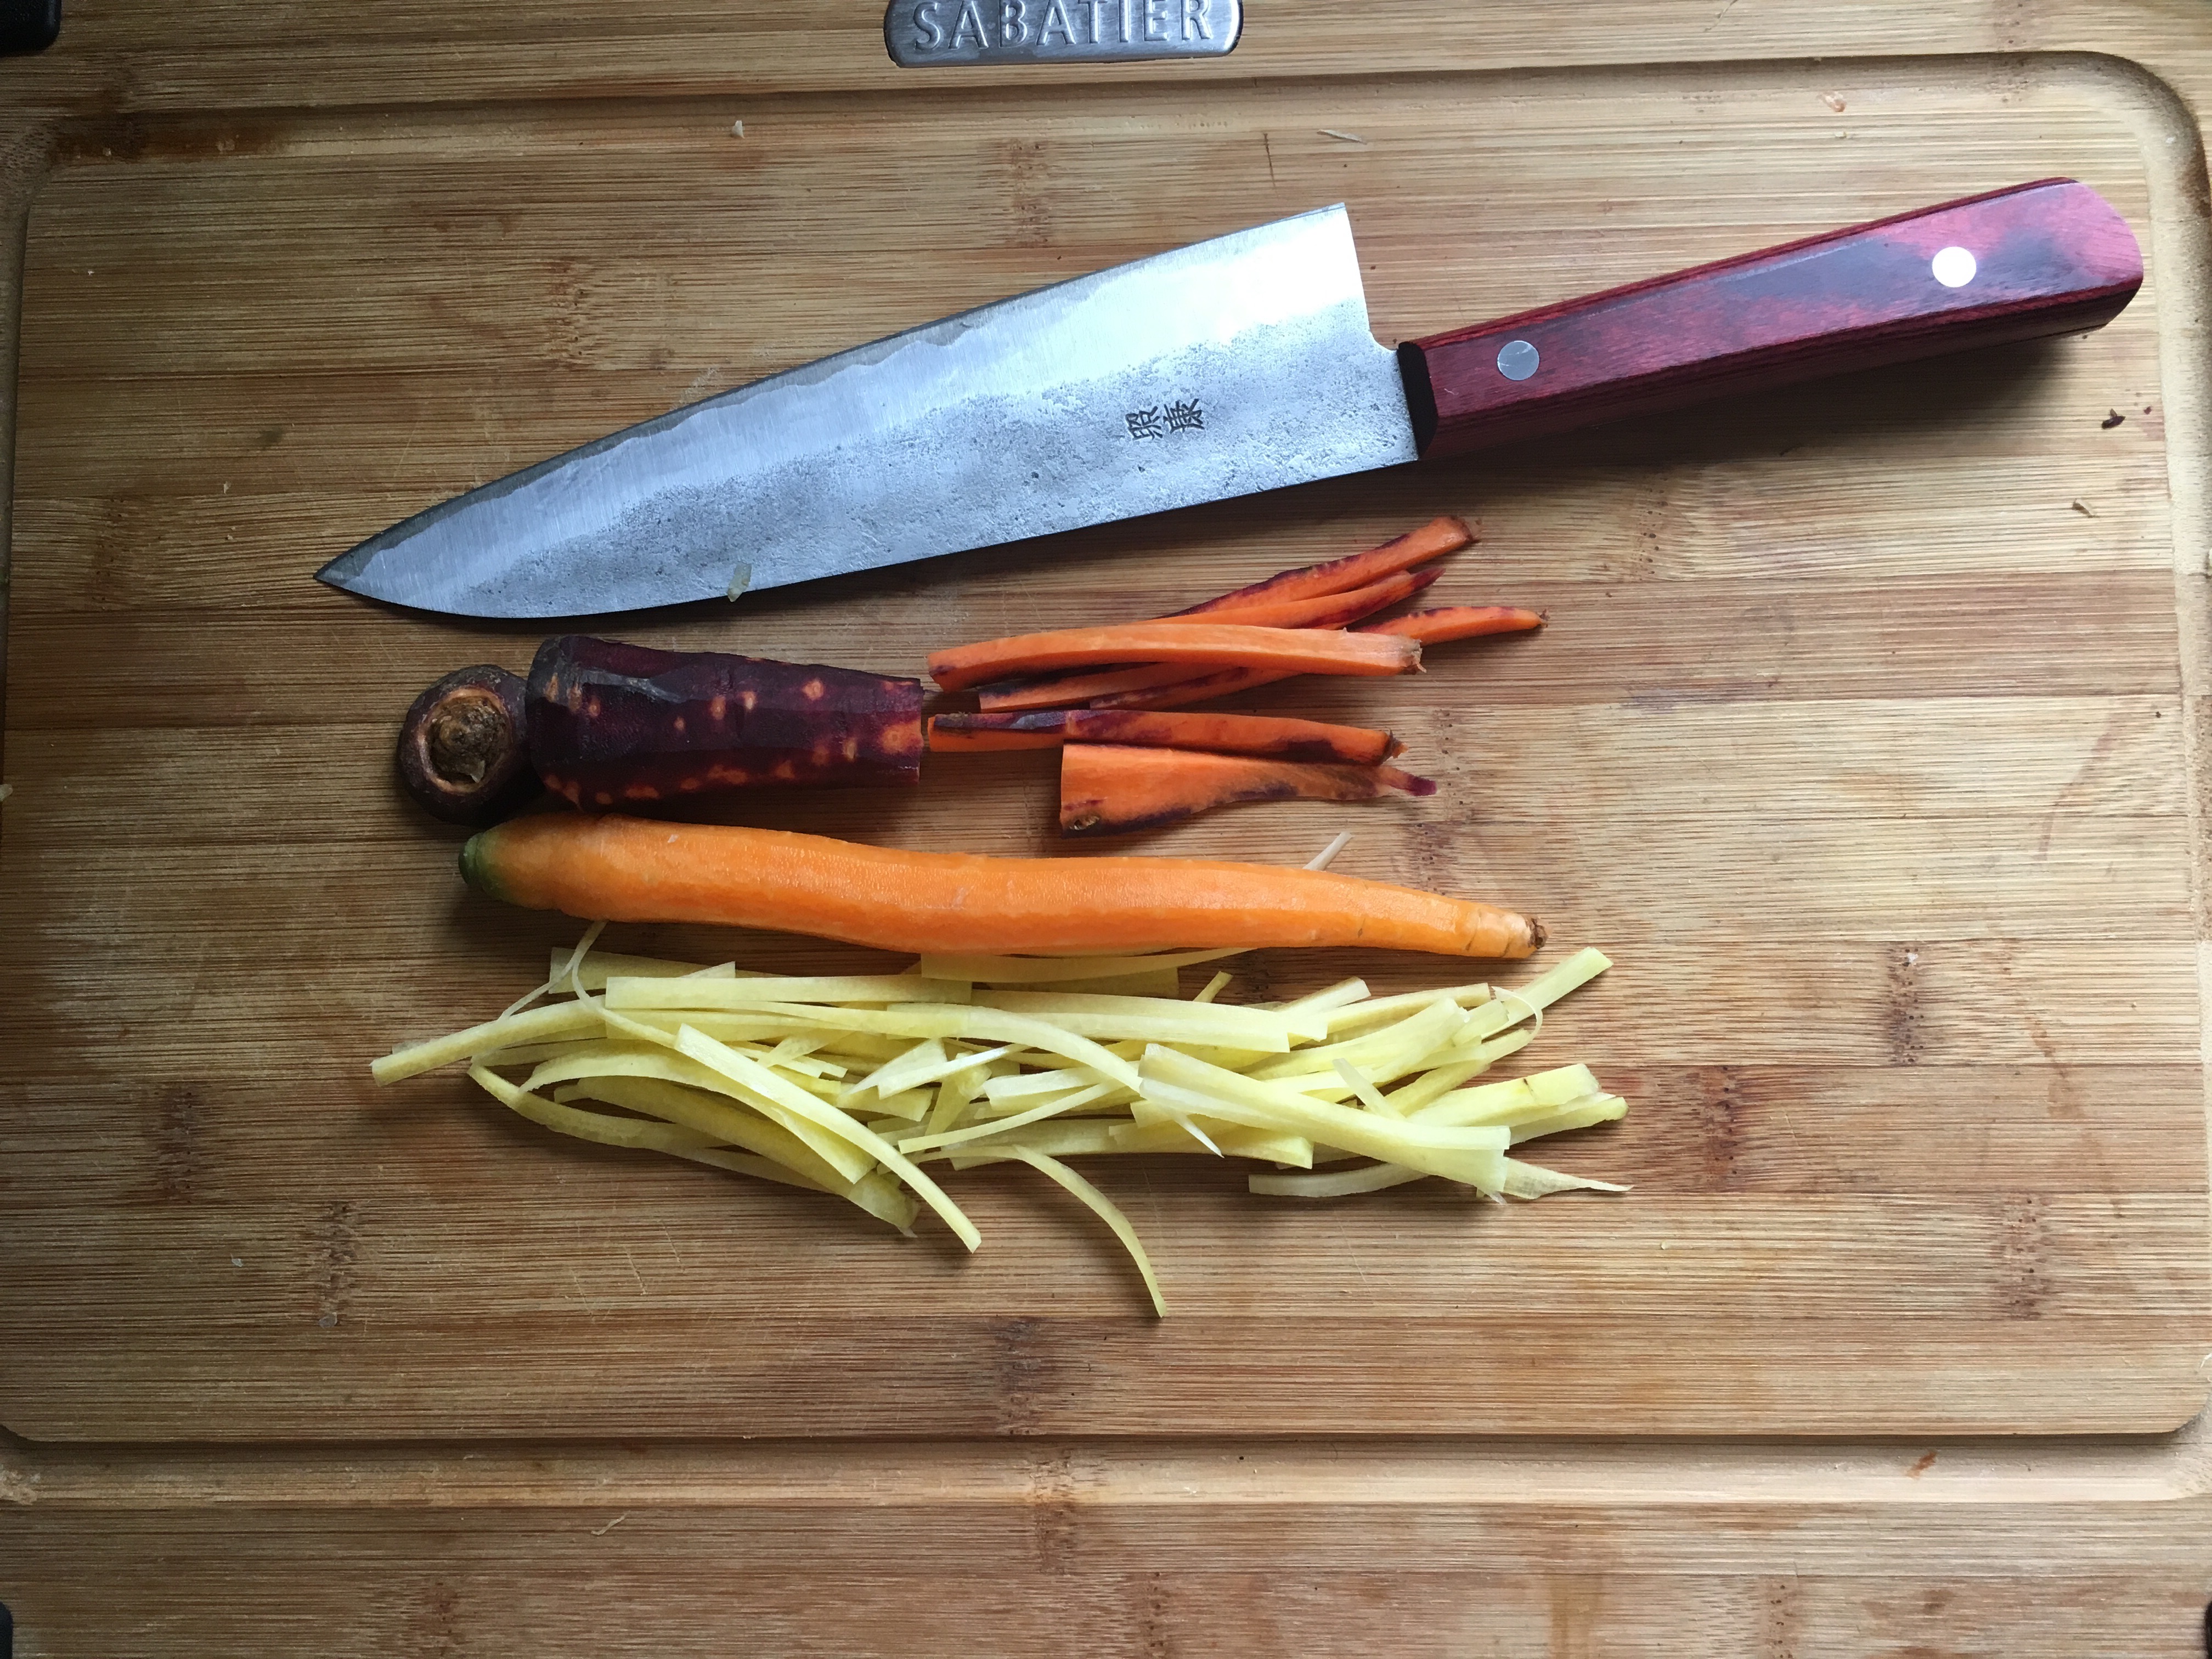
  9. Cut Carrots into 1/8″ by 3″ sticks by cutting them into half, then each half cut into strips, then each strip into sticks
  10. Mince Celery as thin as possible. They should be almost transparent.
  11. Jalapeño's get their heat from their seeds, So make sure to remove them if you don't want it too hot. 
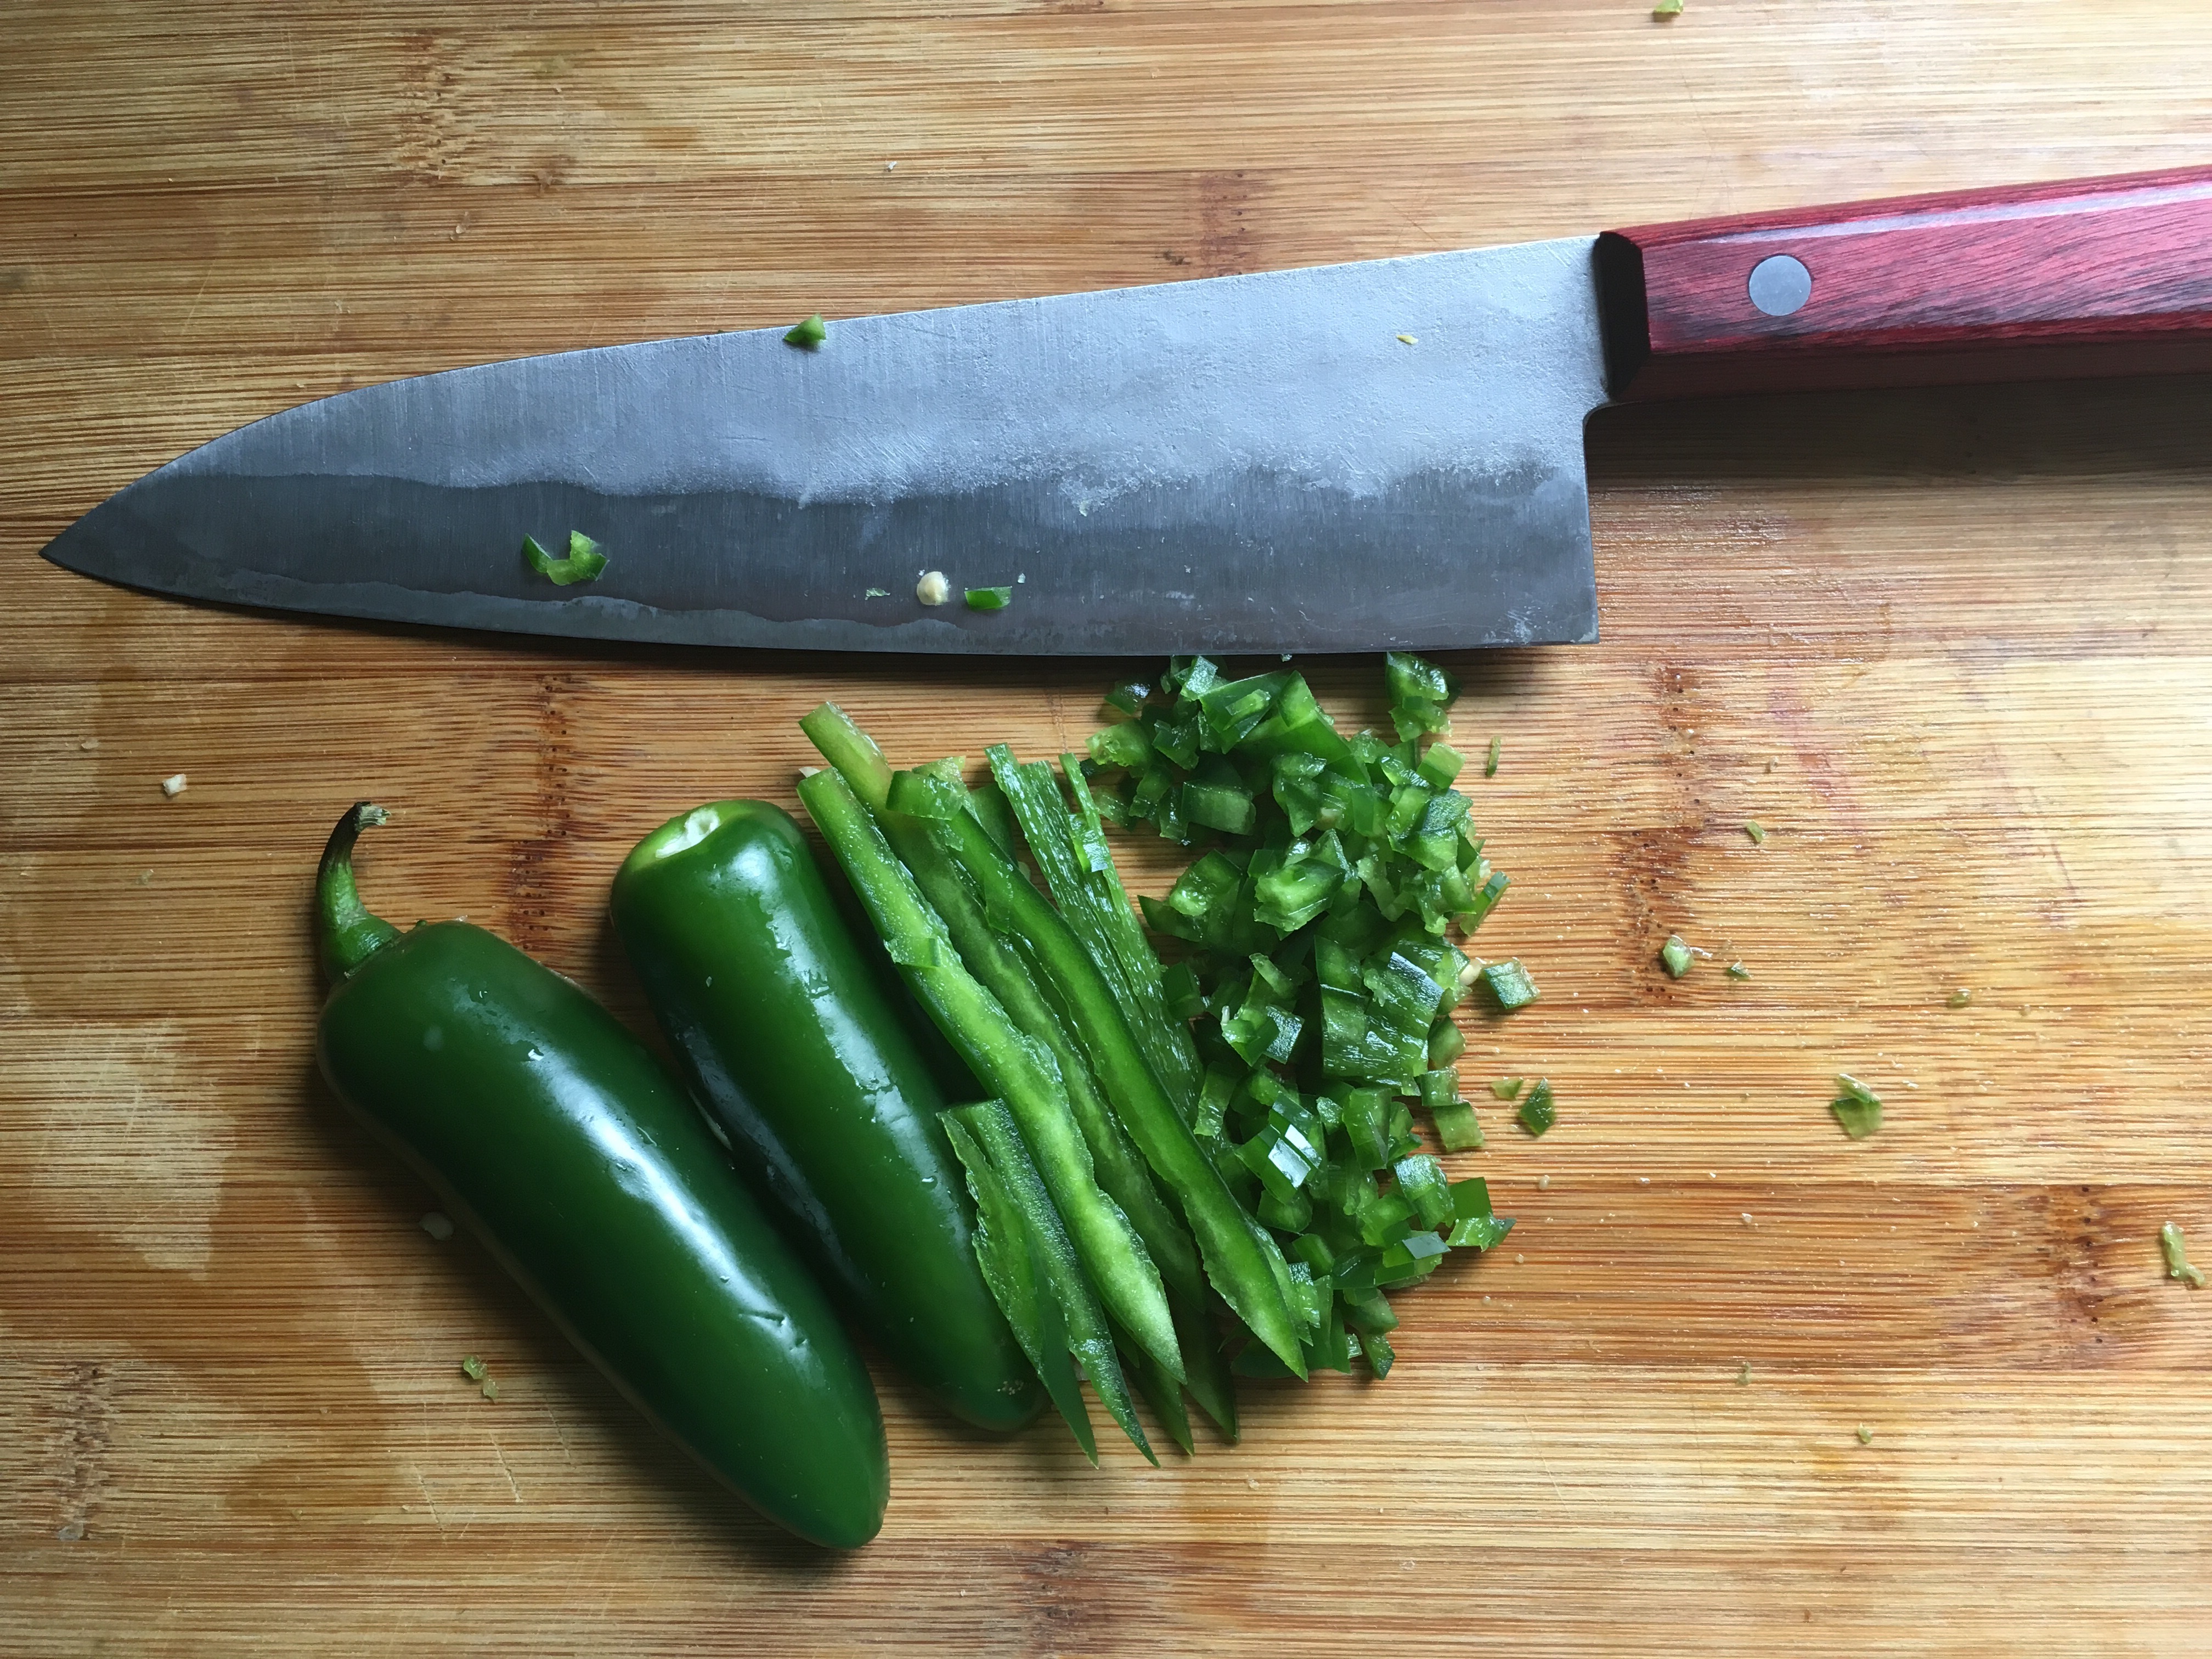
Dice the Yellow Onion and Jalapeño into 1/4″. Make sure to discard the seeds from the Jalapeño.
  12. Mix all the ingredients except the dressing into a mixing bowl, then add the dressing desired amount of dressing to the bowl. Place slaw covered in the fridge overnight. This will allow the dressing to break down the toughness, and give the flavours a chance to meld.

Finally. The last Mise En Place you will need, the Crispy Fish. Everything else could be done the day before, but this is the best when it done right before eating.

  1. Mix together Chili powder, paprika,  Cumin, Cayenne, Onion Powde and Garlic Powder into a small bowl.
  2. Cut the Haddock into strips, 1/2″ by 3″ and lay out on a cutting board or baking sheet.
  3. The Measurements are all approximate. As you can see the one on the far left was a thinner piece, so I cut it wider to make up for it.
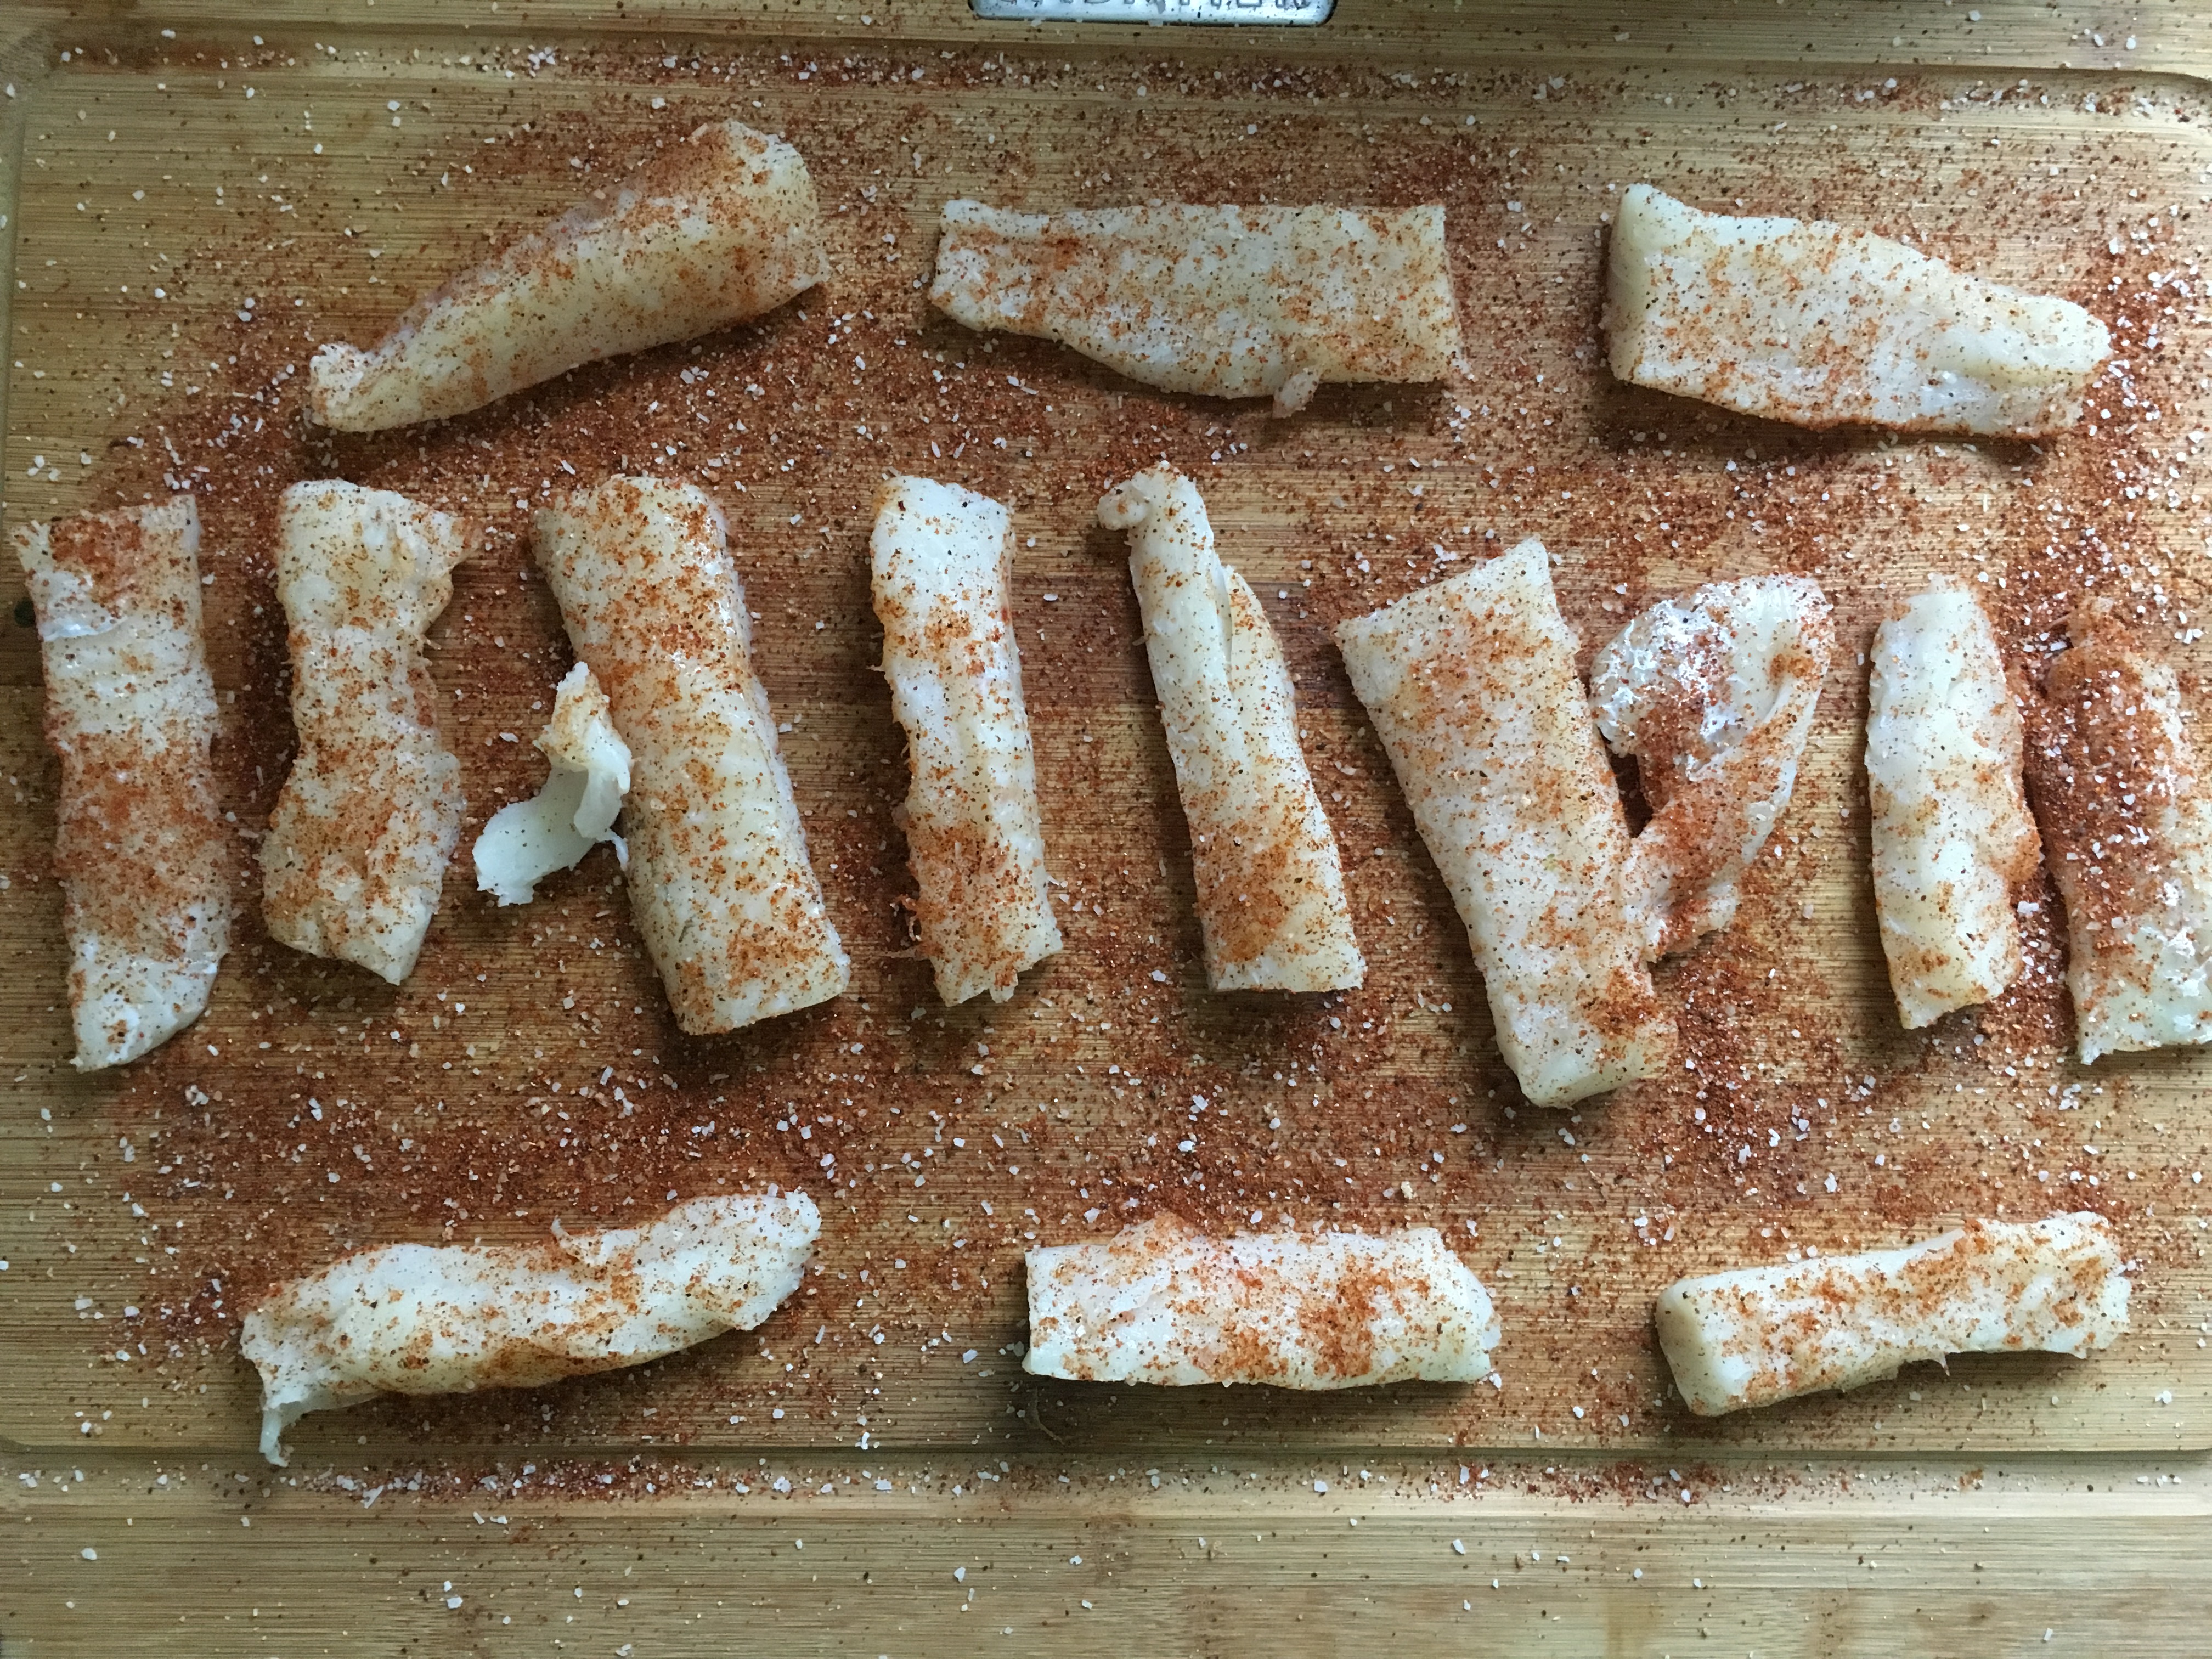
Cover Haddock strips with spice mixture on all sides evenly and liberally. Set aside until needed.
  1. In a small bowl mix together Bread Flour, Corn Starch and Baking Powder.
  2. Fill up a pot or frying pan about 1/4″ with canola or peanut oil. If your using a frying pan, make sure you choose one that has sides that are a least double the height of the oil. Put it on a burner at medium heat and let it heat up to 400 degrees Fahrenheit.
  3. Whisk flour mixture and slowly add rum until batter reaches a amber colour. It should be noted that I had just a little less than enough rum on hand when I took the photos. Ideally my batter would have been darker; however I did get to do my impression of Jack Sparrow saying ‘But why is all the Rum Gone?’
  4. Whisk in water until batter is the right consistency. You’re looking for a viscosity similar to whipping cream.
  5. Lay each piece of seasoned Haddock into the batter, making sure the Haddock is completely covered. Remove the Haddock from the batter and let the extra batter drip off, and place on a wire rack.
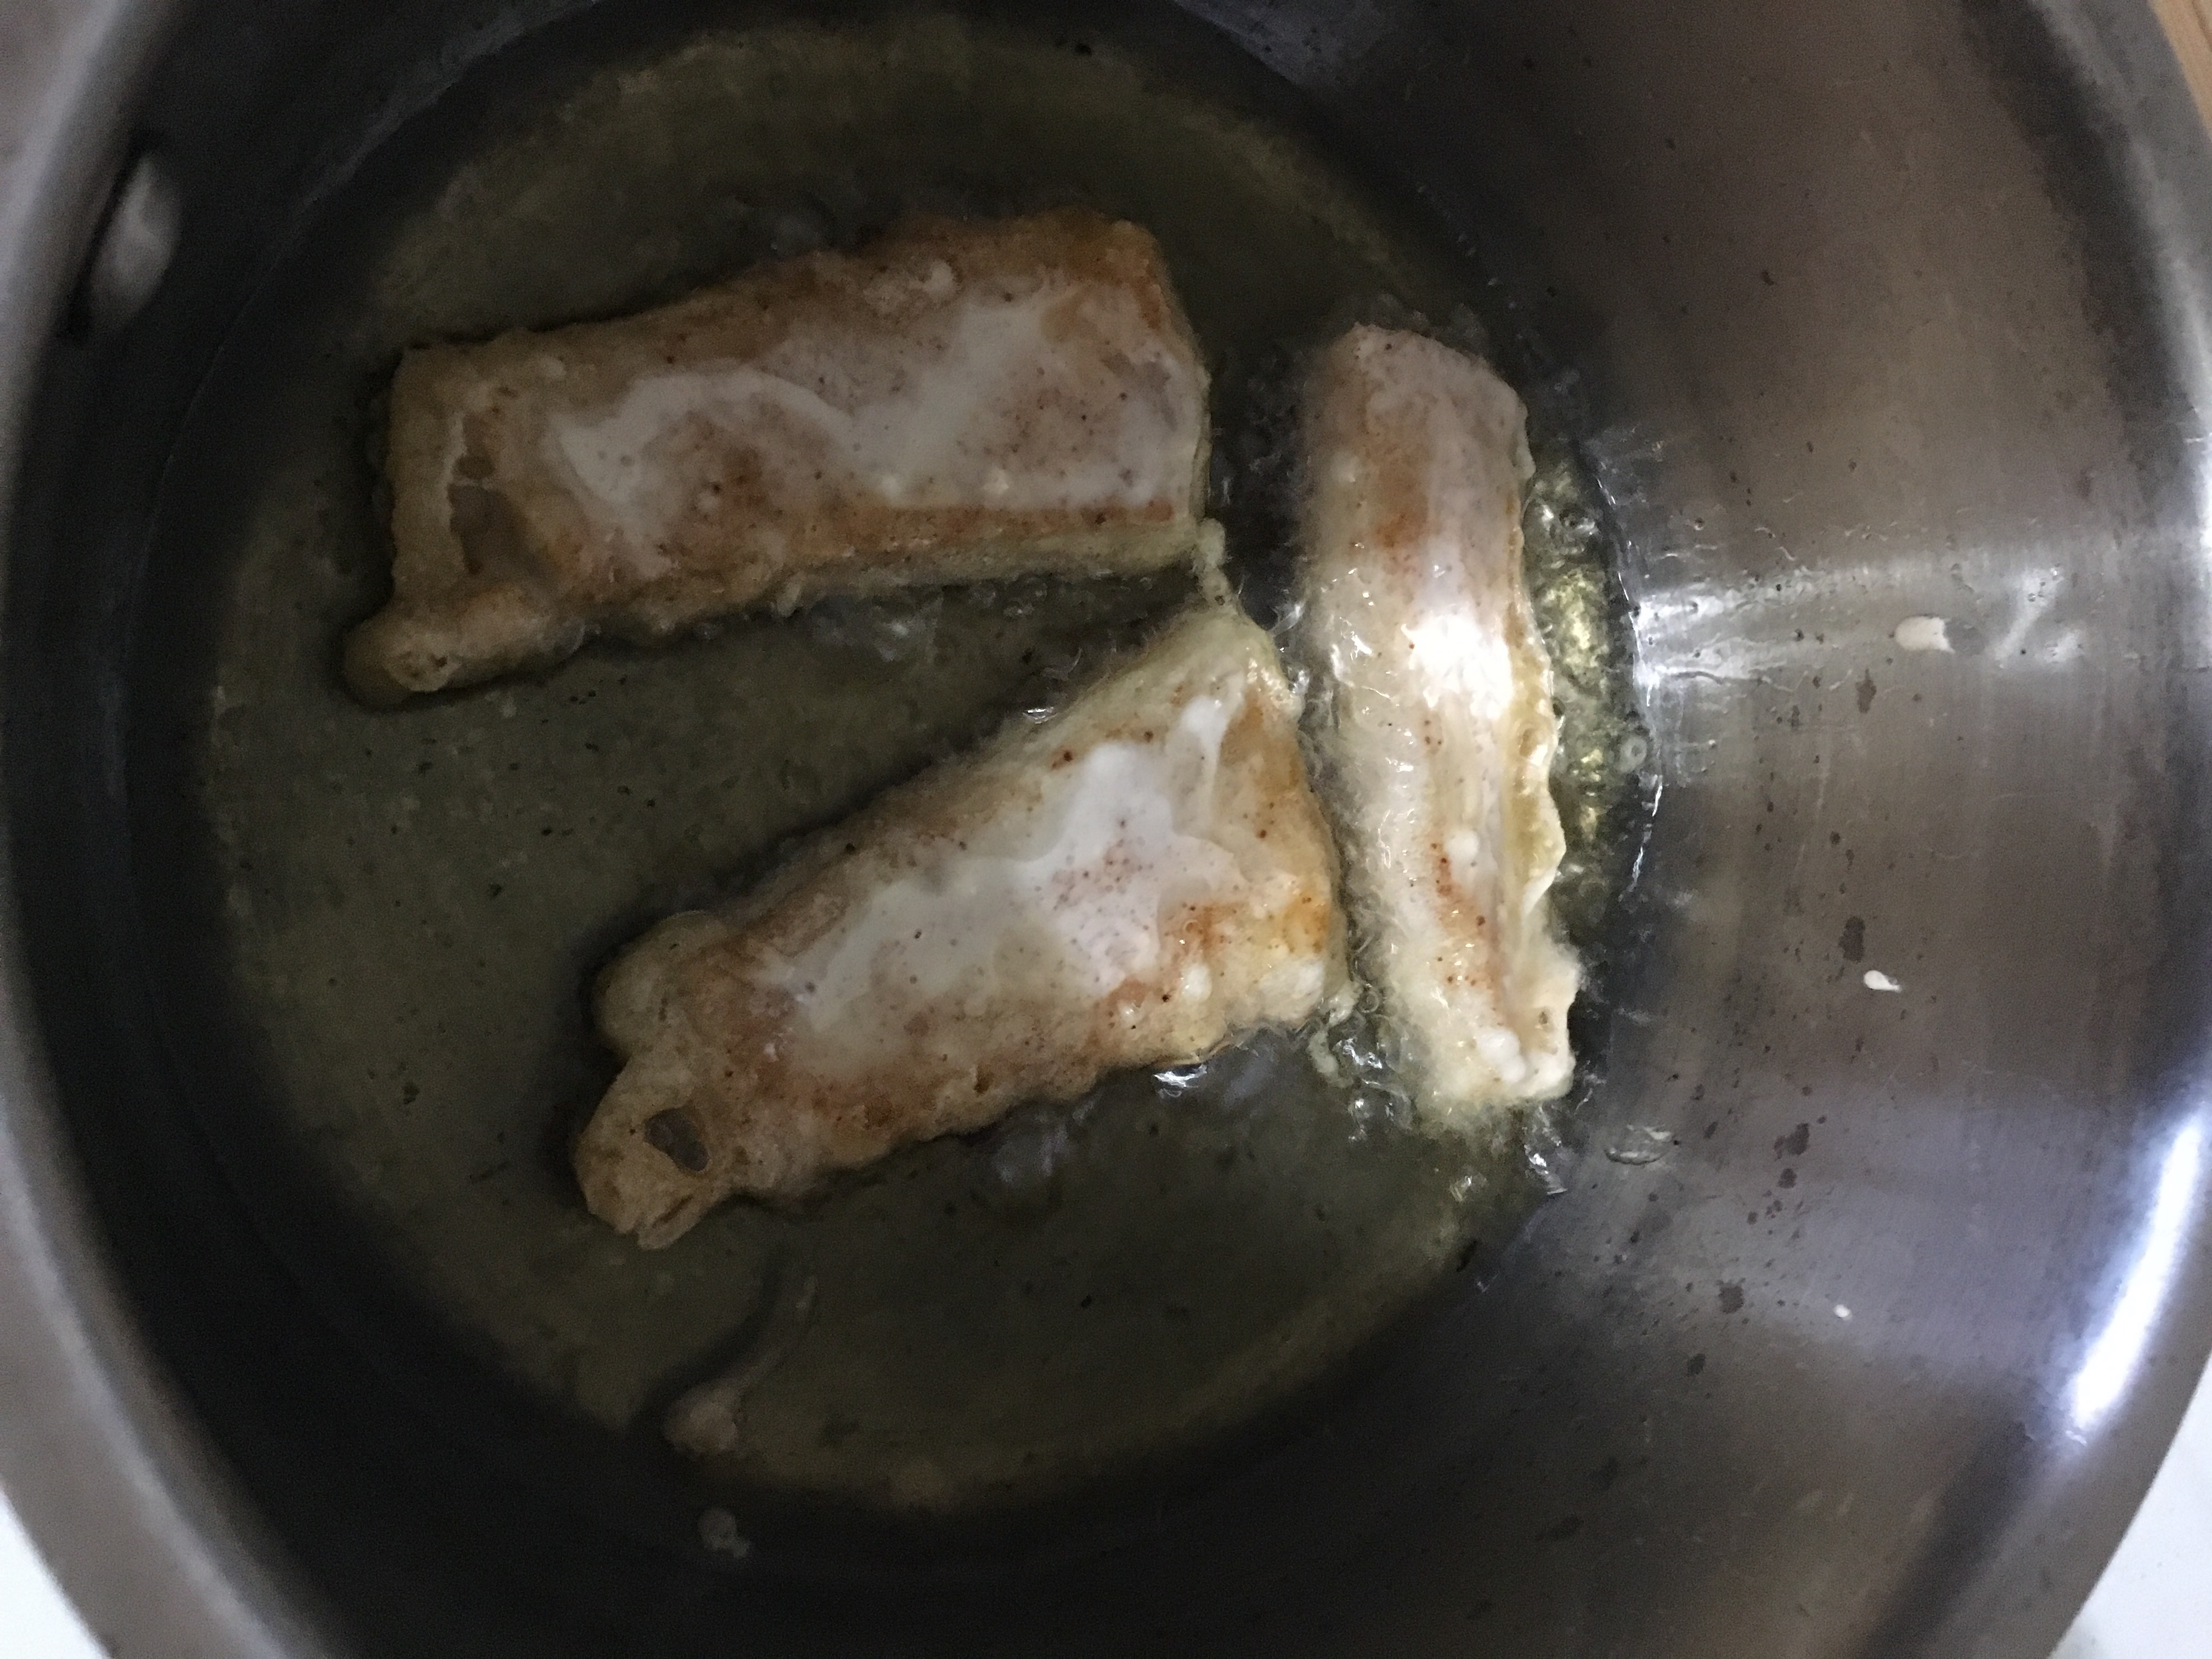
  6. Place two or three pieces of the batter covered Haddock into the hot oil and let it cook, make sure to turn over when the bottom is golden brown. Once the second side is cooked, remove the fish and place on paper towel covered plate and sprinkle lightly with Salt.
  7. Repeat step 6 until all the Haddock is cooked

And the final assembly!

  1. Generously place Apple Slaw in your taco shell
  2. Place two pieces of the Crispy Haddock on top of the Apple Slaw
  3. And a thin layer of Pico de Gallo on top of the Crispy Haddock
  4. Finally Top the whole thing with an Avocado wedge
  5. Take a fancy photo, and post it to Instagram with the hashtag #foryourfoulmouth
*sources http://www.sunset.com/food-wine/flavors-of-the-west/in-search-real-fish-taco, https://en.m.wikipedia.org/wiki/Taco (I generally don’t like wiki as a source, but it had citations)

What to do if you CAN handle the heat: how to find a job in a kitchen.

Over my 3 years working in kitchens, I’ve learned a few things about how they work, and who they hire. Most people hate finding a new job, but I always thought it was the best part of losing/leaving your old one. There is so much possibility, and so much opportunity for you to leave a good impression with influential people in the industry.

So here are my tips on how to find a job in a kitchen:

1. Make a list

I always start my search with a list of the places I want to work. I emphasize want, because enthusiasm and honesty is going to be a common theme. It’s important that your list be filled with places you picked purposefully. By that I mean, there is a reason that that place legitimately attracts you to want to work there… Whether it be the reputation of the head chef, or the style of cuisine, it’s important that the idea of joining the kitchen excites you. The other thing to remember is geography. Before I apply anywhere, I like to figure out how accessible it is for me. Nothing is worse than getting a job, then figuring out you can’t make your shifts due to accessibility. So once I have my list, I organize them by area, because that information will be the same for all the neighbouring restaurants. Where I am working now isn’t that close to me, however it isn’t horrible by bike, and the bus gets me there on time, even on holiday and weekend schedules. This sounds like a lot of work, but it isn’t. I spend maybe 30 mins putting this together. Usually I pick the top three places I’d love to work, then pick the rest of my list based on those locations (later on this list, I’ll get into more detail about why I do it this way). This shouldn’t be a long list, 3-10 places is ideal.

2. Make a friend.

Knowing what you’re walking into is always important, making a friend who works there is always a good idea. I always call these places in advance. The goal here is not to apply but rather get 3 basic pieces of information. (1) Who is the chef/kitchen manager, (2) What time they work, and (3) If the person I’m talking to likes their job. That’s it. The people answering the phones are hired to be helpful. That being said, remember whoever you’re speaking to owes you nothing. So be pleasant, acknowledge you’re looking for help, and make sure to thank them. Quite often, a little respect will go along way! These phone calls work best during off hours. I tend to call restaurants between 1:30-4. It’s in between rushes, and they are less likely to cut your conversation short. If you’re dream job happens to be at a hotel kitchen, even better. Call after 9pm. The person who works the front desk has all the information you’re looking for, and is not dealing with a lot of customers.

3. Avoid applying online, at first, especially job sites.

Most places don’t advertise they are looking, and a lot will hire a good worker even if they are not looking. I always glance at these sites, just to see what the job market looks like. If you apply online, you’re missing out on the chance to show your passion for the job. I have applied online before; but almost always after I met the person in charge of hiring before hand. It puts me in a situation where my resume will stand out, and if I left a good enough impression, they will seek my resume out immediately. This is how I got my current job, I walked in, and met the chef. He took my resume and said he would set up an interview as soon as I applied online. There have been a few situations where I apply before, but I always go in and try to meet the person in charge of hiring afterwords. Nothing can replace a handshake and a smile. And that’s what I usually tell them. Which brings me to my next point

4. Apply in person!

You have your list! Since you organized your list well, all the places are close to each other, you now know who you need to speak to, and when they are working…. you have everything you need. So go do it. When you walk into a restaurant and ask for the chef or kitchen manager by name, most people don’t ask too many questions. They assume you have a legitimate reason for coming in, which you do. If they do ask why you’re in, tell them the truth. ‘I am hoping to join the team; I understand he’s the person to talk to’. There will be times where the chef/kitchen manager is too busy to meet with you. You might get told to leave your resume or apply online, and you should do exactly that, but before you leave, ask when is a better time to catch him/her, then come back with an extra copy of your resume at that time. Let that person know you just wanted to make sure he got it, and that you had a chance to match a face with the name. I always bring a few extra copies of my resume. This is in case I walk by a restaurant I didn’t know about, and want to apply on a whim. Applying on a whim is done the same way! Simply ask the person at the front the same questions you would have if you’d called. Sometimes you’ll get lucky, and the chef/kitchen manager will come out right away. Just to drive the point home, which is how I got my current job!

5. Ask for an interview as soon as the opportunity arises

This is crucial. Don’t put yourself in a position where you’re waiting for calls. As my last point illustrated, as soon as you have made contact with that person, and have explained why you’re there; ask for an interview. ‘Do you have time to sit down and see if I’d be a good fit’, or even ‘when can I come back for an interview’.

6. What to do and say when you get the interview

This is the easiest advice I can give you. Always tell them the truth. If you’re inexperienced, tell them. Much better they know you need training before hand, and a lot of chefs will see that as an opportunity to teach you good habits. If you’re just looking for work during the summer, before you go back to school, tell them. I have been told I’m a great interview, and I attribute it to the fact I’m upfront and honest. Another thing I always make sure, is that at the end of the interview, I ask two very important questions: How did I do, and, when can I expect to hear back from you.

7. Follow up

I can’t stress this enough. Running a restaurant is hard work. You’re not the first thing on their mind. Phone numbers get lost, and people get distracted. If you have followed my instructions thus far, you should have one or two restaurants that have either given you an interview, or told when would be a better time to apply. Either way, you should have a timeline of when you should contact them again. These calls are often as valuable as past work experiences. Remember, if you don’t get the job, you now have nothing to lose! I ask questions, and if there is anyway I could have improved my chances. If there was any experience I was lacking, or any skills I could improve. Finally, I ask if in the future any of those change, can I apply again. I promise you, it will be worth it.

8. If you can’t handle the heat; stay out of the kitchen.

I want to work in a kitchen. Kitchen work is hard work, crap hours with low pay. The only benefit for me is that I love doing it. There are lots of jobs that pay the same or more and give better hours.
Hopefully this helps. I know it seems like a lot more work than simply applying to all of the jobs on Monster.com or Indeed, but remember, that’s how everyone else applies. A lot of these places get more applications than they can handle. So you’re gambling they will open your application before making a decision. Taking the time to help yourself stand out, and show you’re passionate, will increase your chances of having the employer look for you!

It started with a FIRE!

It was a cold day in January.  I was sitting at my desk reading my favourite food blog to see if Chef John had any new recipes for me to try when I got home. It was a slow day at the dealership, and I thought I was in for a “good” long 8 hour shift of sitting in a customer-less car dealership. That’s when my two managers pulled me aside to talk to me. “It’s not working out, we’re letting you go” they said. “It’s not?” I asked. I found this confusing seeing as I was only in the job for two months, and I was sitting well on the sales board. “What could I have done differently?” I asked. “This just isn’t for you” was all they replied. It was so weird to me, but in hindsight I wasn’t happy there, and maybe they knew. I then had to pack up my stuff, and make the walk of shame to my car… in the cold… which was in the back of the lot. I remember getting into my car, and sitting in the front seat. I knew there was a competing dealership that was willing to hire me on the spot if I went and applied. However, that’s when it hit me: “I want to be a chef”. I spent my days looking up recipes, my nights cooking, and my free time talking about food. I loved to cook and bake, and I loved finding something I couldn’t do, and becoming a pro at it. That’s when I decided to drive home, alter my resume and start working towards becoming a chef. That was just over 3 years ago. Since then I have accomplished so much!For most cooking is a hobby, to others it seems like witchcraft, and to a few unlucky souls, it’s just a pay cheque. I often look back at that cold day, and think about how I got fired, and how awful my life might have been if I had not been. For me cooking is pure happiness.

Which brings me here. I decided to share my insights, and opinions on what it’s like to be a cook on his way to becoming a chef. I am hoping to fill this blog up with reviews, recipes, and short writings. Hopefully you’ll join me for the ride!