What is it about the rain that makes us put things off? I mean, people change around their whole day just to avoid a 5 minute walk to the car because they might get a little wet. Even the very expression we use to cancel plans is called a ‘rain cheque’, it’s kind of ridiculous when you think about it.
I bring this up because the other day I decided I wasn’t going to let the weather get in the way of my plans. This started when my roommate and I were shopping. I saw baby back ribs where on sale, and since the few days prior to that were beautiful, I thought I would pick them up and possibly smoke them. It had been a while since I made ribs and my mouth was watering just thinking about it. I popped them into my cart, and got on with my life. Then the rain came, and when it rains, it pours for 3 days! The swine gods had sought to cancel my plans to enjoys sweet fall off the baby back ribs… and I was having none of it. Ribs were only good for a few days in the fridge, and I wasn’t about to freeze them indefinitely until the clouds parted.
The way I saw it, I had 3 options:
- BBQ in the rain
- Use liquid smoke and other methods to simulate the flavour of BBQ in an oven.
- Change my plans to best fit the situation, and braise my ribs.
Since my smoker is homemade and electric, I didn’t feel using it in the rain was a good idea. I also am not a fan of liquid smoke, since it feels like aiming for second place. Oven roasted ribs bring so much possibilities, and once I’ve got the oven ready, why use it in a way where it less than shines? So braising it is!
My roommate is not a fan of cooked tomatoes, and a big fan of Asian food. So I decided instead of cooking like down south, I’d aim for the Far East, and use things like ginger, soy sauce and oranges to braise the baby back ribs.
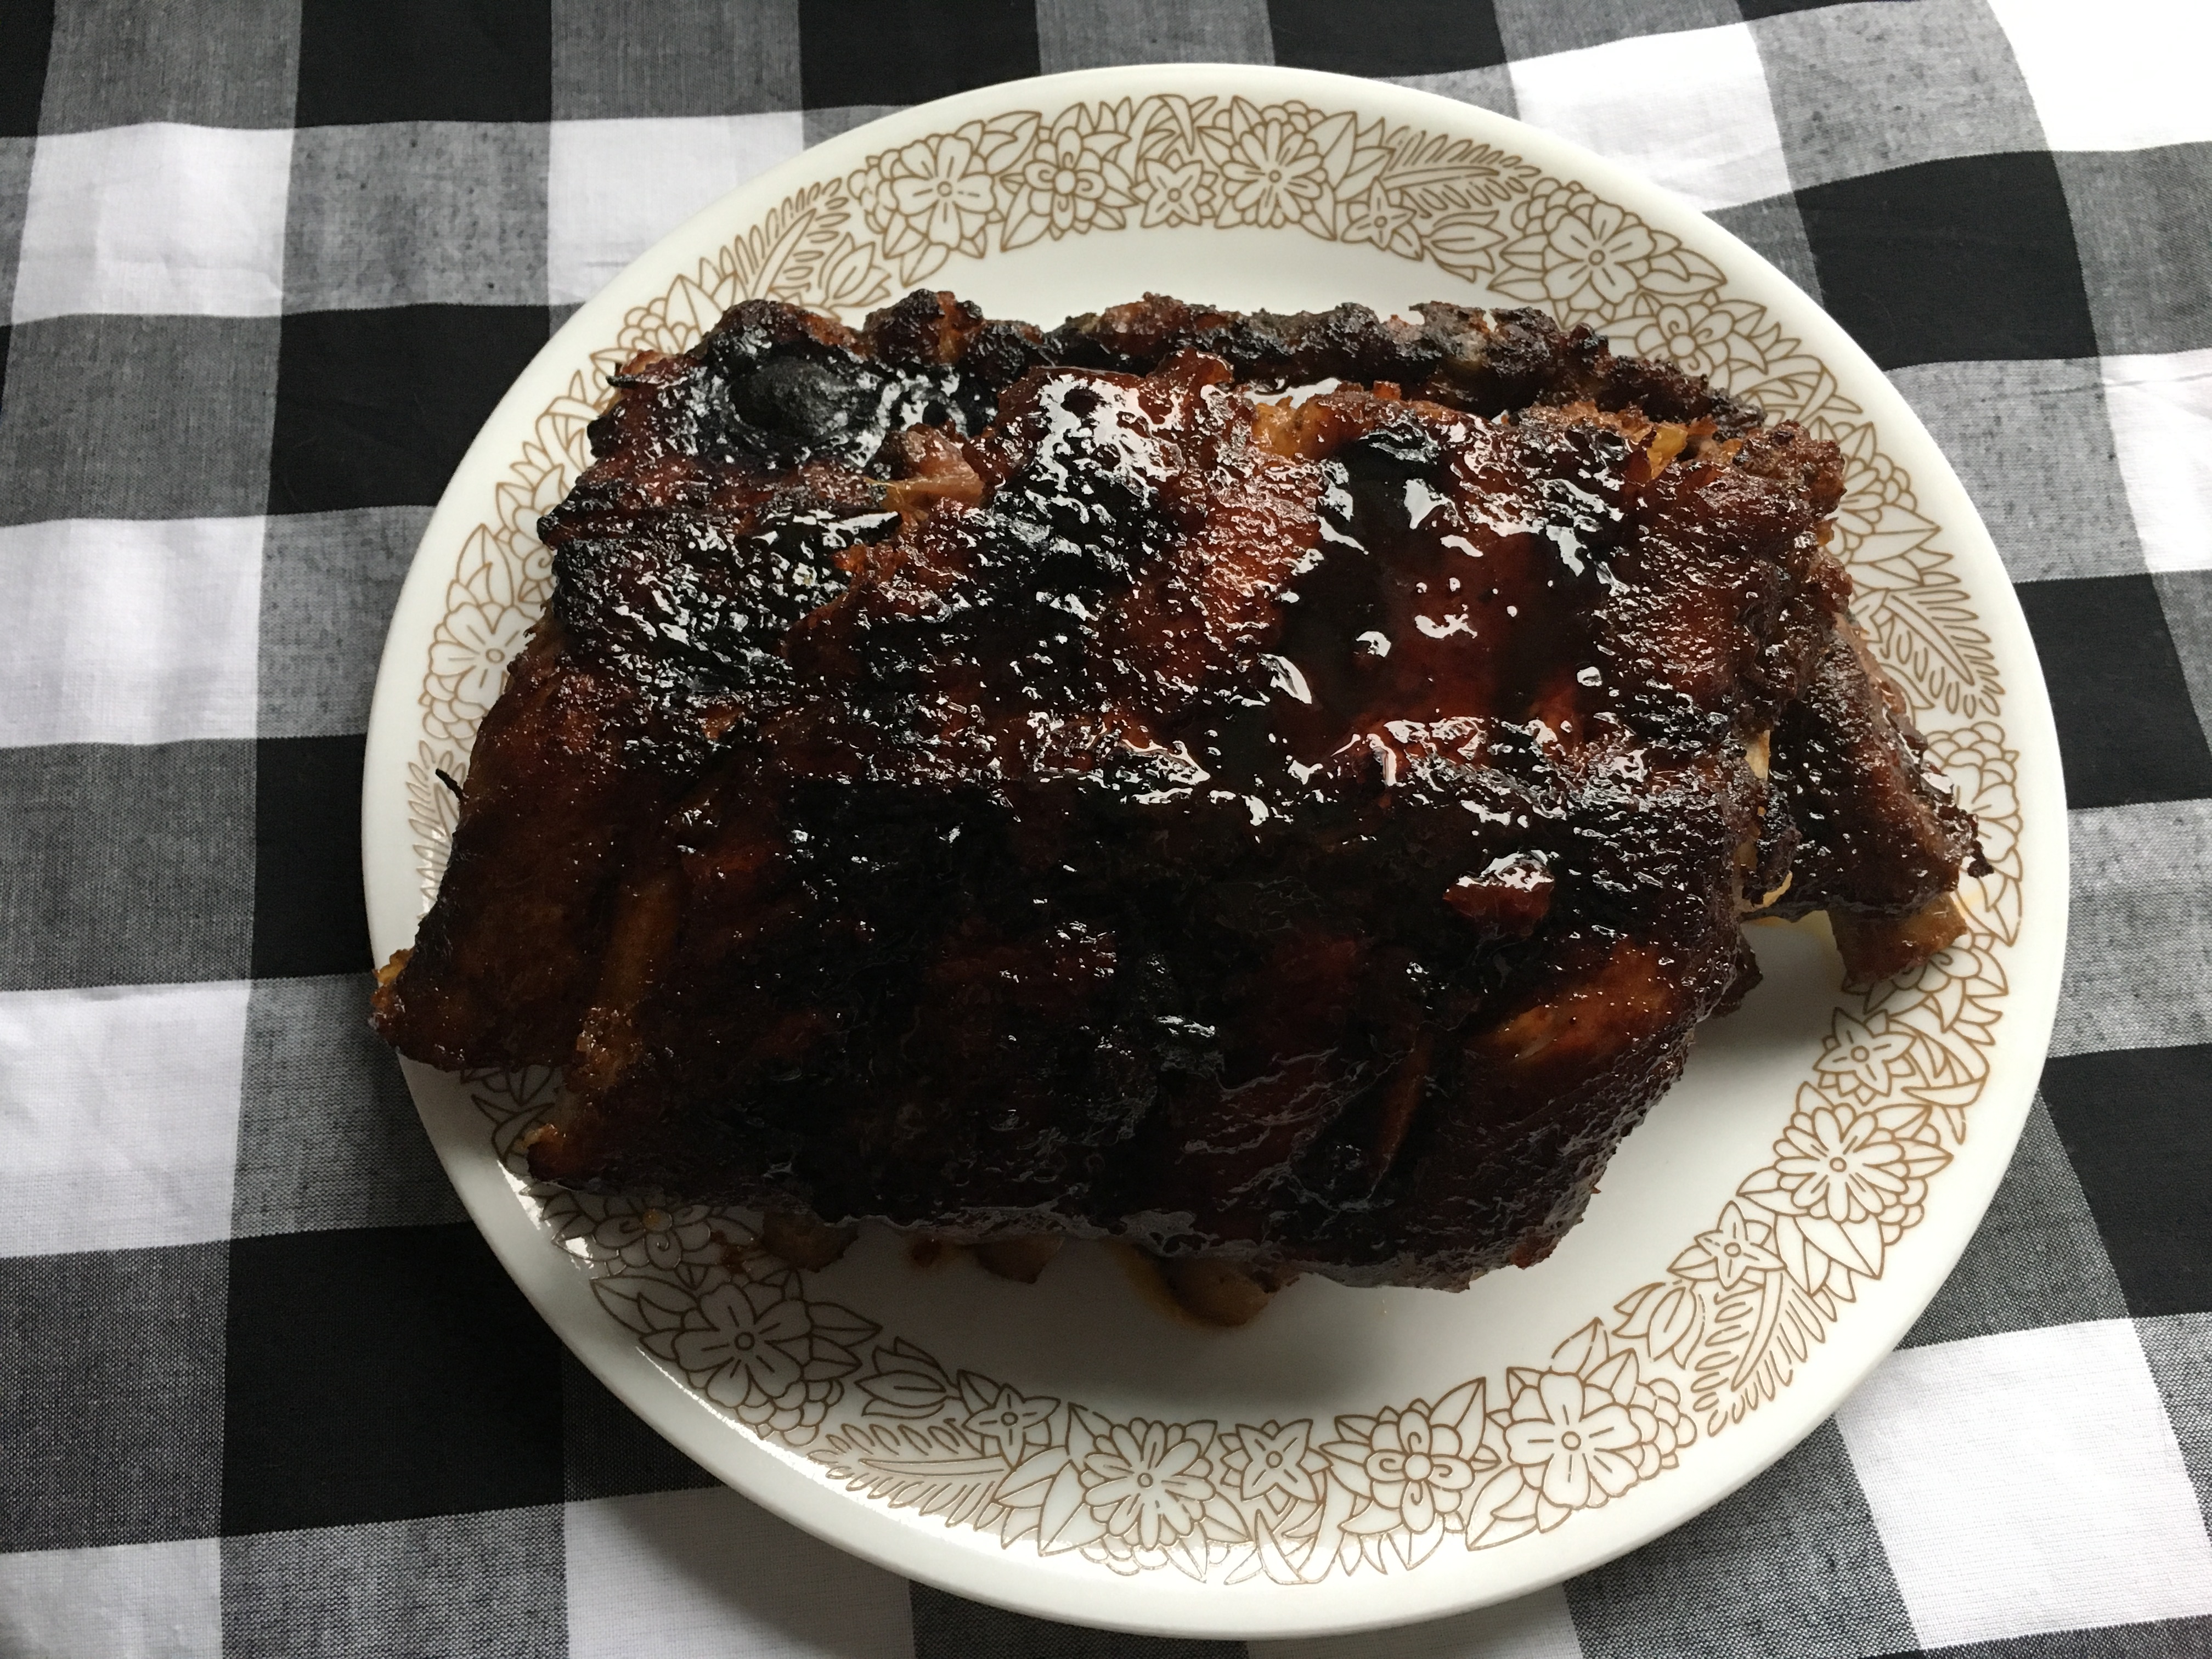
The end product wasn’t perfect, but it was definitely a good start to a recipe I think will one day shine.
If I had let the rain entice me into making something else, I would have missed out on exploring this. Down below is the recipe I used. Next time I try this, I’m going to use more orange juice, and reduce it more. I’m also going to cut the amount of spices in the braising liquid by up to half while increasing the honey. I am probably going to replace the Apple Cider Vinegar with regular rice vinegar. I feel the orange flavour is what best compliments the ribs. The last change I would make is how I coated the ribs with the reduced braising liquid. I coated the ribs and broiled it three times until the liquid was dry. In hindsight, I should have only done that once, and one more time taken it out sooner. That way their would have been more of a ‘sauce’ on the ribs.
The Ribs:
- 2 Full rack of Baby back Ribs
The Rub:
- 2 Tablespoons Chili pepper
- 2 Tablespoons Salt
- 1.5 Tablespoons Whole Peppercorn
- 2 Tablespoons Paprika
- 1/2 Tablespoon white Pepper
- 1 teaspoon Ground Ginger Powder
- 1 teaspoon Ground Garlic Powder
- 1 teaspoon Ground Onion Powder
The Braising Liquid:
- 300ml (approx 1 1/3 cup) freshly squeezed Orange Juice
- 50 ml (approx 1/4 cup) Apple Cider Vinegar
- 1 Tablespoon Soy Sauce
- 1 Tablespoon Worcestershire Sauce
- 1 Tablespoon Honey
- 1 Clove Garlic
- 1/2 Ginger
 Blend whole peppercorn in a spice grinder, or small blender, place in bowl with the other spices then set aside
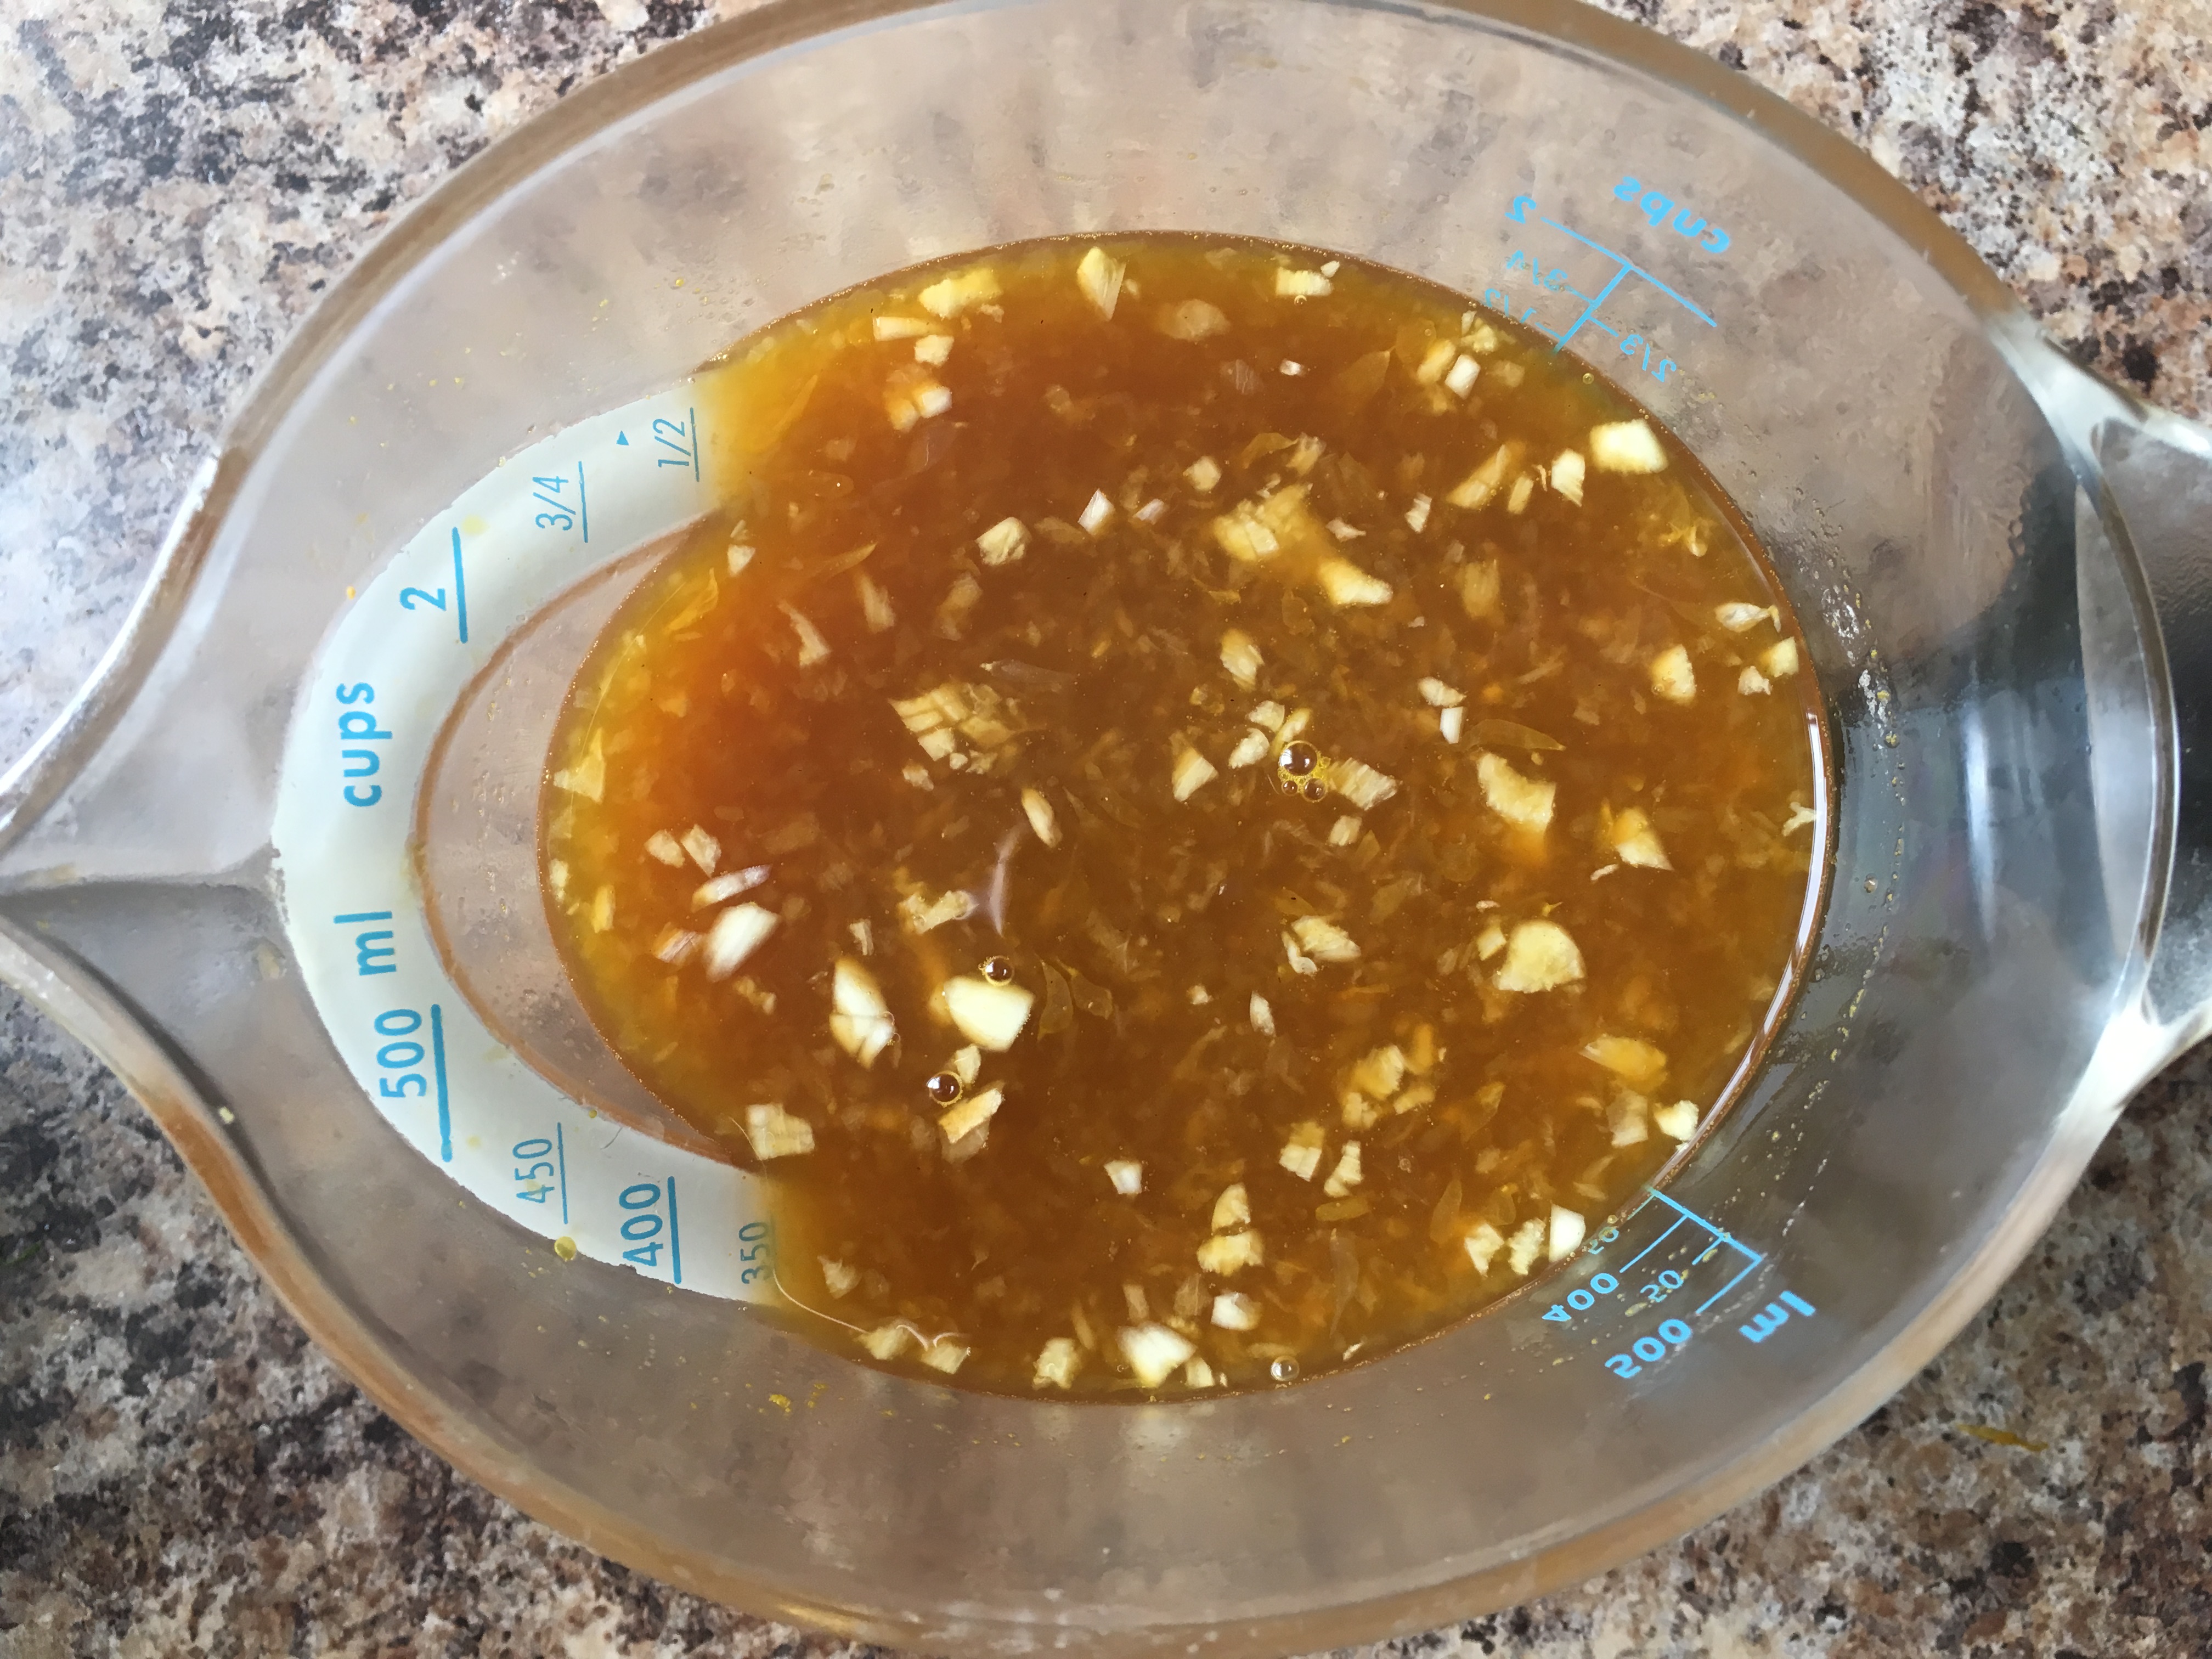 Place your orange juice in a pot and simmer on low until it has reduced to about 250ml (1cup), turn off heat and whisk all the other Braising Liquid ingredients together in the pot, let cool and set aside covered in the fridge.
 Let your ribs sit out for about 30 mins, it’s easier to work with at room temperature.
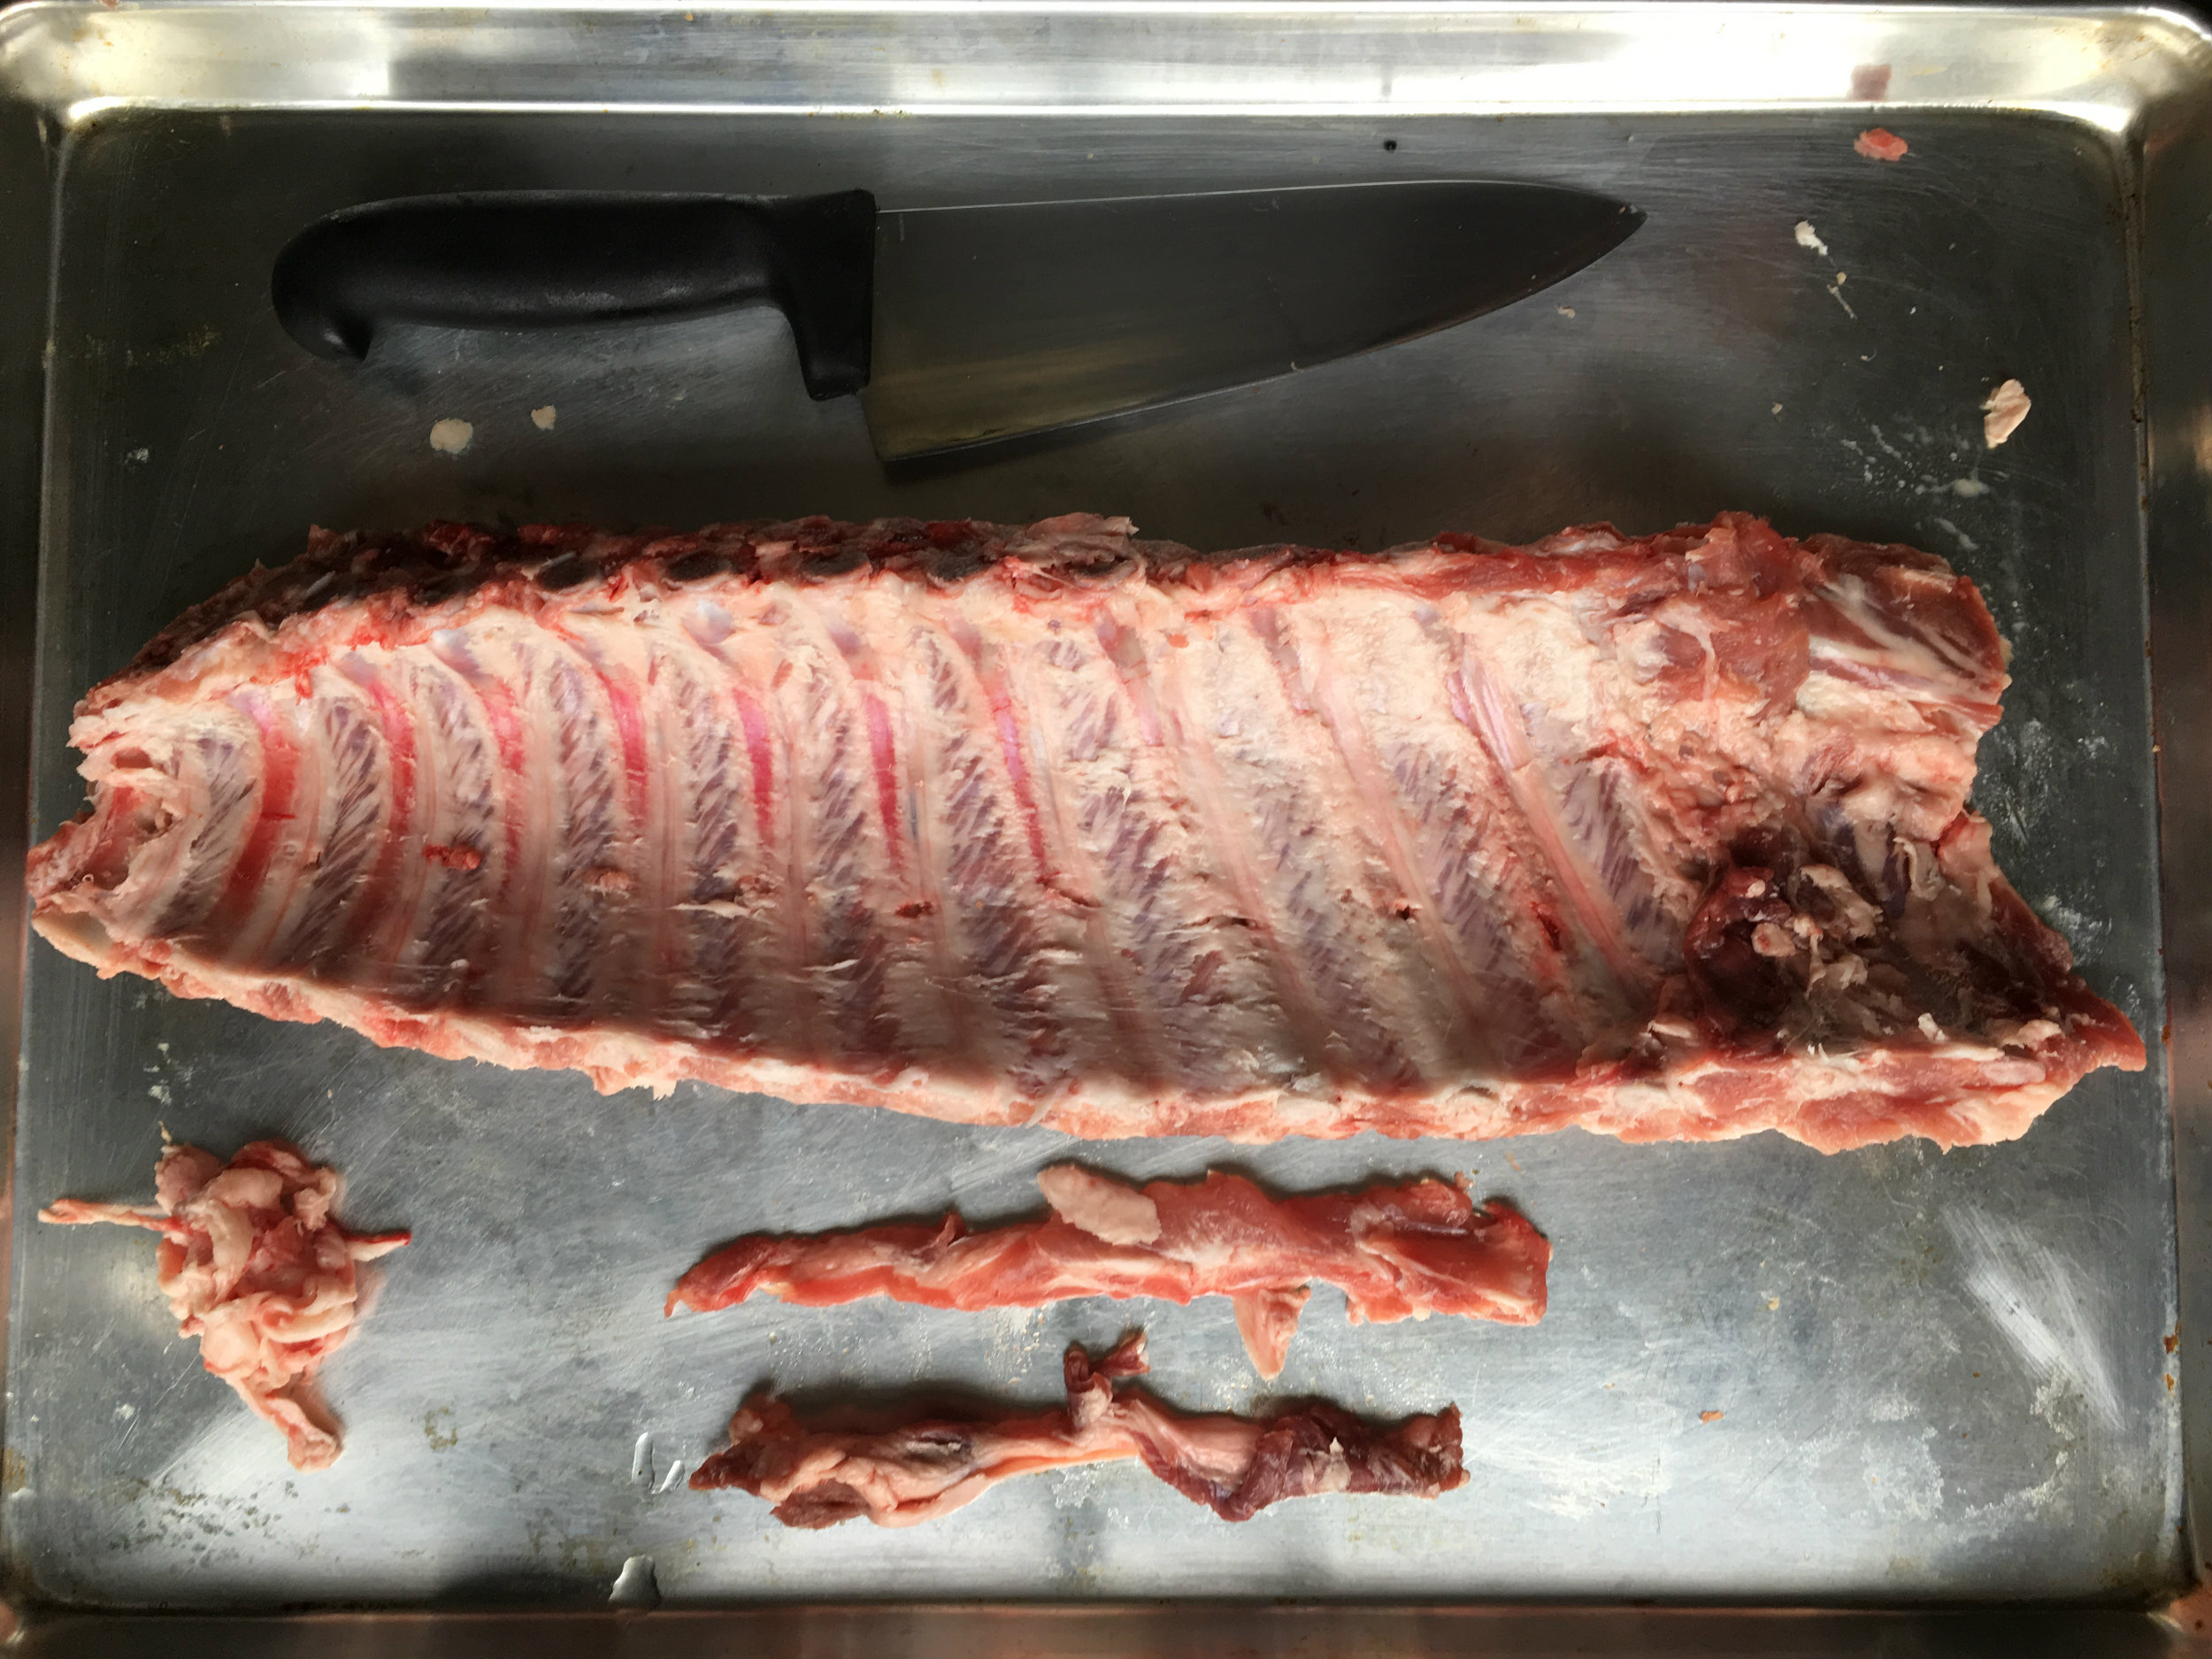 Trim your ribs of any extra “flabs” of meat. these will cook too fast, and generally be unappealing, also you want to remove the pulmonary pleura (Aka the thick membrane on the concave side of the ribs). There are some myths that this prevents flavour from penetrating into the meat, but that isn’t true. It does however create a chewy texture. You can remove it by using a knife to poke a hole in the membrane in the corner, and using your finger to pull it off. It should come off as one piece.
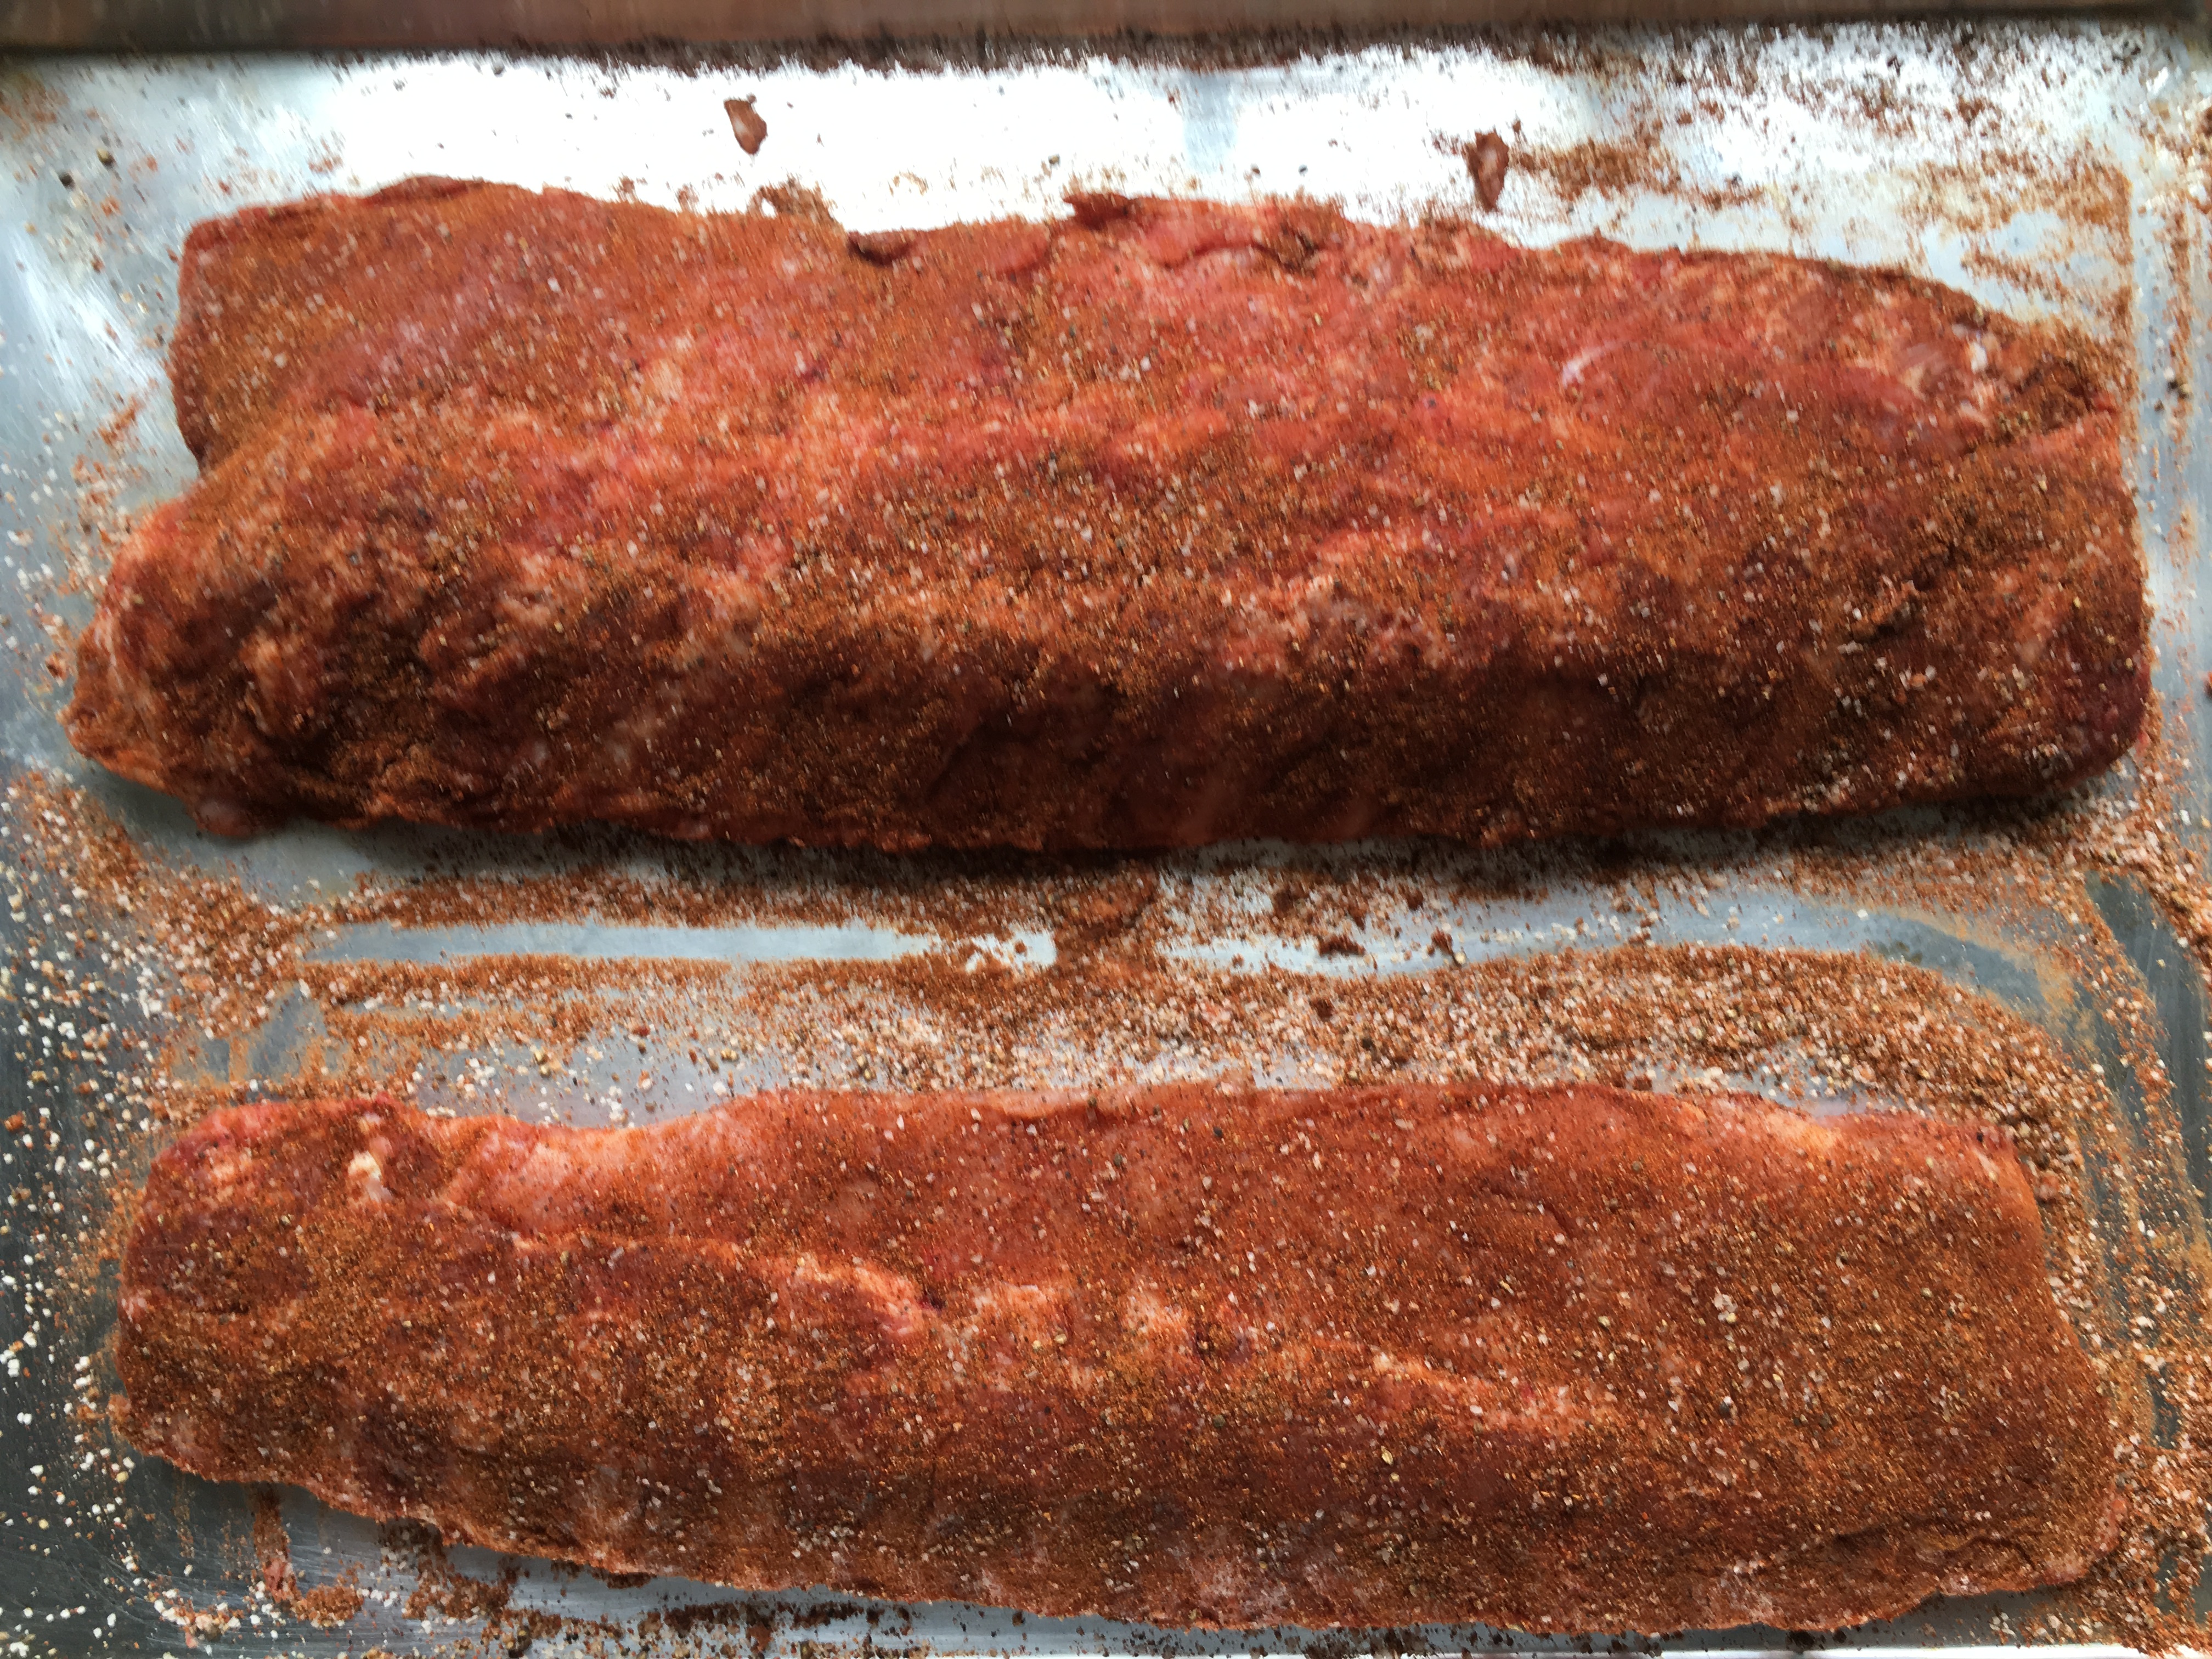 Cover both of your ribs in the Rub mixture. Don’t be shy here, this is what will form your “bark”. You want to cover the top, sides and bottom of the ribs.
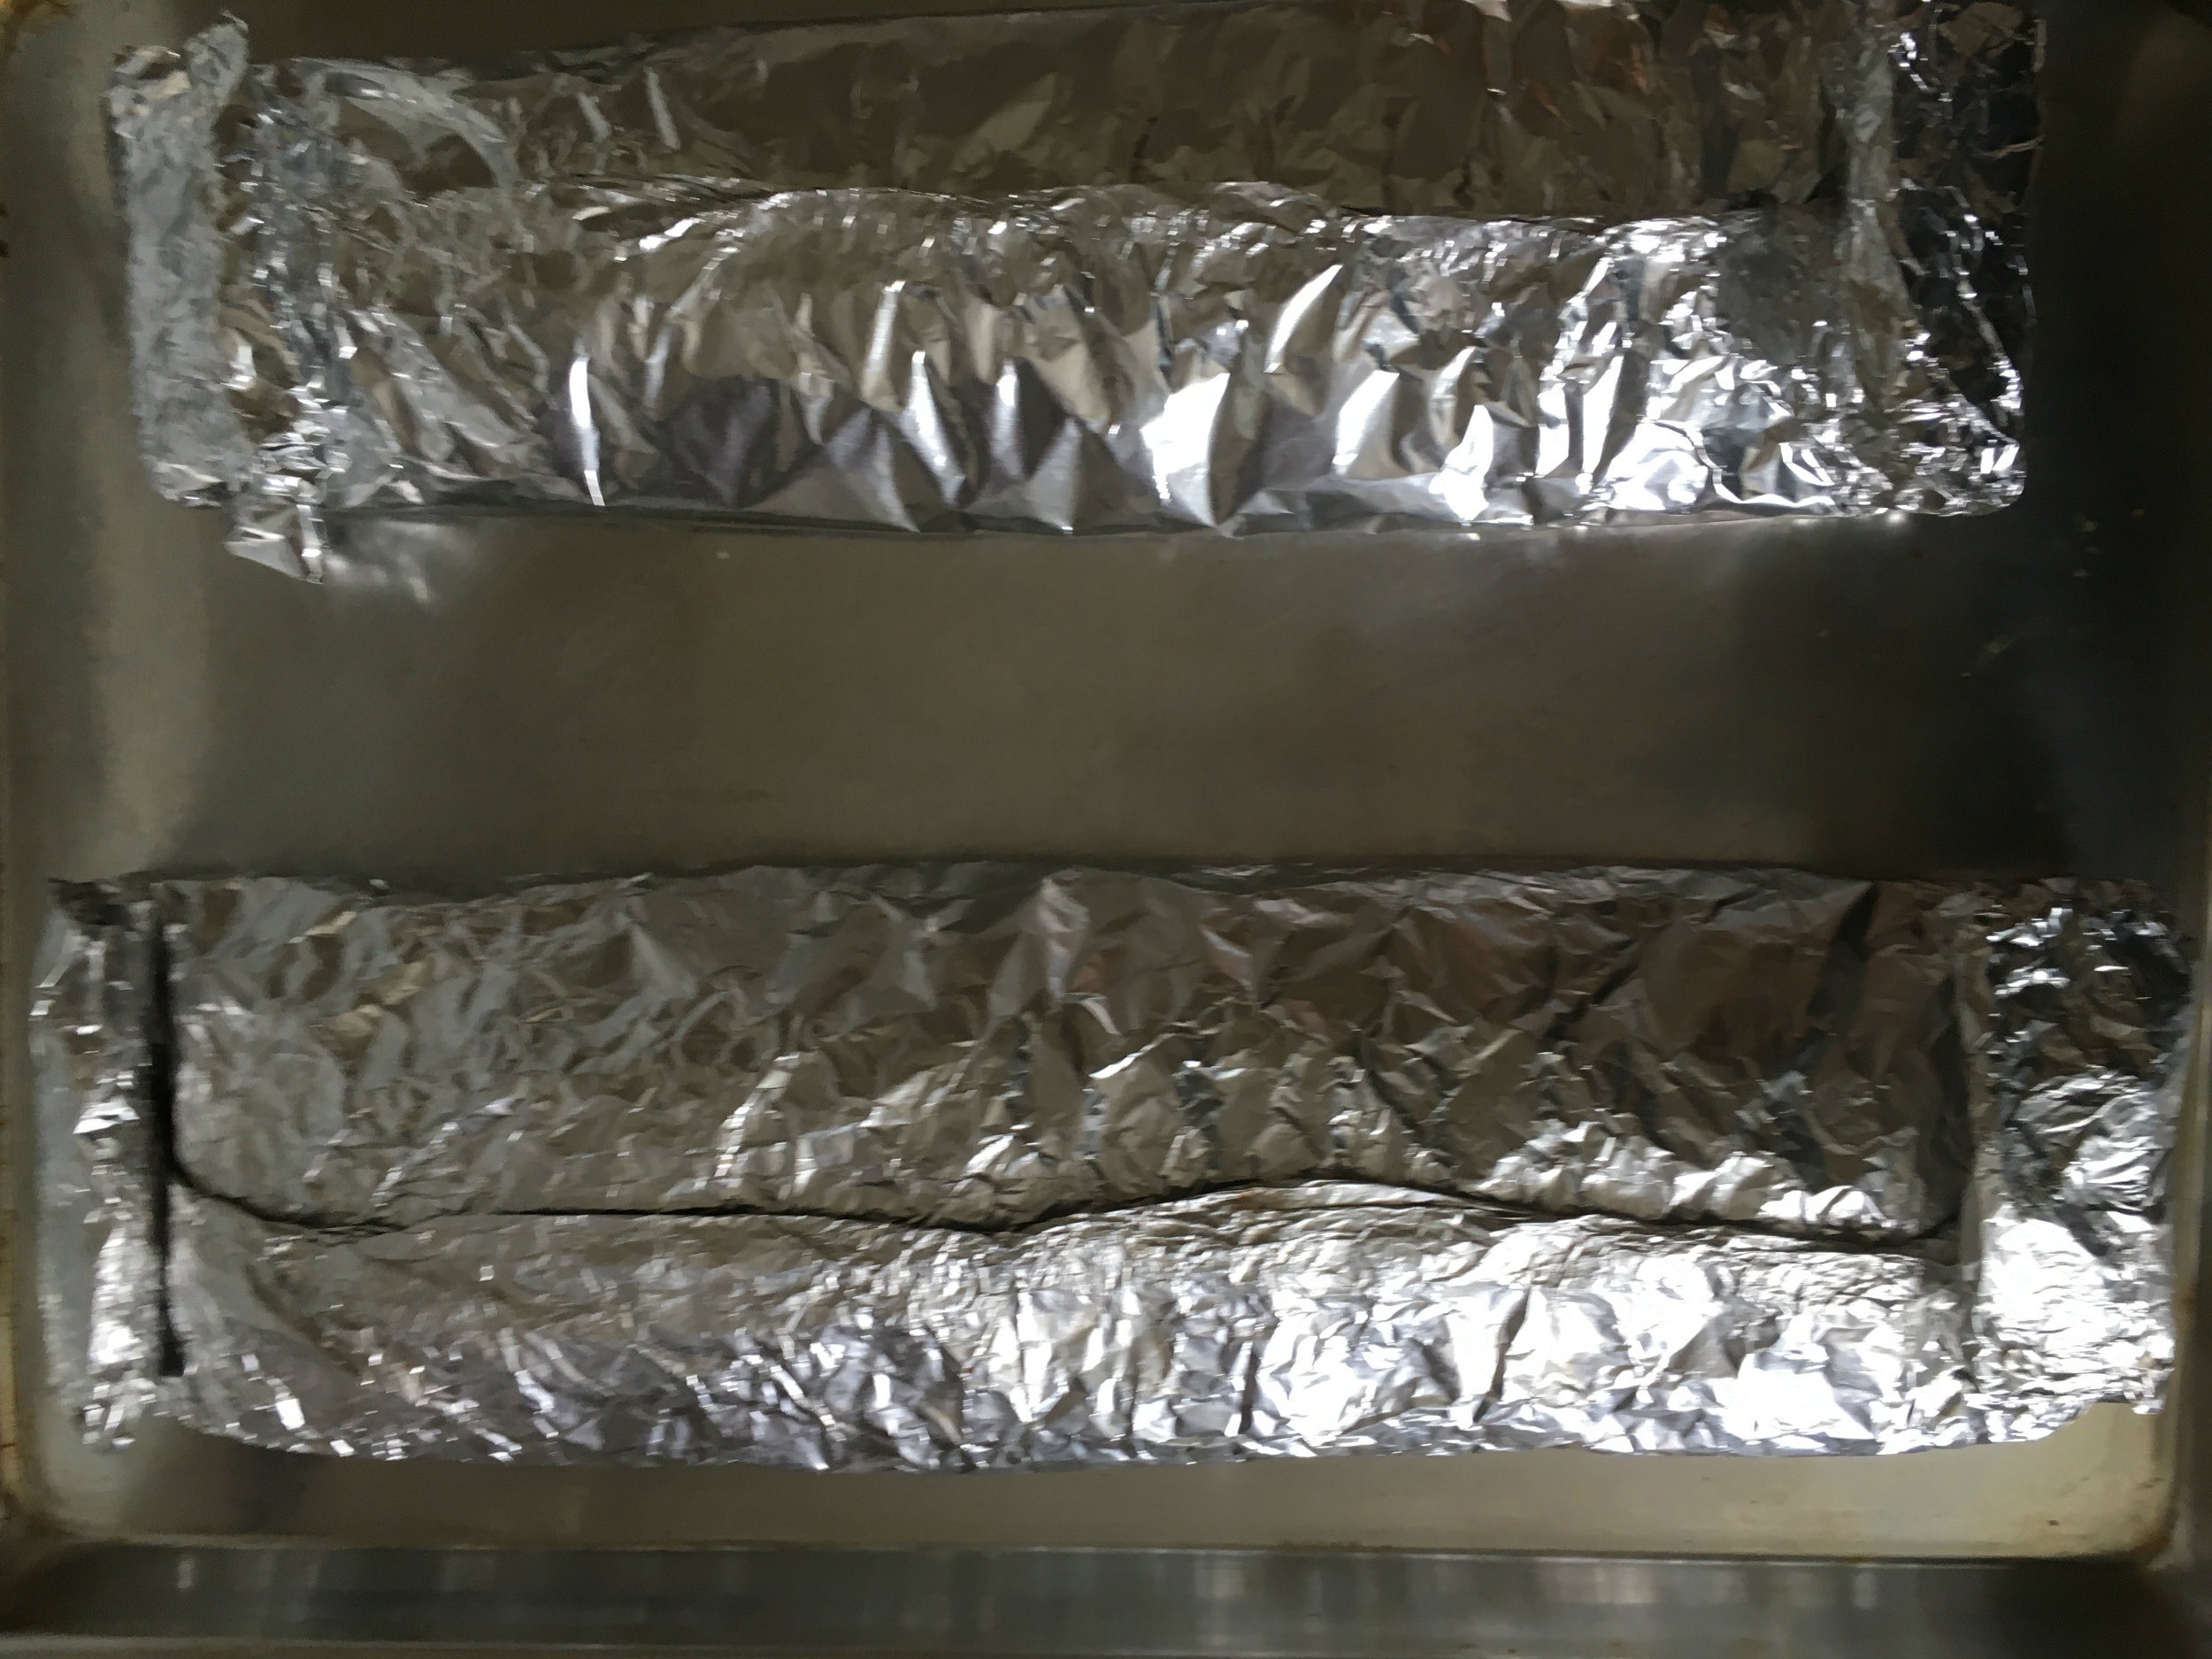 Place your ribs on top of wide heavy duty aluminum foil so the concave side is down. You want to wrap them so you have a tight seam on top of the ribs. Then tightly roll up one side of the foil, and loosely roll up the other.
- Place your wrapped ribs in the fridge for a minimum of 2 hours, preferably overnight.
- Preheat your oven to 225 degrees Fahrenheit.
- Take the ribs out of the fridge and unroll the loosely rolled side of the foil, pour half the braising liquid into each foiled ribs. Tightly re-roll the aluminum foil.
- Place the foiled ribs on a baking sheet, and place the baking sheet into the oven for minimum 2 hours. Unfortunately this recipe doesn’t have a set cooking time, after the two hours you’re going to have to use best judgement to tell if these are cooked or not. My method (amongst other people) is to unwrap the corner of the ribs, and look for 3 major signs. pull, crack and twist. That means You want: the ribs to have significant amount of the bones showing, also called “pull back”, you want to see cracking on the top when you bend the ribs, and you can twist the bones fairly well in the ribs. If the ribs don’t pass this test, roll the foil back up, and put in the oven. Generally speaking, if I don’t see the Pull Back, I don’t bother doing the other two test, and put it back in the oven for 30-45mins. If it only passed the first test, I do 15-30 mins of cooking time. By doing this, you have ensured the connective tissue of the ribs of dissolved. This will give you more tender ribs.
- Once your ribs passed the three tests, pour your braising liquid into a pot and simmer to thicken, also place your ribs directly on the baking sheet, and place it on the side for now.
- Set your oven to broil, and move the rack to the highest position in the oven.
- You want your braising liquid to thicken. My general test is I can run a spatula though the liquid and see the bottom of the pan for about 2-3 seconds. This will form your rib sauce.
- Once you have your rib sauce made, use a pastry brush to lightly coat your ribs with it and place it in your oven (set to broil) until the sauce is bubbling and forms a nice thick coating on the rub. Don’t walk away from this, it takes about 20-45 seconds for this to happen. Repeat the coating and broiling 2 more time.
- Cover the ribs one more time with the sauce, plate and serve.
- Take a fancy photo, and post it to Instagram with the hashtag #foryourfoulmouth
Amazing Ribs I got the information about the
Good Eats SEASON 2 EPISODE 13 TITLED Pork Fiction. My Recipe is nothing like Alton Browns, however the techices where inspired buy this episode.